Cesium for Omniverse: Trimble SketchUp
This is a guide to combining Trimble SketchUp content with Cesium ion datasets within NVIDIA Omniverse, using the Trimble SketchUp Omniverse connector and the Cesium for Omniverse extension.

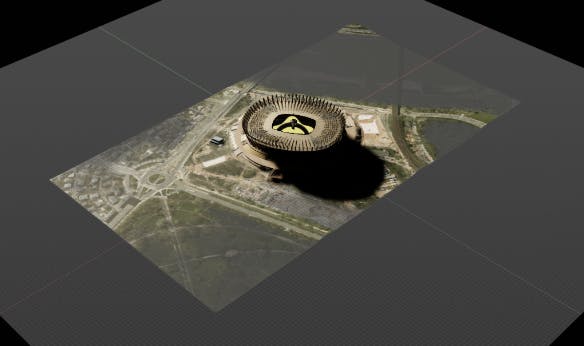
National Stadium, Warsaw, Poland, exported from Trimble SketchUp and georeferenced onto Cesium World Terrain with Bing Maps Aerial imagery.
You’ll learn how to:
- Prepare and export 3D content from Trimble SketchUp.
- Accurately position this content on Cesium World Terrain.
Prerequisites
- Know how to set up a basic Cesium for Omniverse stage in NVIDIA Omniverse USD Composer. Check out our Cesium for Omniverse Quickstart guide for instructions on starting with the Cesium for Omniverse extension.
- A georeferenced SketchUp scene. In this tutorial, we use the National Stadium, Warsaw asset from the SketchUp 3D warehouse. You can download this scene here.
- The Trimble SketchUp Omniverse connector installed from the Omniverse Launcher.
Architectural software commonly favors local Cartesian coordinate systems over geographic ones to meet the demands of precision, accuracy, and simplified workflows. Local coordinate systems offer a convenient method for defining and manipulating precise measurements without the complications associated with geographic factors like Earth's curvature and latitude-longitude coordinates.
When it comes to Cesium for Omniverse, it typically adopts a geographic, Earth-centered Earth-fixed coordinate system, representing Earth as an accurate 3D globe. Consequently, to position an architectural model represented in local coordinates onto a geographic dataset such as a globe, a conversion process becomes necessary.
Fortunately, SketchUp has the capability to geographically locate its content on the globe. It achieves this by allowing the user to specify a latitude and longitude of the origin of the 3D scene. By taking these values and applying it to Cesium for Omniverse, we can render the globe such that the exact latitude and longitude specified in SketchUp is located at the origin of the SketchUp-created USD. It's important to note that height values are not included in this process, so manual adjustments to the height may be required depending on the height datum used in the SketchUp scene. For further details on SketchUp's geolocation capabilities, you can refer to its “Add Location” resource.
This tutorial assumes that you already have a georeferenced SketchUp scene. We recommend using the National Stadium, Warsaw asset from the SketchUp 3D Warehouse for this tutorial.
1Open your georeferenced SketchUp file. Go to Window > Model Info to display the model info dialog. Click on the Geo-location option in the left hand list, which should display the current geolocation information for this scene.
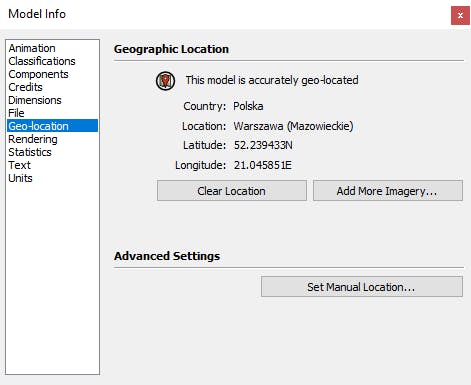
If your scene does not display geolocation information, you will not be able to continue with this tutorial. Find a geolocated model from the 3D Warehouse to continue.
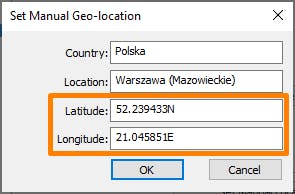
2Click on Set Manual Location and copy the exact latitude and longitude values into your text editor of choice, as we will need them later in Omniverse. Be sure to remember which one is which! Once this is done, close the Geo-location and Model Info windows.
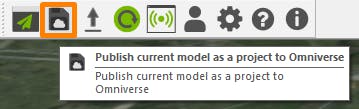
3From the Omniverse toolbar, select Publish current model as a project to Omniverse.
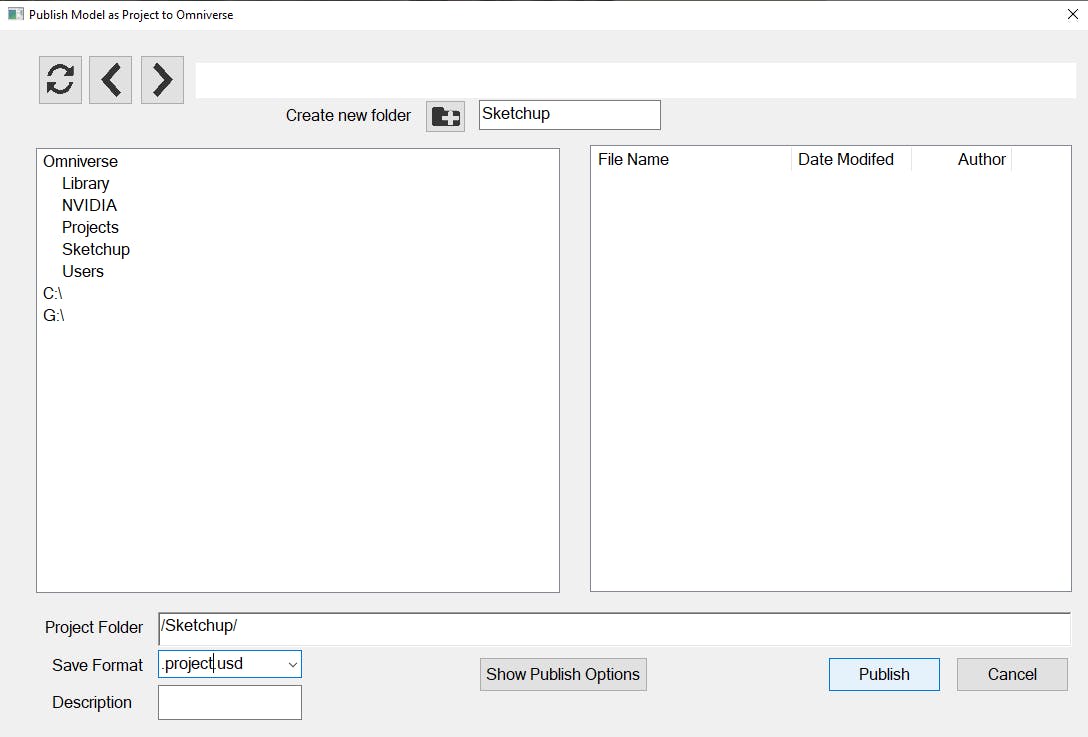
4Publish your USD to a Nucleus server or a location on disk.
1Open Omniverse USD Composer, ensuring the Omniverse Fabric Scene Delegate is enabled as per the quickstart tutorial.
2Open the USD file created during Step 1. If nothing is visible, press F to zoom extents. You should see your SketchUp content within the stage.
3From the Cesium window, add Cesium World Terrain + Bing Maps Aerial imagery to the stage.

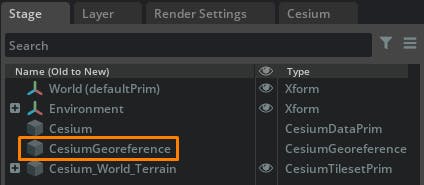
4From the stage, select the CesiumGeoreference prim to display its properties in the Property window.
5In the Property window, enter the latitude and longitude obtained from SketchUp. Depending on the location of your model and height values used in SketchUp, you may need to experiment with different height values.
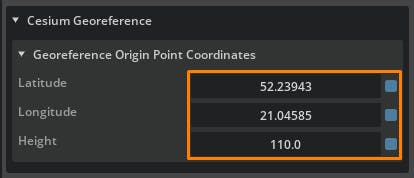
You will notice the latitude and longitude in SketchUp is suffixed with letters. This represents if the latitude is in the Northern (N) or Southern (S) Hemisphere and if the longitude is in the Eastern (E) or Western (W) Hemisphere. For values that end with S or W, convert these into negative values before adding to Omniverse.
6If the geolocation has been successful, you should see your model accurately positioned on the surface of the globe. If not, confirm coordinates and calculations from Step 1.2 and Step 2.5.

Follow our Lighting the Stage and Capturing Images and Video tutorials to prepare your project and capture amazing visuals.