Tileset Clipping
With Basis Curves and Cesium Polygon Raster Overlays, you can define areas of a tileset to hide from the stage. Tileset clipping is a powerful tool that aids in building stages with overlapping tilesets, removing areas of tilesets to replace with other 3D content, and more.
- Know how to set up a basic Cesium for Omniverse stage in Omniverse USD Composer. Check out our Cesium for Omniverse Quickstart guide for instructions on starting with the Cesium for Omniverse extension.
- USD Composer 2023.2.2 or later.
- Cesium for Omniverse 0.17.0 or later.
1In USD Composer, click File > New to create a new stage.
2Select and delete the default Environment/ground prim.
3Select the CesiumGeoreference prim and configure it with the following coordinates:
- Latitude: -28.02299
- Longitude: 153.43348
- Height: 48
4From the CesiumQuick Add Cesium ion Assets menu, add Google Photorealistic 3D Tiles.
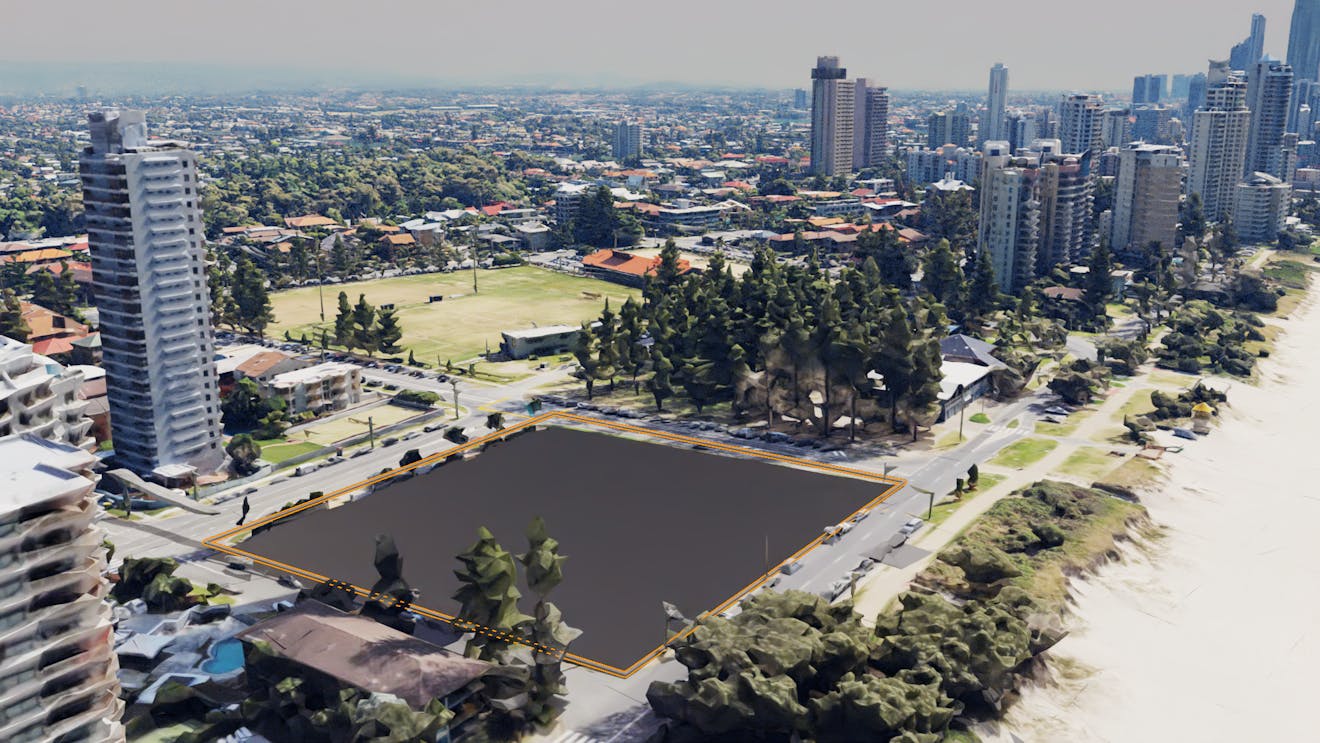
5An area on the Gold Coast, Australia, should load. Zoom out until you can see several buildings like in the picture below.
A Basis Curve is a USD prim type that defines a series of points. We use Basis Curves to define a closed shape that can be used to clip out contents of a tileset that falls within the shape’s footprint.
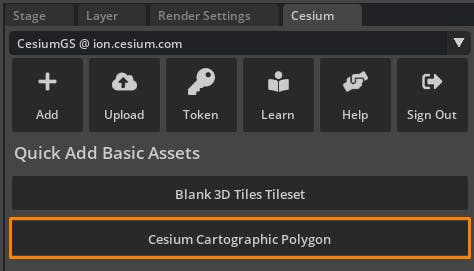
1Click the Cesium Cartographic Polygon button in the Cesium Quick Add Basic Assets menu.
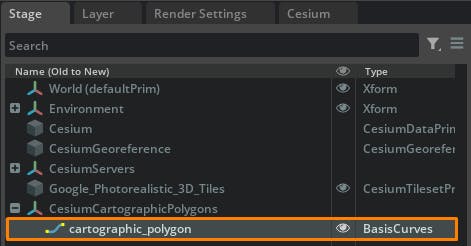
2This will create a prim at the path of /CesiumCartographicPolygons/cartographic_polygon, located at 0,0,0 on the stage.
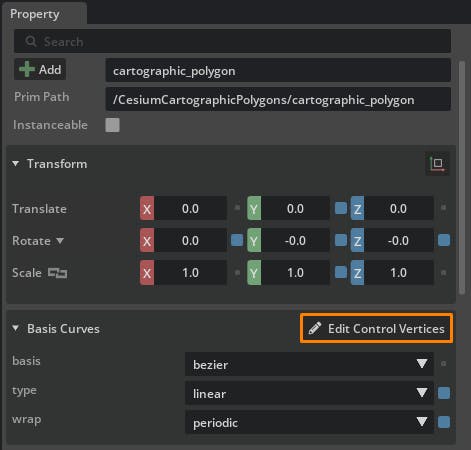
3Select the prim and click Edit Control Vertices in the Basis Curves section of the Property window. Control points for the curve will appear.
4To move one of the points, select the point by clicking on it in the viewport. Use the transform gizmo to change its position.
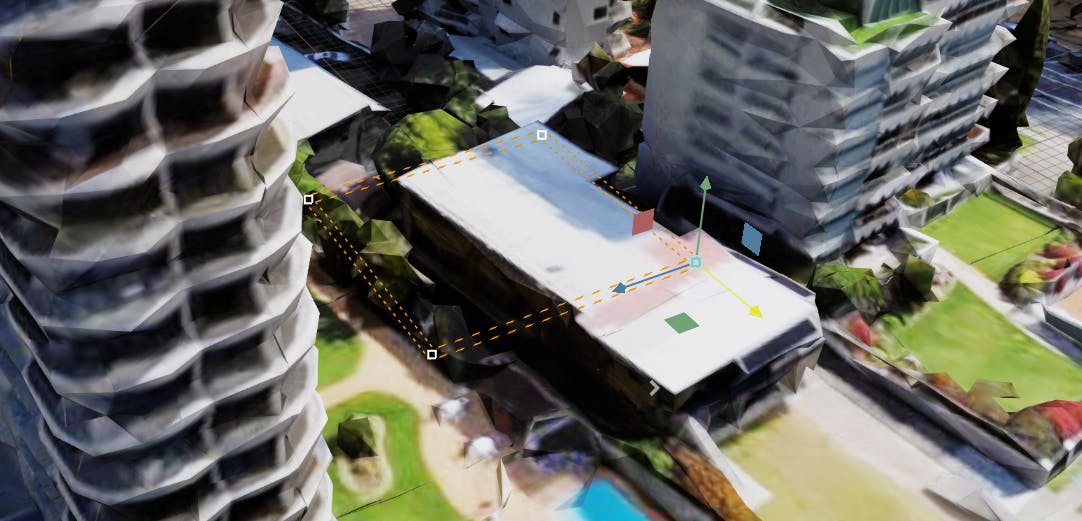
5Drag the vertices of the Basis Curve so that it outlines the block of buildings.
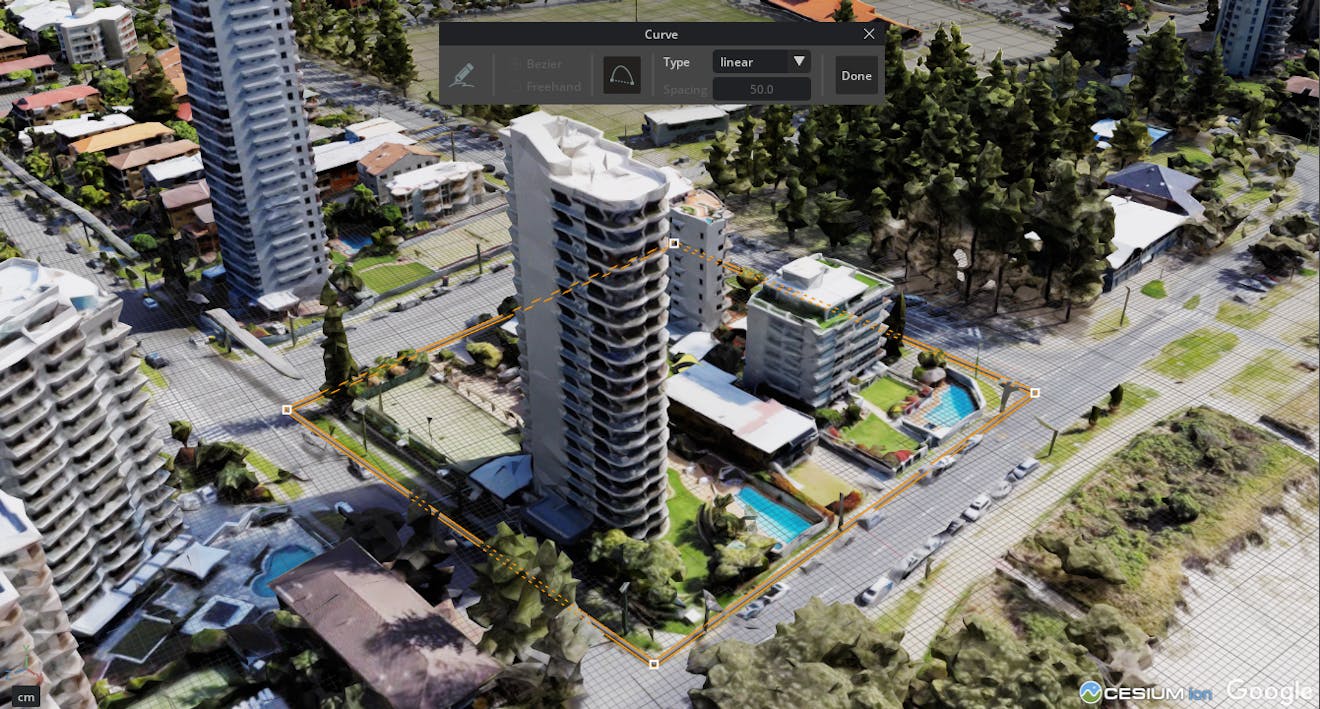
6For more information on adding, removing, and editing points, see Curve Authoring.
7The prim also contains a Globe Anchor. This ensures the Basis Curve remains in the correct location on the globe.
You can also create Basis Curves through alternative methods, such as Create > Basis Curves > New Curve, programmatically, or through importing Basis Curves from USD files. If following any of these workflows, be sure to add a Globe Anchor by right-clicking on the Basis Curve and selecting Add > Cesium > Globe Anchor.
Only Basis Curves with the type Linear and basis Bezier are supported at this time.
Some more tips and tricks for creating polygons:
- The Basis Curve clips tilesets in 2.5D, so it will affect everything below and above the shape. As such, it will not work for vertical clipping, like cutting out the windows on the side of a building. The precise vertical location of a curve vertex does not matter, only the horizontal location.
- For the most accuracy in placing your Basis Curve, try to keep the vertices as close as possible to the surface of the tileset.
A Cesium Polygon Raster Overlay rasterizes the Basis Curve into textures that are applied to the tileset. These textures are used as a mask to hide portions of the tileset that fall within the Basis Curve footprint.
1Right-click the Google_Photorealistic_3D_Tiles prim and select Add > Cesium > Polygon Raster Overlay.
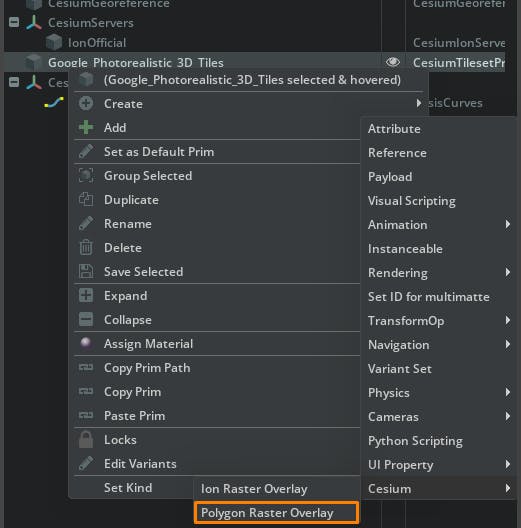
2A new prim will be added as a child of the tileset. Select it to view its properties.
3Under Cartographic Polygons, click Add Target to select a BasisCurve to bind to the overlay.
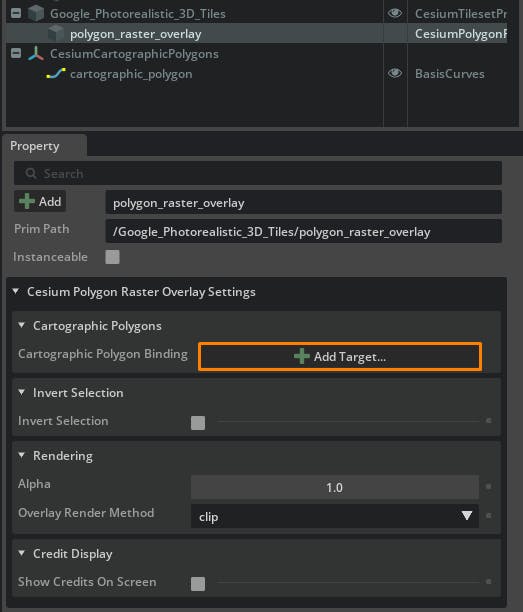
4Select the cartographic_polygon prim created in Step 2 and click Select.

5If the tileset does not begin reloading because of the change, select the tileset and click the Refresh Tileset button in its properties.
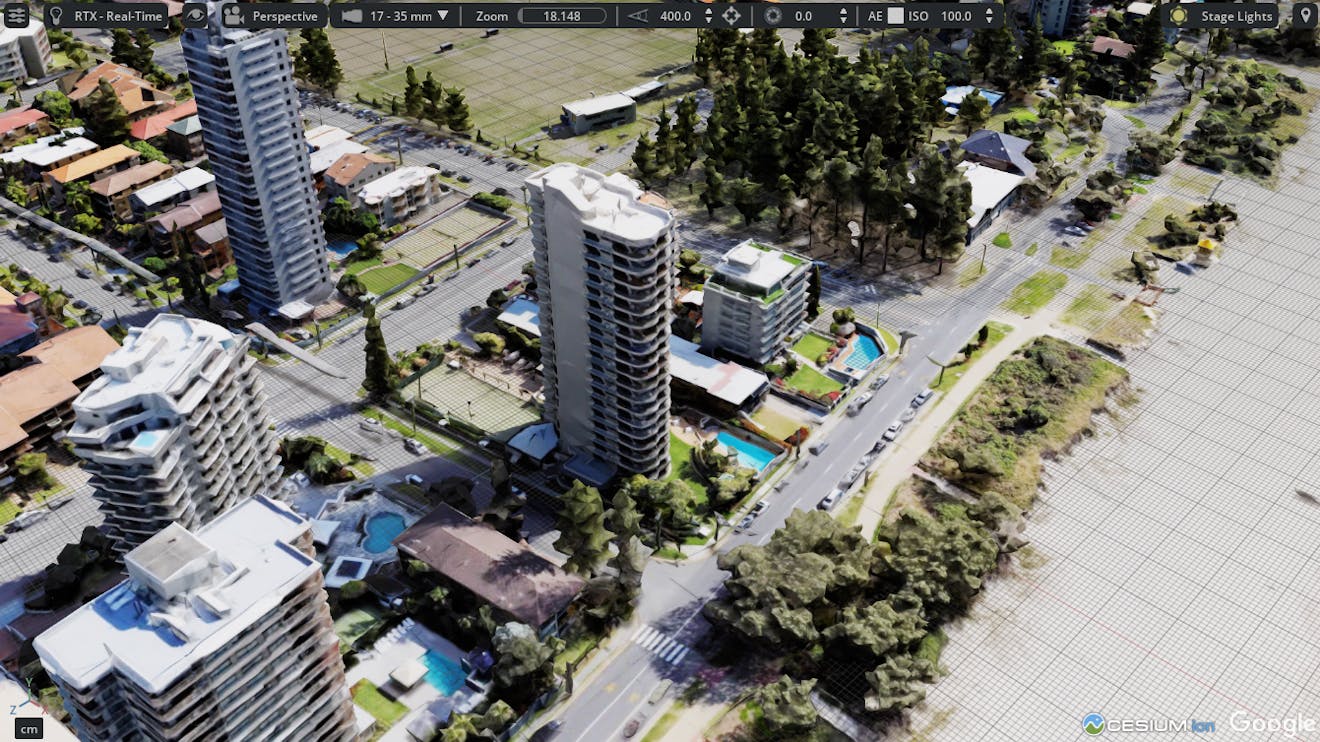
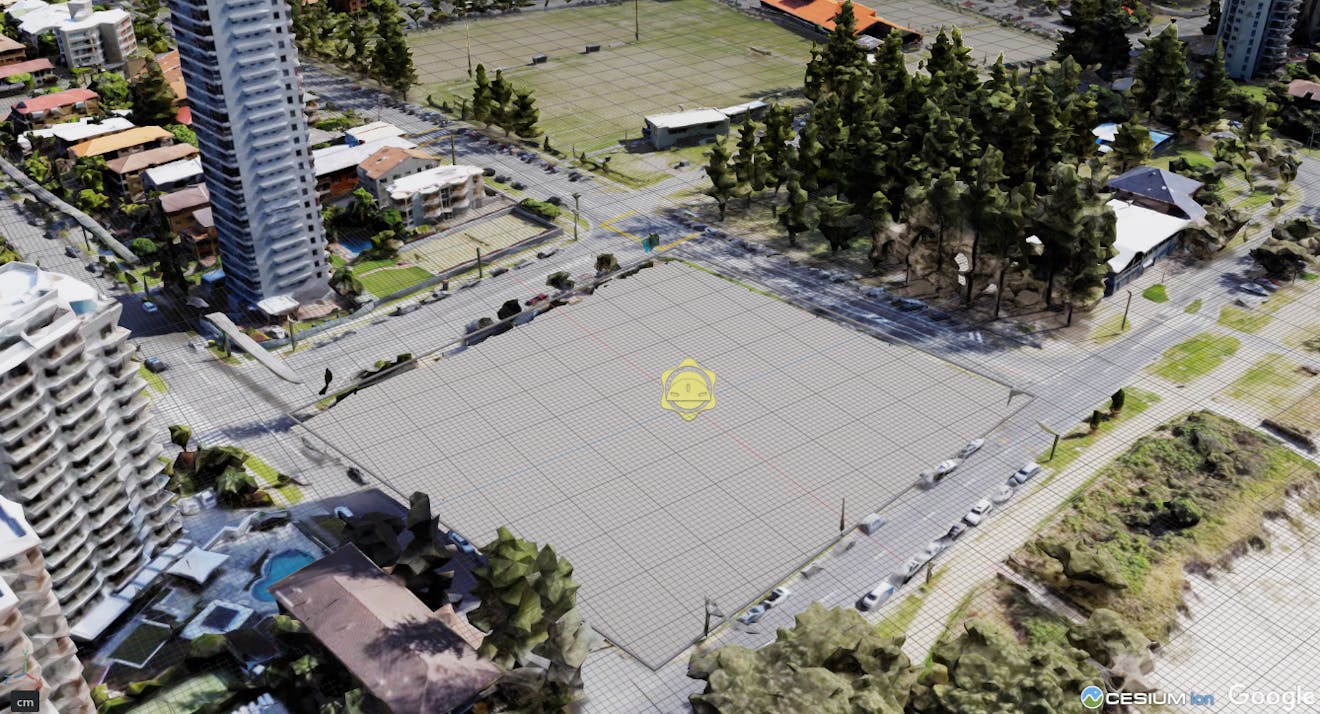
6The tileset should reload with an area the shape of the Basis Curve clipped out.
7Clipping can be inverted by ticking the Invert Selection checkbox under the CesiumPolygonRasterOverlay.

The same Basis Curve can be used with multiple tilesets. Likewise, a tileset can reference multiple Basis Curves by adding more targets to the Cartographic Polygon Binding relationship.
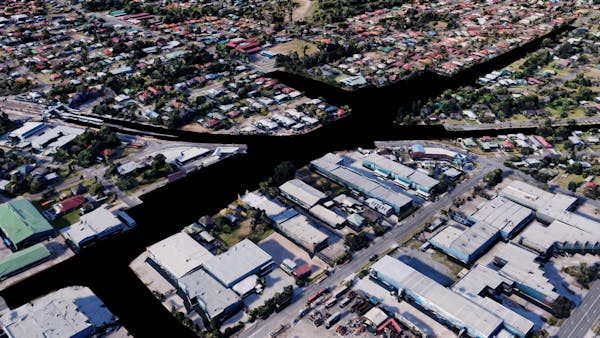
For an example of more complicated tileset clipping, check out /examples/TilesetClipping/TilesetClipping.usda in the Cesium for Omniverse Samples.
Removing areas of tilesets to replace with other 3D content via tile clipping: before.

Removing areas of tilesets to replace with other 3D content via tile clipping: after.
Need help or have questions about tileset clipping? Visit the community forum.