Dynamic Skies and Sun Study
This tutorial shows you how to use Dynamic Skies and Environment Sun Study to accurately position the sun based on the geolocation of your stage in Cesium for Omniverse and to capture sun study images and video. You’ll continue to use the San Francisco project created during previous tutorials.
You’ll learn how to:
- Add a Dynamic Sky to the stage.
- Configure the Environment Sun Study extension for accurate lighting and shadows.
- Capture Environment Sun Study imagery and video.
- Know how to set up a basic Cesium for Omniverse stage in NVIDIA Omniverse USD Composer 2023.1.1 or newer. Check out our Cesium for Omniverse Quickstart guide for instructions on starting with the Cesium for Omniverse extension.
- The Cesium for Omniverse samples downloaded.
- A copy of the USD created during the Lighting the Stage tutorial. A completed USD can be found within the Cesium for Omniverse samples.
This tutorial assumes that you have already installed the Cesium for Omniverse extension and opened NVIDIA Omniverse USD Composer with the Fabric Scene Delegate settings enabled. If you have not yet done this, see the Quickstart for detailed instructions.
1Open your USD from the Lighting the Stage tutorial, or open /tutorials/02_lighting_the_stage/02_lighting_the_stage.usda from the Cesium for Omniverse samples. You should see Cesium World Terrain along with Aerometrex San Francisco Photogrammetry.

2From the Stage panel, select the existing DomeLight and delete it.
.png?auto=compress%2Cformat&w=522)
3In the Environments tab, right click on CloudySky and click Set to Stage. A new sky should appear within the stage.
.png?auto=compress%2Cformat&w=854)
4The new sky is much more powerful than the previous dome light. Go to Render Settings > Post Processing and enable Auto Exposure. Alternatively, you can set your render settings to use a specific ISO value under Tone Mapping settings.
.png?auto=compress%2Cformat&w=615)
5In the Stage, select the Environment prim to configure the sun study location values. You can copy the Latitude and Longitude values from the CesiumGeoreference prim and paste them into the Latitude and Longitude attributes of the Environment prim. This will ensure the sun location accurately reflects the georeferencing location of your stage.
.png?auto=compress%2Cformat&w=539)
Be sure to keep the Environment prim’s location values in sync with the CesiumGeoreference values to ensure accurate lighting.
6Set the North Orientation to 90 degrees. This will ensure the sun correctly rises in the east and sets in the west.
.png?auto=compress%2Cformat&w=531)
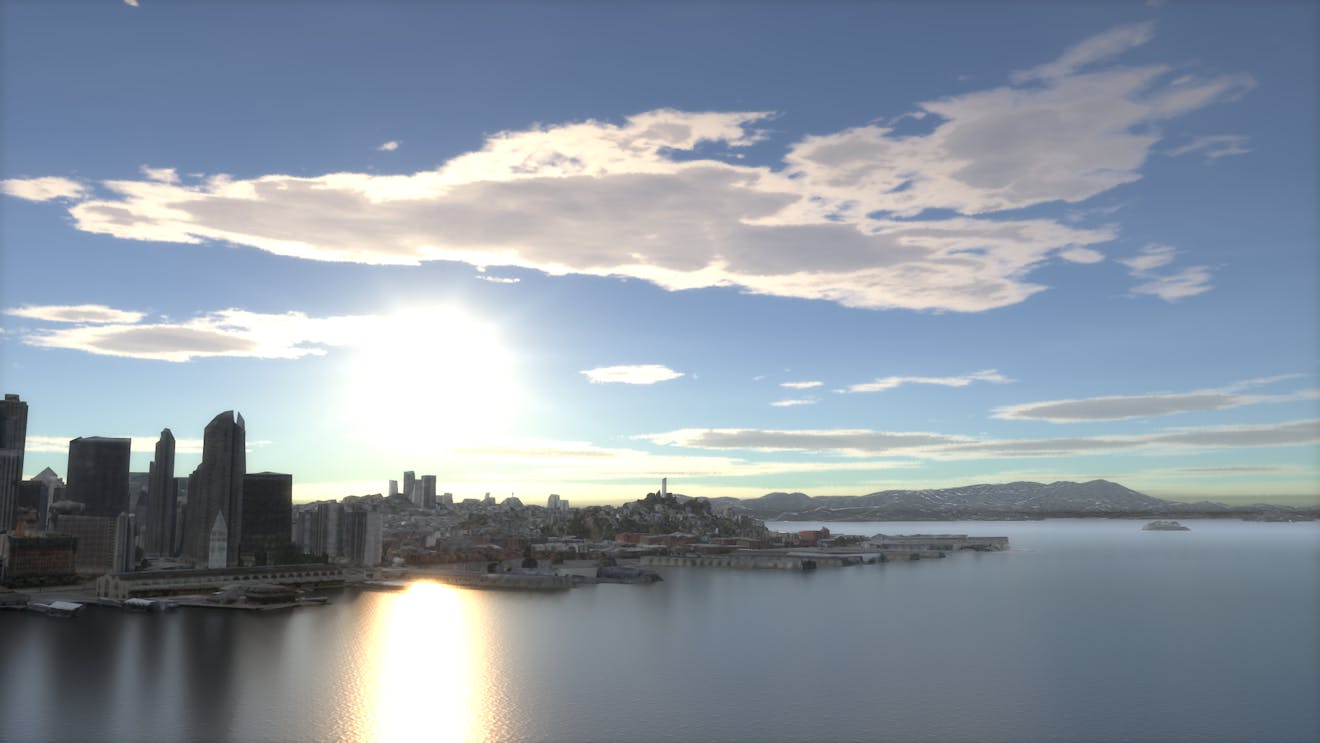
7Adjust the Time of Day slider to 6 p.m. and confirm the afternoon sun is to the west of San Francisco.
.png?auto=compress%2Cformat&w=1209)
The Environment Sun Study extension provides additional controls for managing the time of day and date, along with capturing video sequences of sun studies.
1Click on Window > Extensions and search for Sun Study. Find the Environment Sun Study extension under Feature and enable it.
.png?auto=compress%2Cformat&w=395)
2Click on Window again, and you will see several new options related to Sun Study. These are alternative interfaces to configuring the location, date, and time attributes of the Environment prim. Click on the Sun Study entry to view the Sun Study user interface.
.png?auto=compress%2Cformat&w=251)
3Click the Play button on the Sun Study user interface to watch the sun cycle from morning to afternoon. There are several options for changing the start and end of the cycle, date, and playback speed. For more information on the Environment Sun Study extension, visit the Omniverse documentation.
.png?auto=compress%2Cformat&w=1086)
4Navigate to a location with tall buildings and move to a top-down style view. Experiment with different dates and times, and capture screenshots by pressing F10 on your keyboard.
.png?auto=compress%2Cformat&w=1199)
The Environment Sun Study extension adds a feature to the Omniverse Movie Capture tool that enables video capture of a Sun Study sequence.
1Click Window > Rendering > Movie Capture to open the Movie Capture tool.
.png?auto=compress%2Cformat&w=418)
2Adjust the four settings below while leaving the rest at their defaults.
a. Movie Type: The Sunstudy mode will capture a video that starts at the start time of day and finishes at the end time of day. These values can be configured below.
b. Time of Day: Set the start and end time of days for the sun study movie capture.
c. Movie Length: Set the total length of your sun study movie capture.
d. Format: Capturing to an MP4 makes it easy to quickly view an output, but it is recommended to capture individual frames into lossless formats such as PNG, TGA, or EXR if a professional video editing package is being used to assemble the video.
.png?auto=compress%2Cformat&w=555)
3Click Capture Sequence to begin capturing. You can watch the progress of the capture in your viewport.
.png?auto=compress%2Cformat&w=359)
4Once the capture is complete, you can open your capture path by clicking the folder icon in the Movie Capture tool.
.png?auto=compress%2Cformat&w=548)
For more information on capturing video, check out the Capturing Images and Video tutorial.
5Your sun study video should look like the video below: