Photorealistic 3D Tiles from Google Maps Platform in Cesium for Omniverse
This is a quickstart guide to loading Photorealistic 3D Tiles content into NVIDIA Omniverse USD Composer (formerly Create) using the Cesium for Omniverse extension and Cesium ion.

The Googleplex in Mountain View, California, USA, visualized with Photorealistic 3D Tiles in Cesium for Omniverse.
You’ll learn how to:
- Add Photorealistic 3D Tiles to your stage in Omniverse.
- Access the data using Cesium ion.
- Know how to set up a basic Cesium for Omniverse stage in NVIDIA Omniverse USD Composer. Check out our Cesium for Omniverse Quickstart guide for instructions on starting with the Cesium for Omniverse extension.
- A Cesium ion account to stream Google Photorealistic 3D Tiles into NVIDIA Omniverse USD Composer. Sign up for a free Cesium ion account if you don’t already have one.
This tutorial assumes that you have already installed the Cesium for Omniverse extension and opened NVIDIA Omniverse USD Composer with the Fabric Scene Delegate settings enabled. If you have not yet done this, see the Quickstart for detailed instructions.
1Launch Omniverse USD Composer and create a new stage.
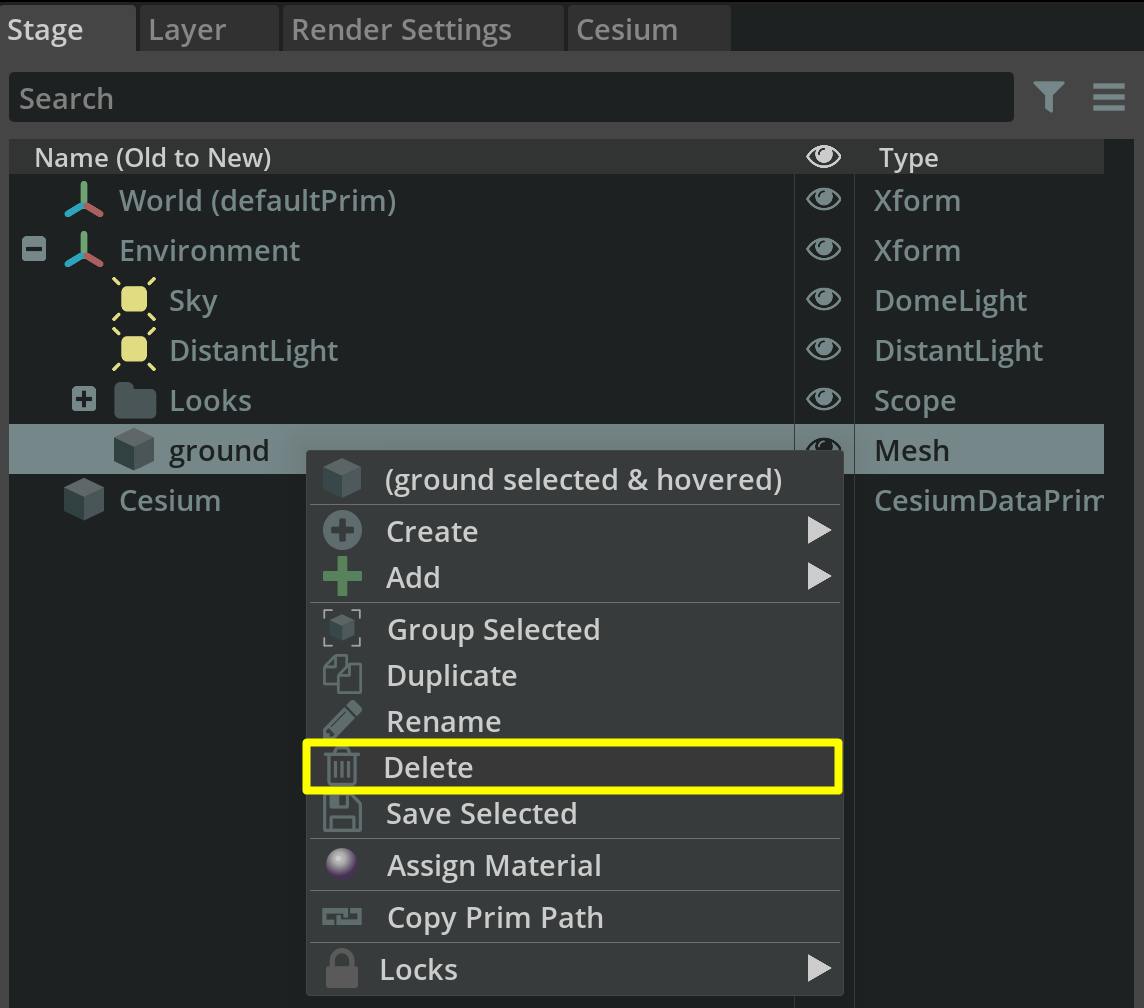
2Delete the ground object in the Stage to create a blank scene, while retaining the default lighting.
3Select the CesiumGeoreference object in the Stage window. This object determines where your Omniverse scene is set. The scene's current latitude, longitude, and height can be changed with this object’s properties.
.png?auto=compress%2Cformat&w=424)
4In the Property window, look for the Latitude, Longitude, and Height variables under Georeference Origin Point Coordinates.
.png?auto=compress%2Cformat&w=415)
These coordinates currently point to the hills outside Denver, Colorado, USA.
5Change these variables to the coordinates below. This will locate the stage around the Googleplex in Mountain View, California, USA.
Latitude: 37.42207
Longitude: -122.08409
Height: 0.0
6Open the Cesium panel in the right sidebar.
If the Cesium panel isn’t visible in your user interface, click on Window > Cesium > Cesium to make it visible.
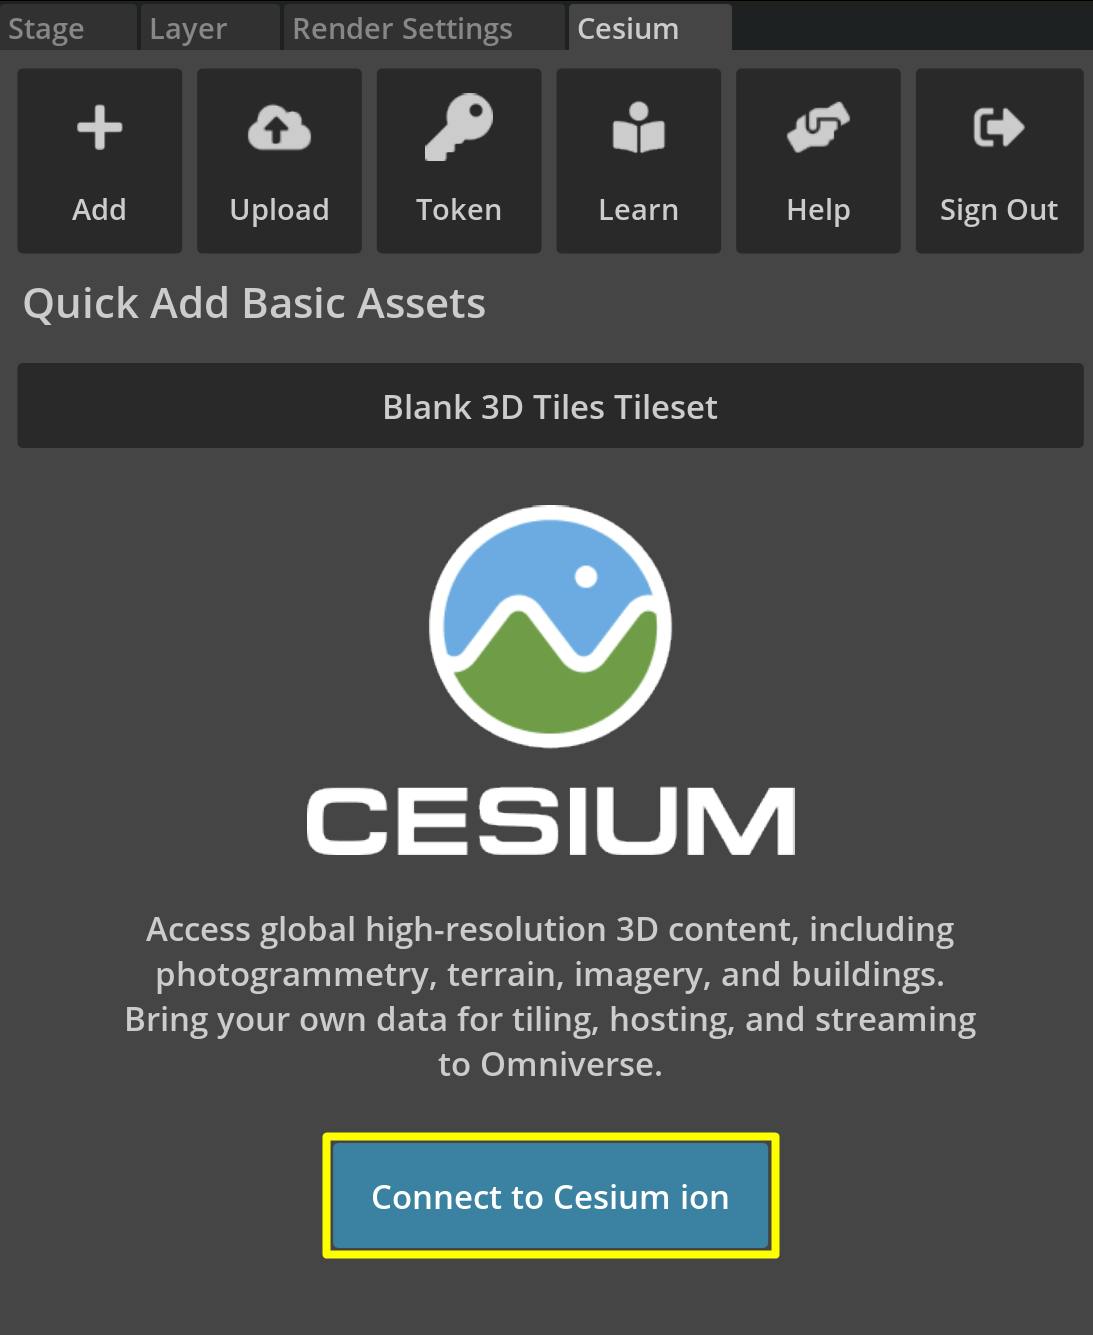
1Open the Cesium window by selecting the Cesium tab on the right sidebar.

2Click the Connect to Cesium ion button.
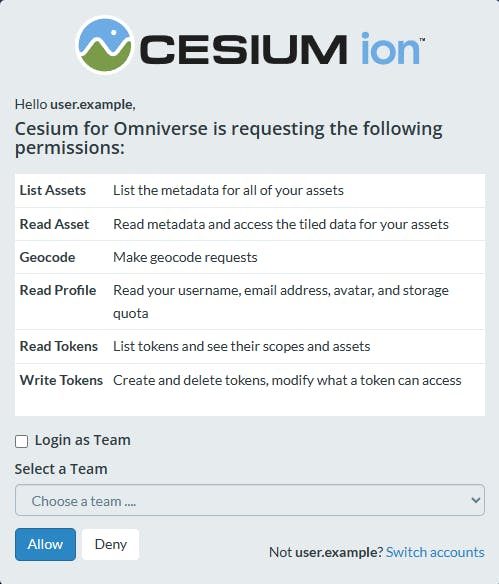
3A pop-up browser window will open. If you are not logged in, log in to your Cesium ion account. You can also sign in with your GitHub or Google account.
4Once you are logged in, you'll see a prompt asking you to allow Cesium for Omniverse to access your assets. Select Allow, and then return to Omniverse USD Composer to continue.
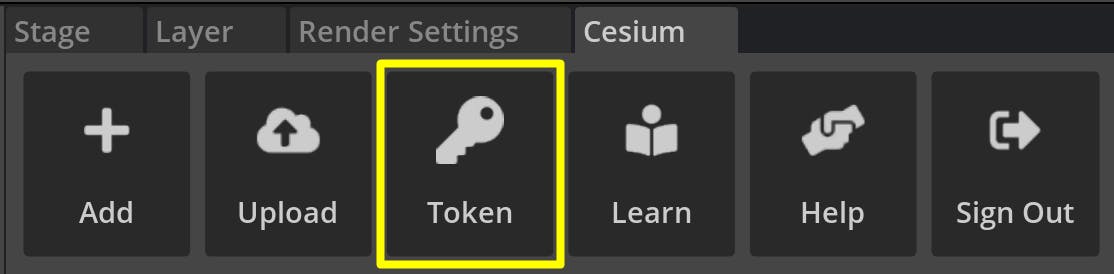
5Now you'll create a default access token for your project. Every asset that you stream from Cesium ion requires an access token. In this tutorial, you'll set a project-wide access token that all your assets will use.
Click the Token button at the top of the Cesium window.
6A new window will appear to configure the token. Select the Use an existing token checkbox, and choose Default Token from the drop-down menu. Then, press the Use as Project Default Token button.
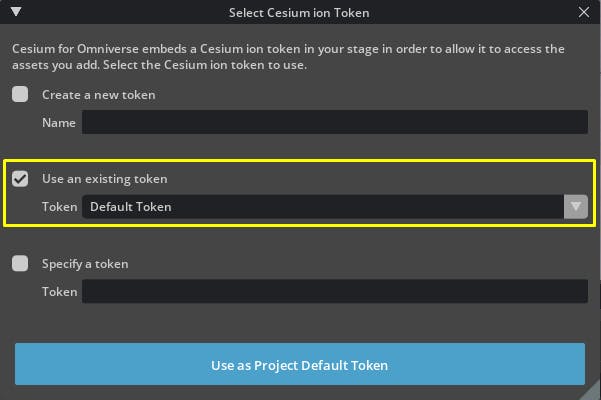
Alternatively, If you already have a token in your Cesium ion account that you would like to use, you can select it from the Use an existing token drop-down. You can also specify a token by selecting Specify a token and entering a Cesium ion token into the corresponding text field.
The Create a new token option will automatically create a new token within your Cesium ion account; however, you will need to manage that token's permissions manually via Cesium ion.
The default token in your Cesium ion account has read access to all individual assets associated with your account. Using the default token is a convenient choice for development but should not be used in production apps. For more information on token management within Cesium ion, visit the Cesium ion Access Tokens guide.
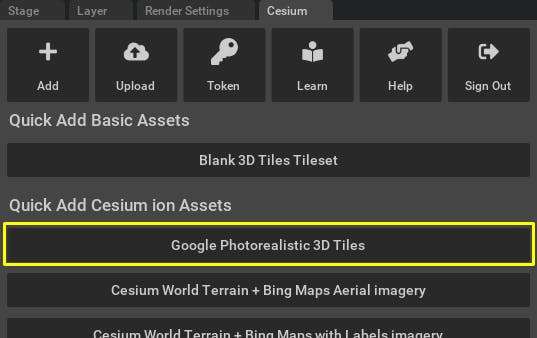
1From the Cesium window, add Google Photorealistic 3D Tiles by clicking the corresponding button.
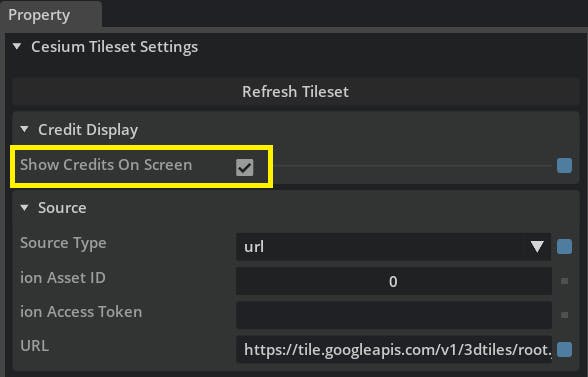
2Enable Show Credits On Screen to comply with the Google Maps Terms of Service.
3Zoom out to view the Googleplex and wider Silicon Valley area.

Congratulations—you've successfully loaded Photorealistic 3D Tiles from Google Maps Platform using Cesium for Omniverse. Feel free to explore and check out the world!
Follow our Lighting the Stage tutorial to learn more about preparing your project to capture amazing visuals of the Photorealistic 3D Tiles.