Cesium for Unreal Quickstart
This is a quickstart guide to building a Cesium for Unreal app with Cesium World Terrain and Cesium OSM Buildings.
Want to skip the step-by-step and see what Cesium for Unreal can do? Download the Cesium for Unreal Samples project.
This guide was written for Unreal Engine 5.1. If you are using a later version of Unreal Engine, the steps will still be the same, though your user interface may look different from the screenshots in this guide.
Still using Cesium for Unreal v1? We recommend upgrading as soon as possible, but you can find the tutorial for the old version here.

A Cesium for Unreal level with Cesium World Terrain and Cesium OSM Buildings, set in Chicago.
You’ll learn how to:
- Install the Cesium for Unreal plugin to Unreal Engine
- Create a level and import assets from Cesium ion
- Set your project's default ion asset token
- Add lighting to your app with CesiumSunSky
- Navigate your level with Cesium's DynamicPawn
Prerequisites
- An installed version of Unreal Engine (at least 5.1 or later). For instructions on installing Unreal Engine, visit the Unreal Engine download page and refer to the Installing Unreal Engine guide for detailed instructions.
- A Cesium ion account to stream terrain and building assets into Unreal Engine. Sign up for a free Cesium ion account if you don’t already have one.
Cesium ion is an open platform for streaming and hosting 3D content, and includes global, curated data that you can use to create your own real-world applications.
Start by installing the Cesium for Unreal plugin if you haven’t already.
1Open the Cesium for Unreal plugin page on the Unreal Engine Marketplace.
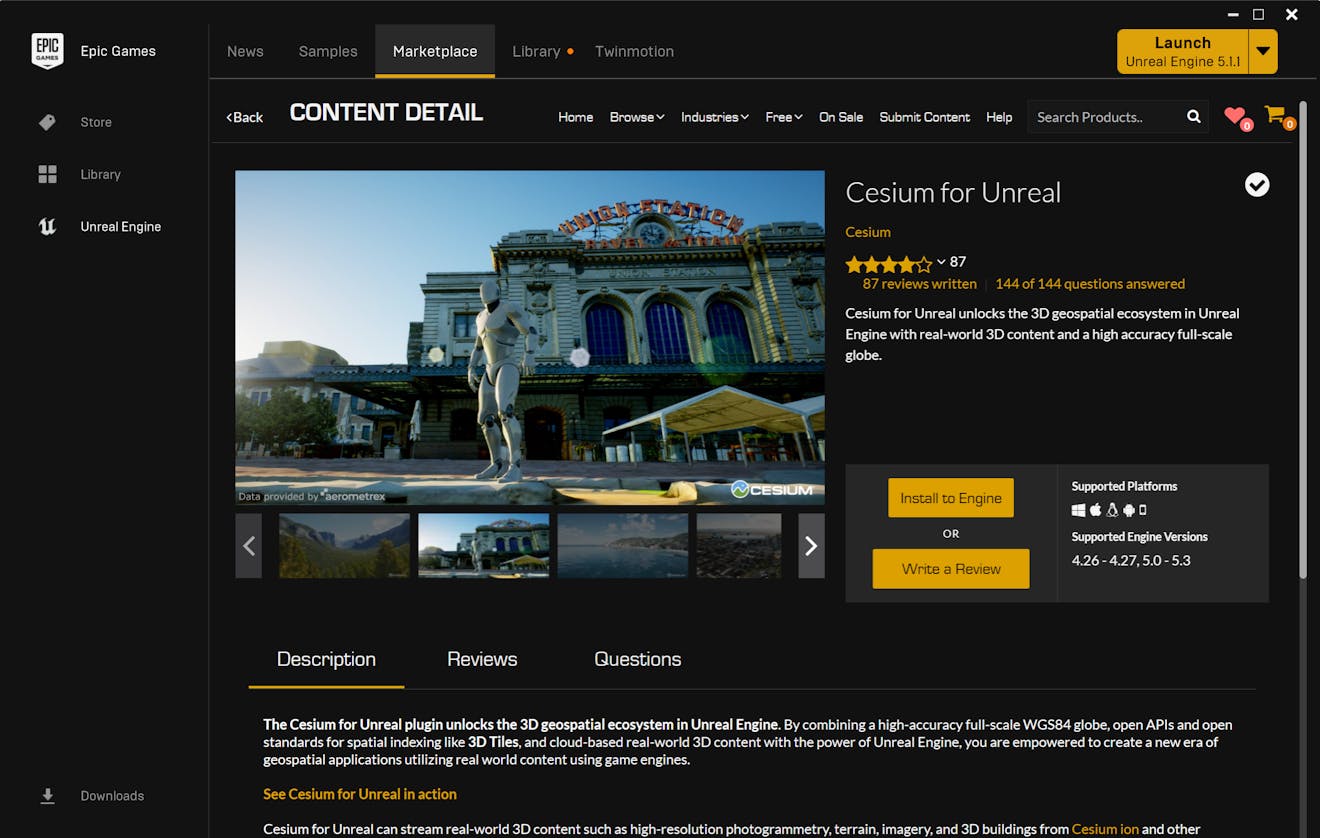
2Sign in if needed, then click on the Free button to install the plugin on your Unreal Engine account. Then, click the Install to Engine button to add the plugin to your Unreal Engine installation.
1Launch Unreal Engine and create a new project. Select Game as the New Project Category and Blank as the Template. Other configurations will also work. The Project Defaults section will allow you to further configure your project. For a simple setup, uncheck Starter Content.
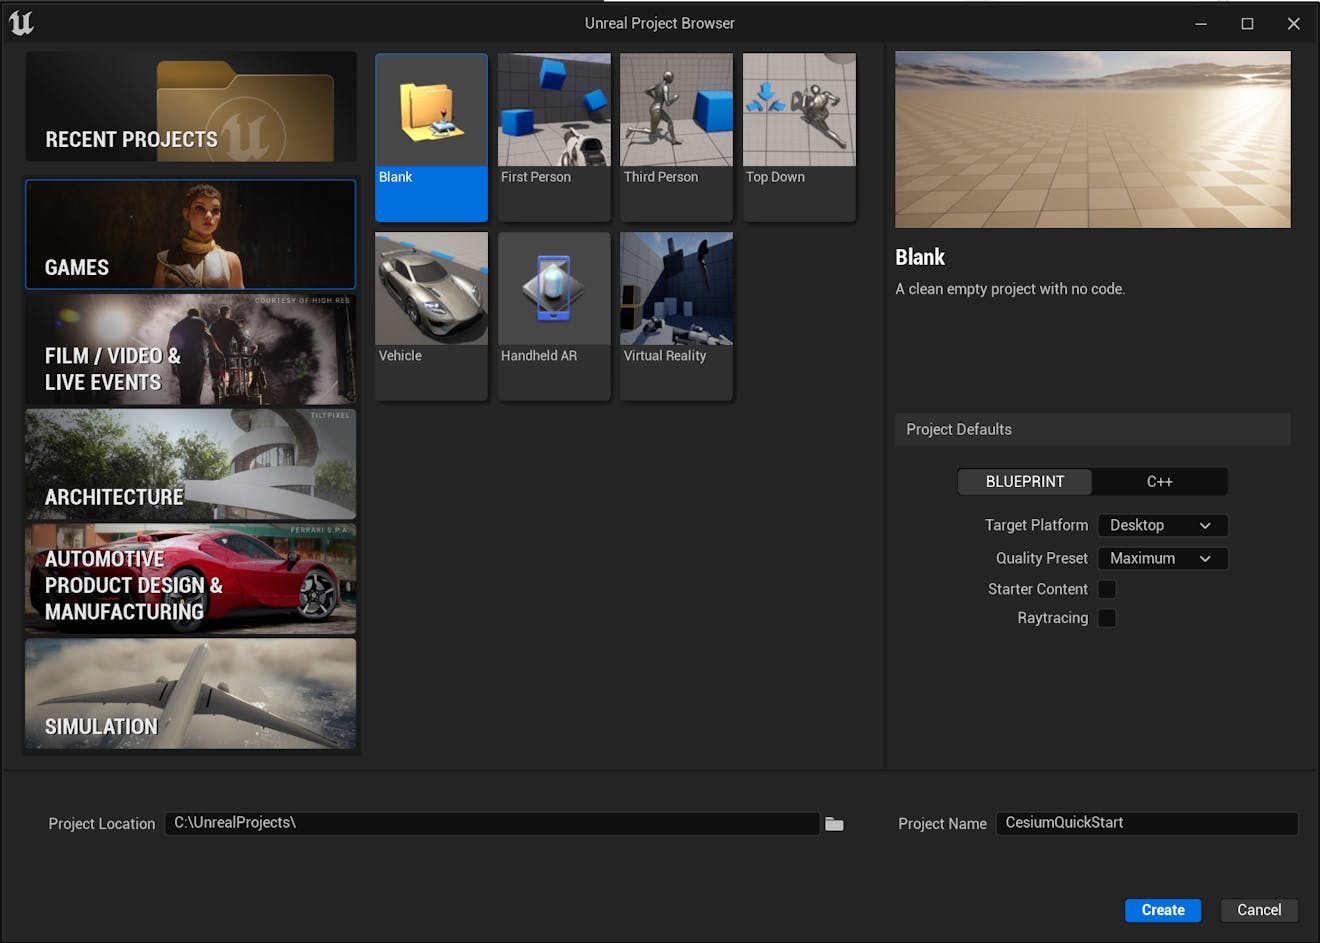
Once you have finished configuring your project, click the Create button. Your new project will open.
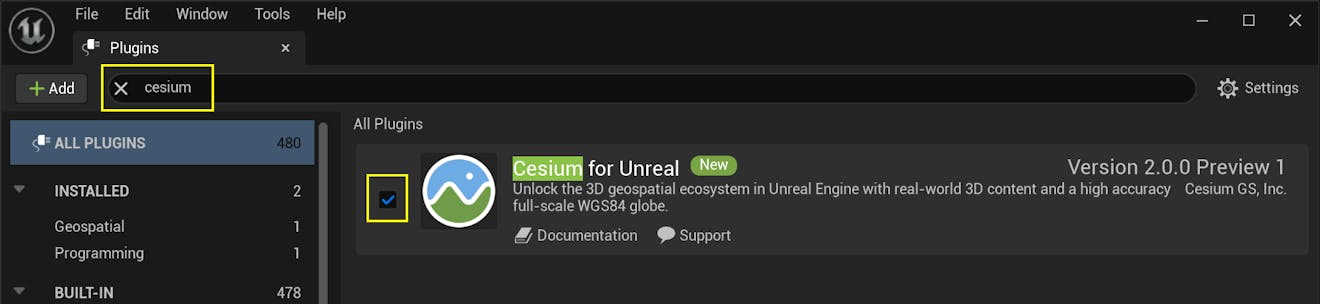
2Once the project is fully loaded, activate the Cesium for Unreal plugin. Open the Plugins window (Edit -> Plugins) and search for “Cesium” in the search bar at the top of the Plugins window. Make sure that the checkbox next to the plugin is checked. You may need to restart Unreal Engine after enabling the plugin.
3After restarting the Editor with the Cesium for Unreal plugin activated for the first time, you may see an error related to the Water Body Collision profile. Click the Add entry to DefaultEngine.ini link to fix it.

1Create a new level (File -> New Level). When prompted, select "Empty Level" to make sure there are no objects in the level.
2Disable the World Bounds Checks. This option is found in World Settings (Window -> World Settings), in the World -> Advanced category.
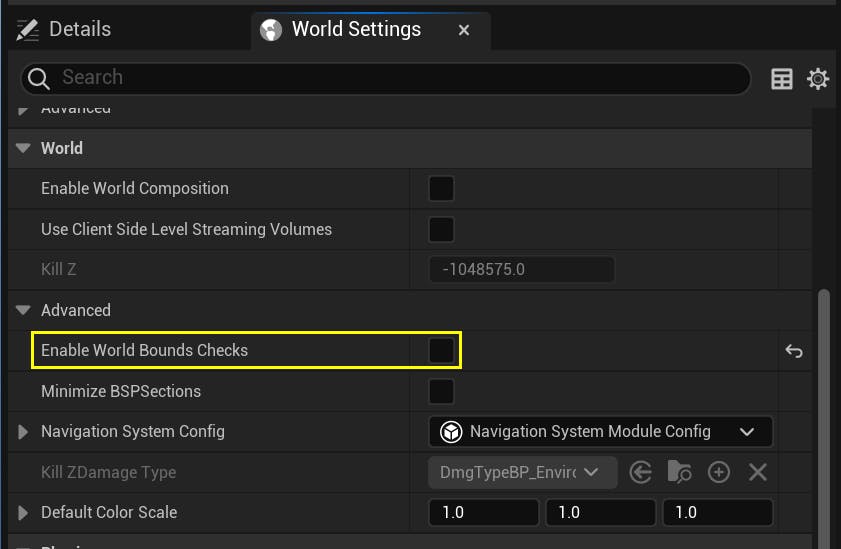
With Enable World Bounds Checks ON, Unreal Engine will attempt to fly a Pawn that is far from the origin back toward the origin. In most Cesium applications, being far from the origin is completely normal, and this automatic behavior prevents the Pawn from going where the user wants it to go.
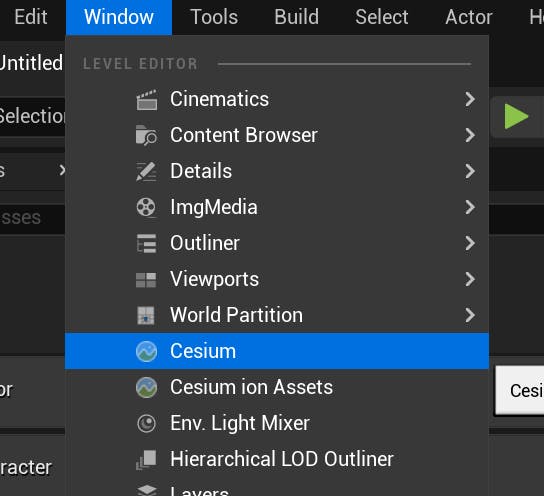
3Open the Cesium panel by clicking Window -> Cesium.
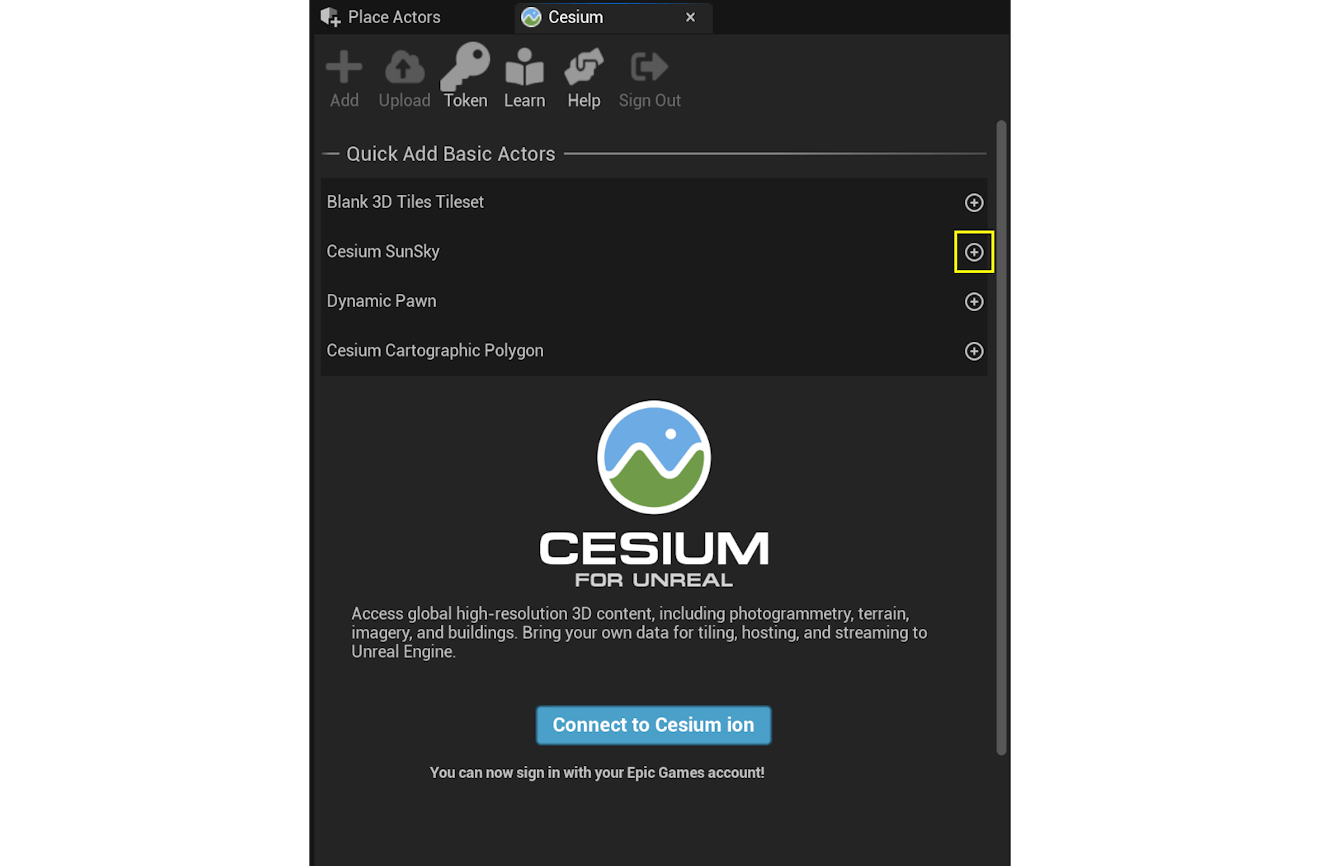
You'll need to add some lighting so you'll be able to see the tilesets you add in later steps. Cesium for Unreal comes with a premade, globe-aware sun and atmosphere system called CesiumSunSky.
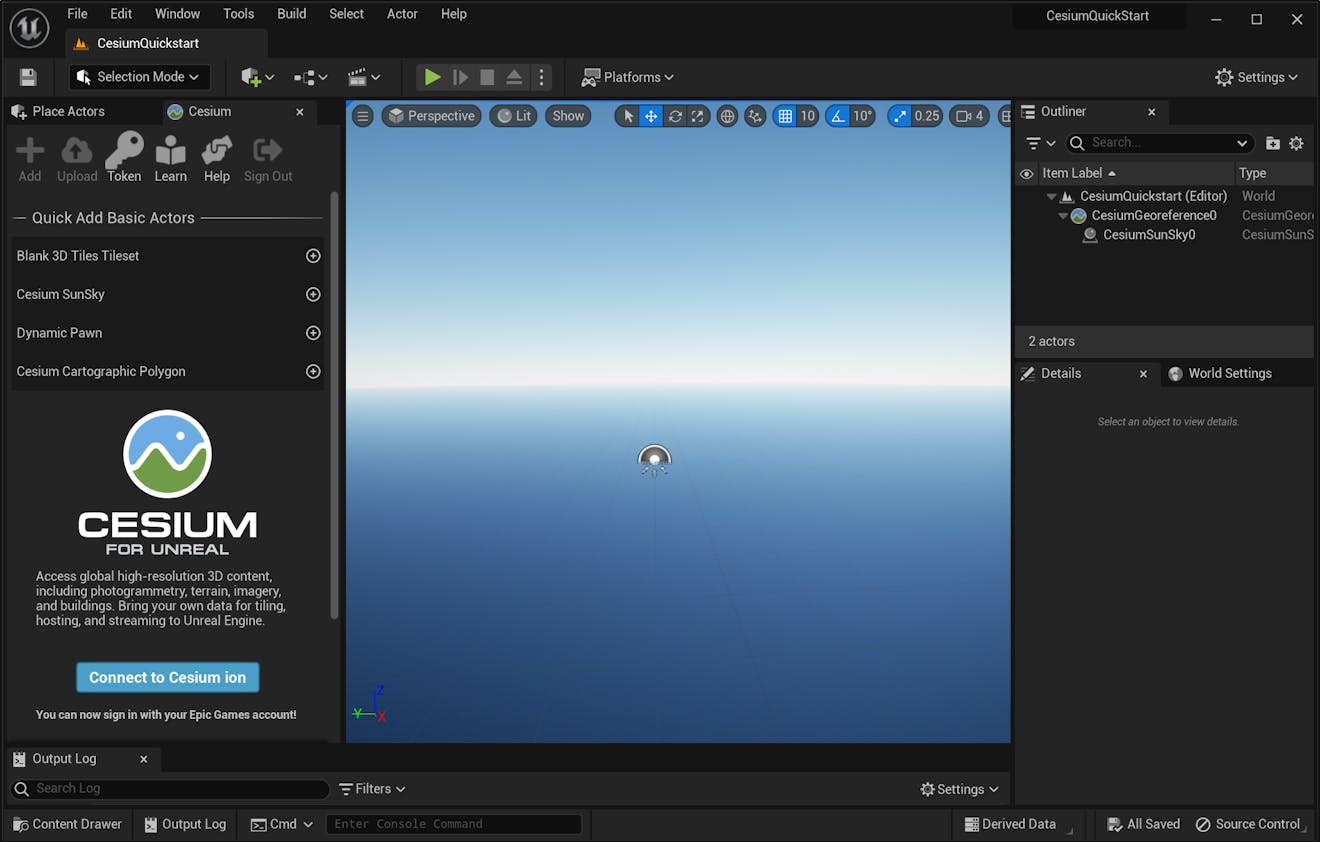
4You can add Cesium for Unreal actors directly to your level from the Cesium panel. In the Quick Add Basic Actors section of the panel, find Cesium SunSky and click the button to add it to the level. You should see a skylike gradient appear in the viewport.
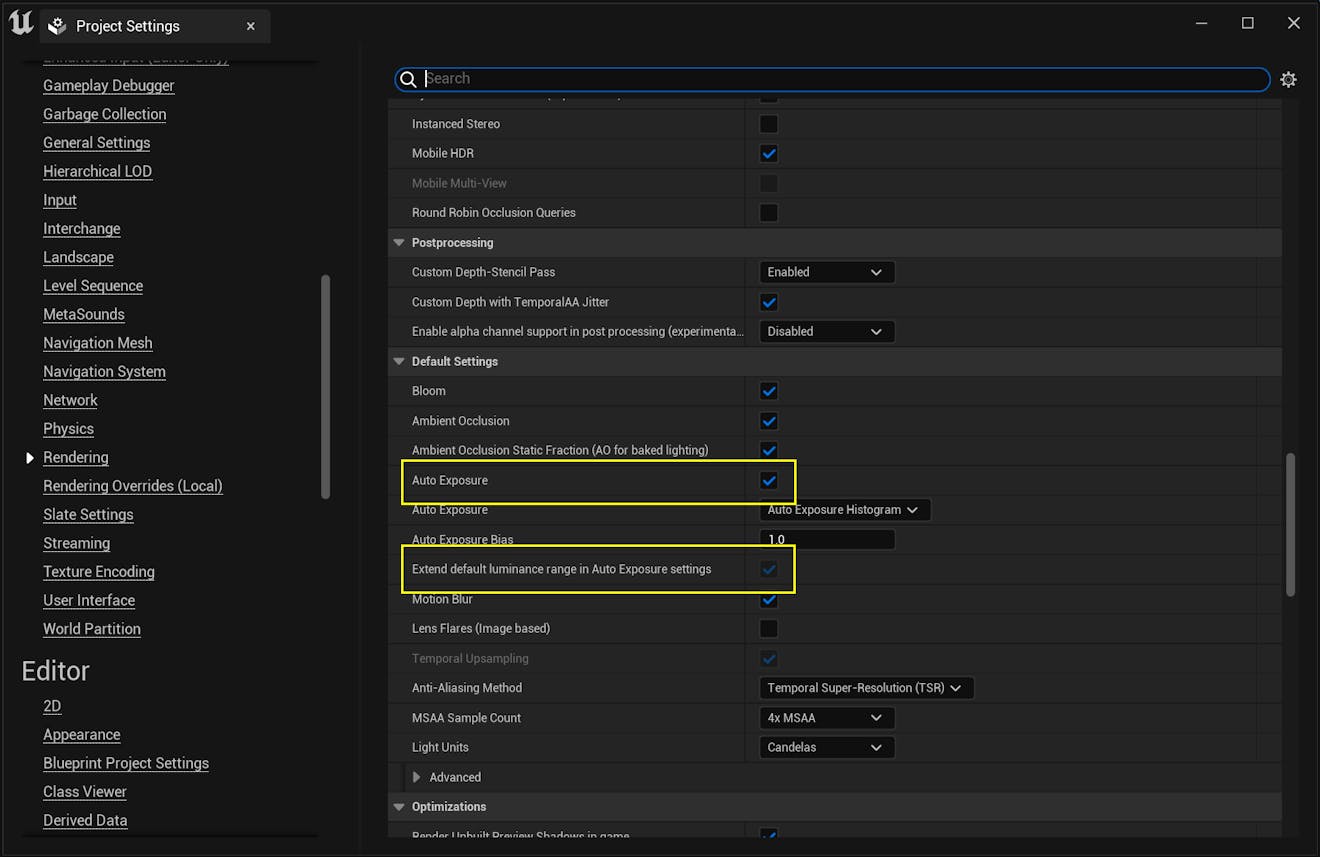
Did your viewport turn solid white - and stay that way - after adding the Cesium SunSky? CesiumSunSky uses realistic light intensity values, which are much brighter than standard Unreal projects. As a result, with some project settings, the light will wash out scenes and make them appear white. To fix this, enable the Auto Exposure and Extend default luminance range in Auto Exposure settings options. You can find these options by going to Edit -> Project Settings, then navigating to Engine -> Rendering and scrolling down to the Default Settings section.
Alternatively, you can reduce the intensity of the sun lighting to a more reasonable but less realistic value. Click on the CesiumSunSky actor. In the Details panel, find the Directional Light component and reduce the light's Intensity to 10.0.
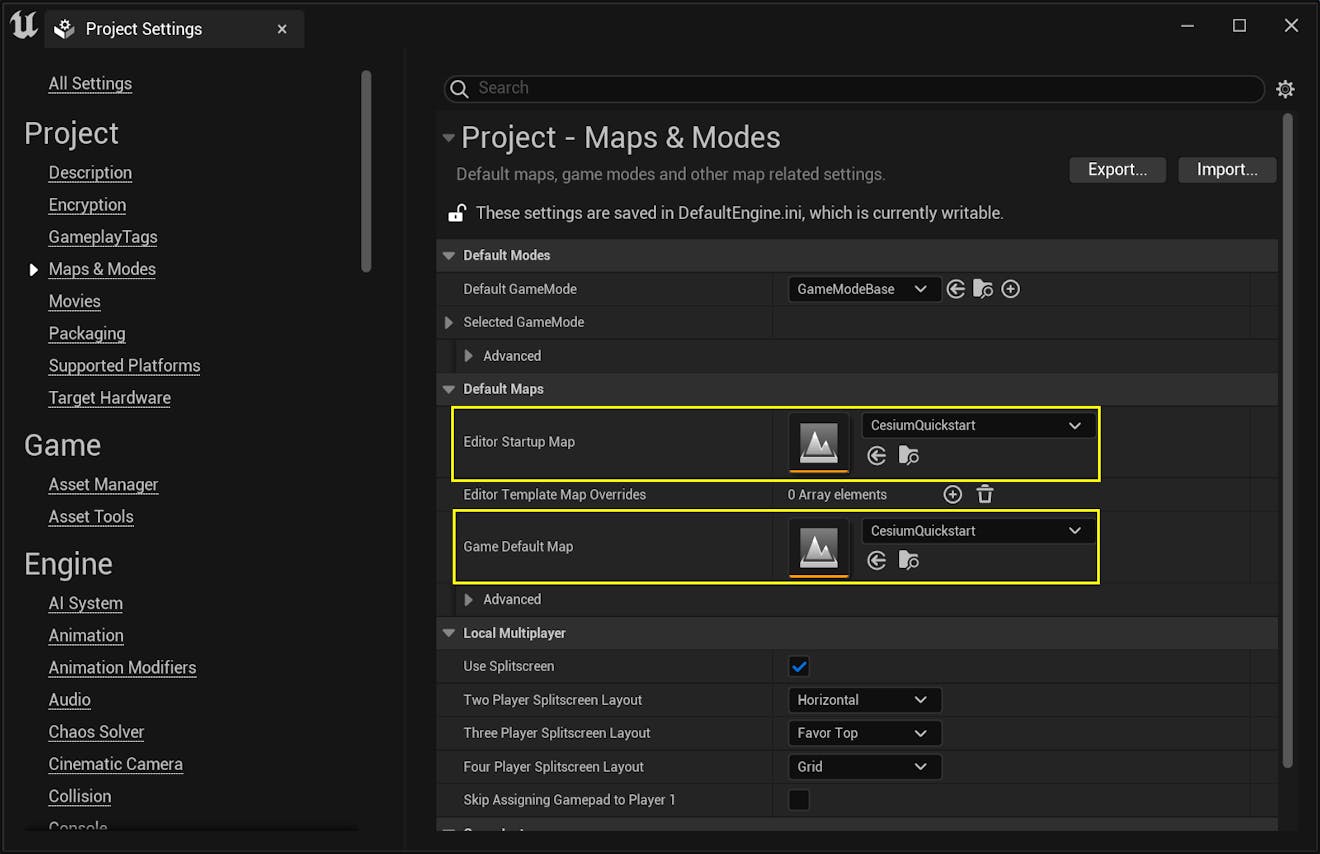
5Now is a good time to save your level. Click the Save the current level to disk button in the top-left corner of the Editor, or press Ctrl+S. Give your level a name. You may also want to set your new level as the project's default map. This will make sure that your level will automatically open when you restart the project or package and run your application. In the Edit -> Project Settings window left sidebar, click on Maps & Modes, then look for the Default Maps section. Change both the Editor Startup Map and the Game Default Map to your new level.
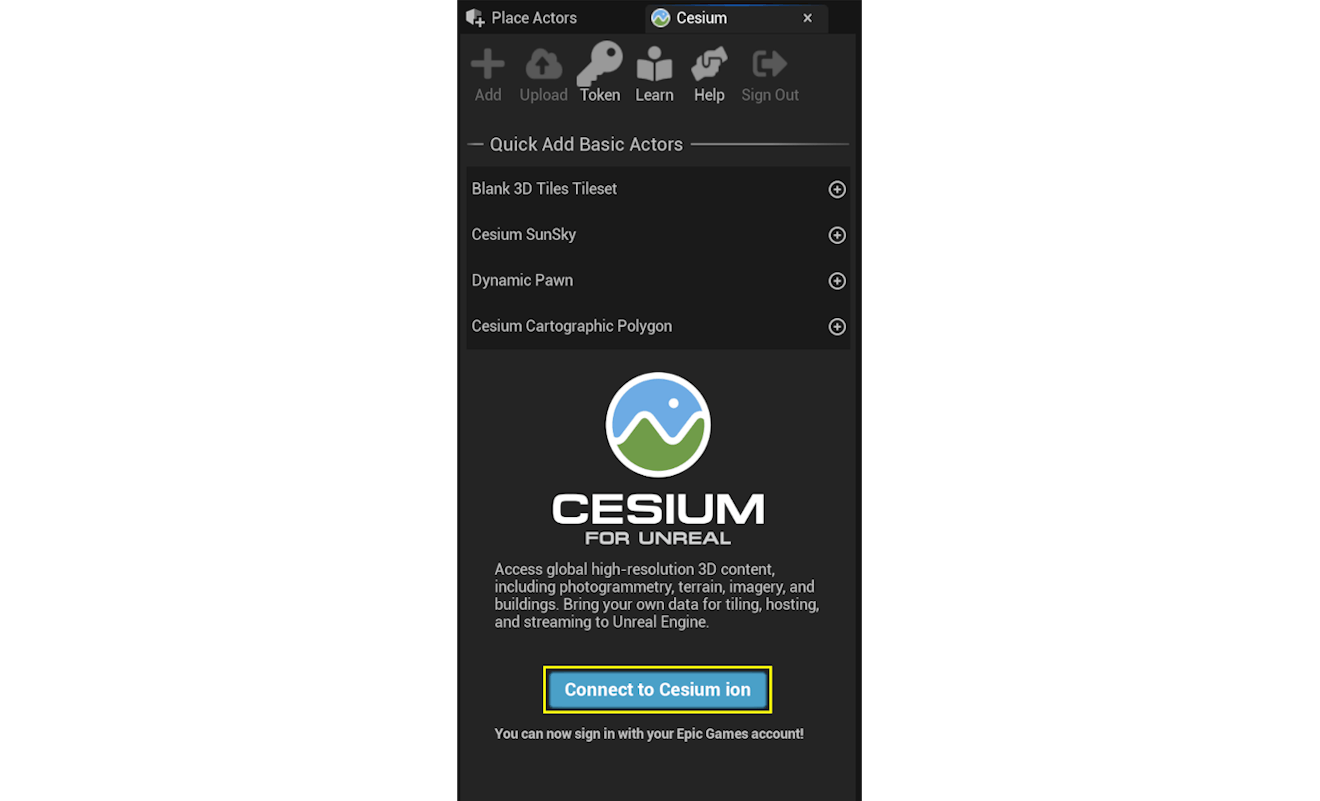
1Return to the Cesium panel that you opened in the previous step. Click on the Connect to Cesium ion button.
2A pop-up browser window will open. If you are not logged in, log in to your Cesium ion account. You can also sign in with your Epic Games, GitHub, or Google account.
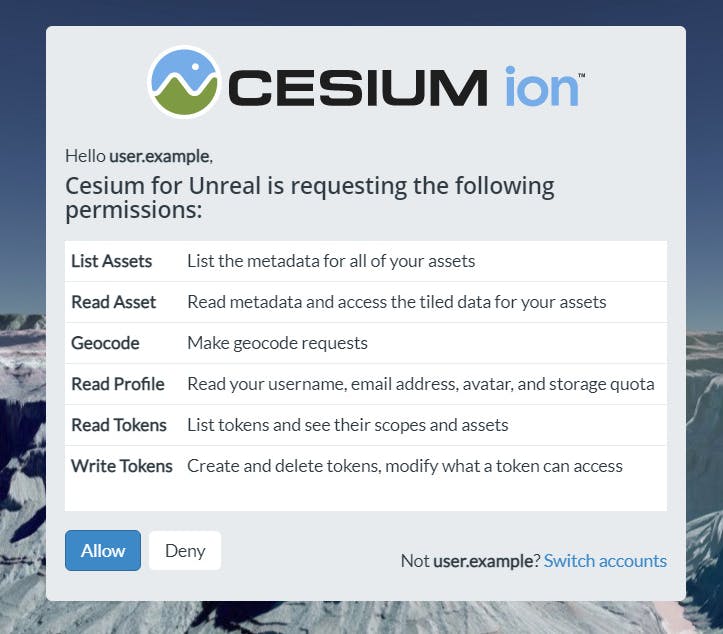
3Once you are logged in, you'll see a prompt asking you to allow Cesium for Unreal to access your assets. Select Allow, then return to Unreal Engine to continue.
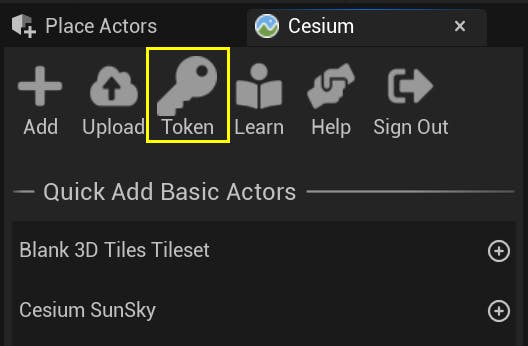
4Now, you'll create a default Access Token for your project. Every asset that you stream from Cesium ion requires an Access Token. In this tutorial, you'll set a project-wide access token that all your assets will use.
Click on the Token button at the top of the Cesium panel.
5A new window will appear to configure the token. Select the Create a new token option, and rename the token if you wish. Then, press the Create New Project Default Token button.
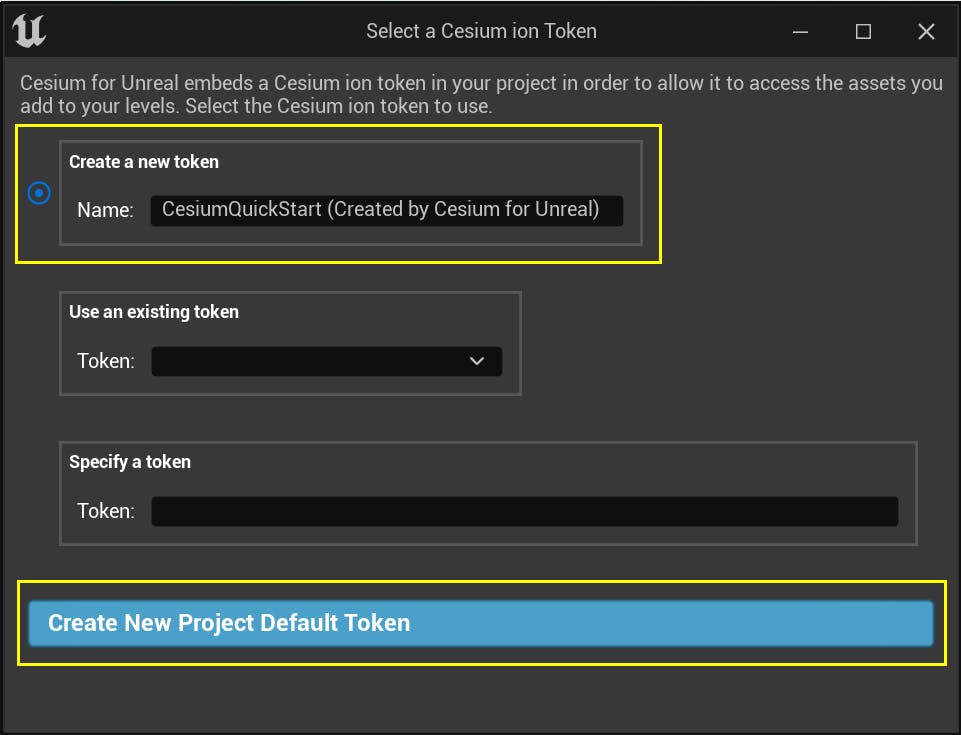
The new token you created will be added to your Cesium ion account.
If you already have a token in your Cesium ion account that you would like to use, you can select it from the "Use an existing token" dropdown instead of creating a new one.
Tokens created by Cesium for Unreal access only the assets that you allow. This follows security best practices for your Cesium ion account. Whenever you use the Cesium panel or Cesium ion Assets panel to add an asset to your level, Cesium for Unreal will automatically update the appropriate permission for the token.
You may choose to manually configure your token and add or remove assets using the Access Tokens page on Cesium ion.
You are ready to add an asset from Cesium ion.
1Using the Cesium panel, add "Cesium World Terrain + Bing Maps Aerial imagery" by clicking the button next to that entry.
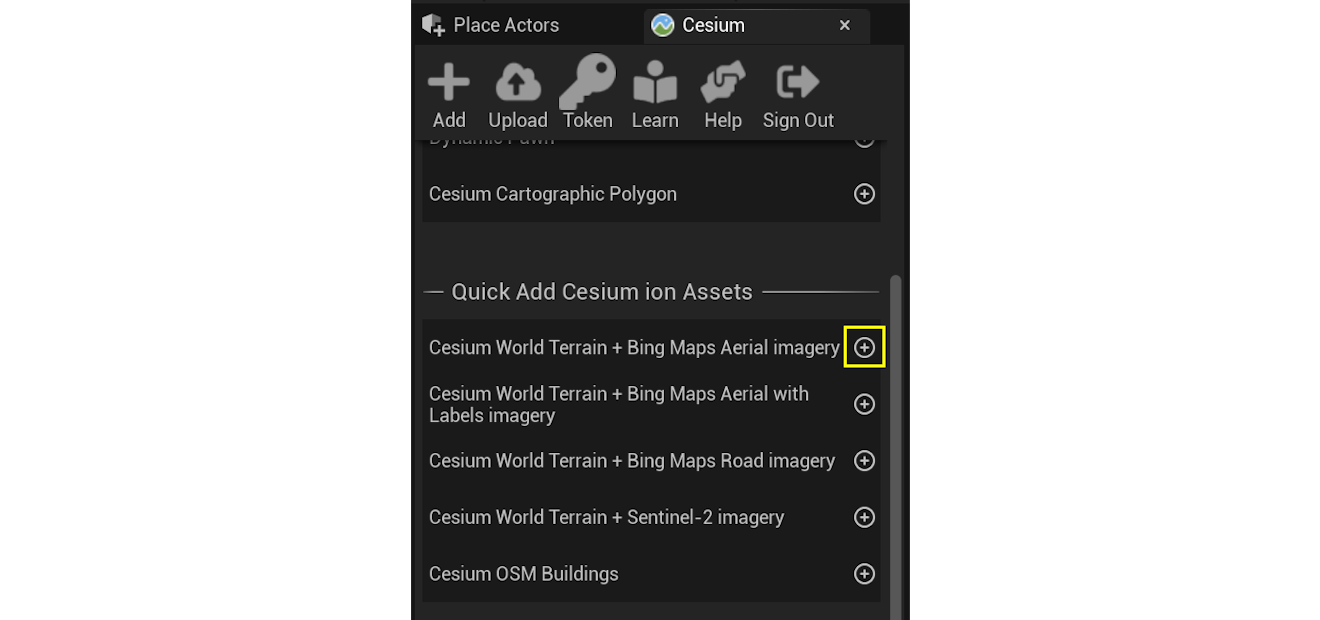
Terrain will appear in the level.
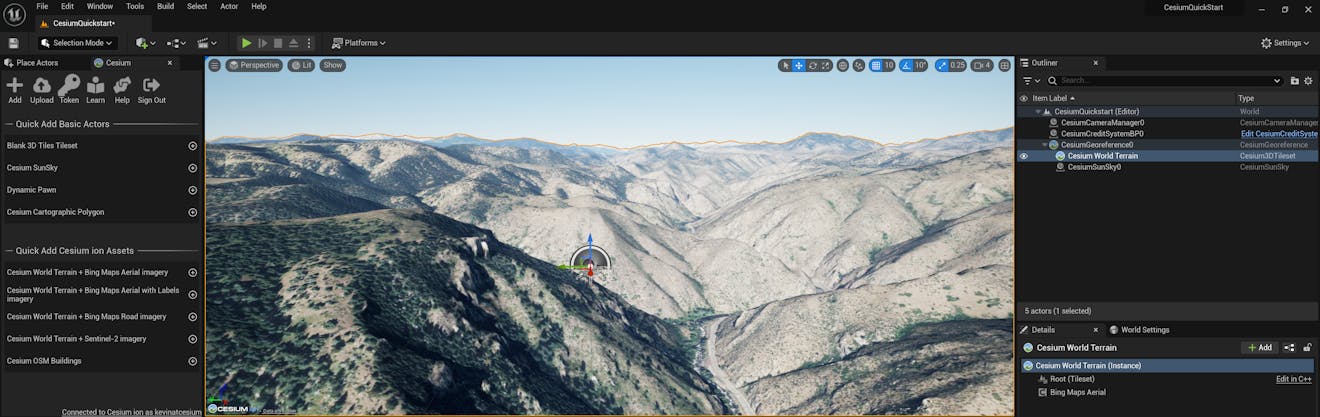
2Take a look at the Outliner on the right. Along with the CesiumSunSky you added earlier, you'll see a variety of Cesium actors. One of them, Cesium World Terrain, is the tileset you just created. The other three—CesiumCameraManager, CesiumCreditSystemBP, and CesiumGeoreference—are created automatically the first time you add a 3D Tileset or georeferenced actor to the level.
3If Cesium World Terrain is not already selected, select it now. In the Details panel, you'll see more information about this actor.
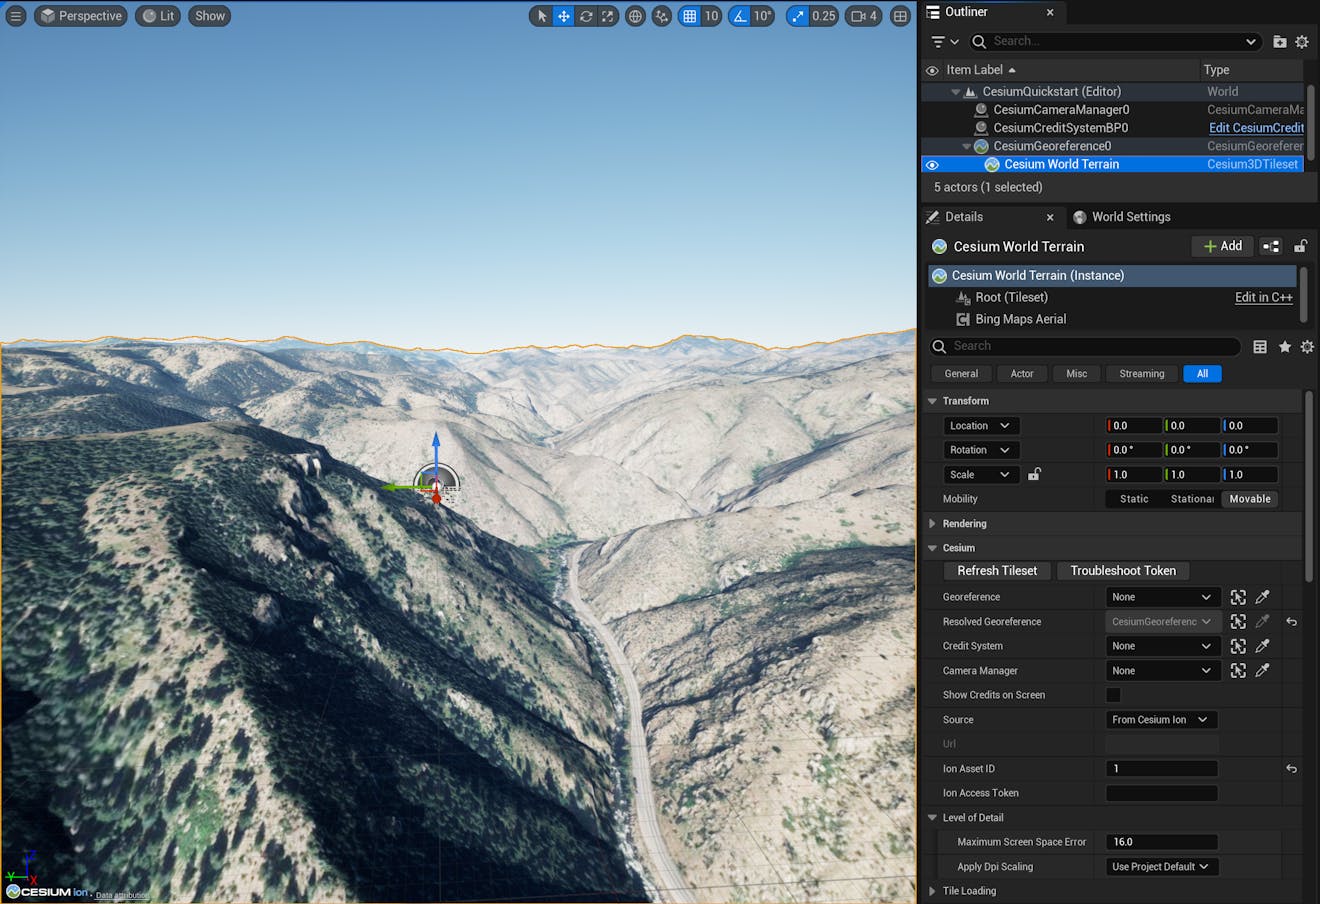
This is a Cesium3DTileset actor. It streams 3D Tiles data into Unreal Engine, and provides a way to configure that tileset.
You'll learn about many of the available settings in later tutorials. For now, feel free to explore and test out different settings. Hover over a setting with your mouse to learn more about what it does.
Once you're ready, continue to the next section.
It's time to leave these picturesque hills behind and head to the big city.
1Select the CesiumGeoreference actor in the Outliner. This actor determines where in the world your level is set. The level's current latitude, longitude, and height can be changed with this actor.
2In the Details panel, look for the Origin Latitude, Origin Longitude, and Origin Height variables under the Cesium category.
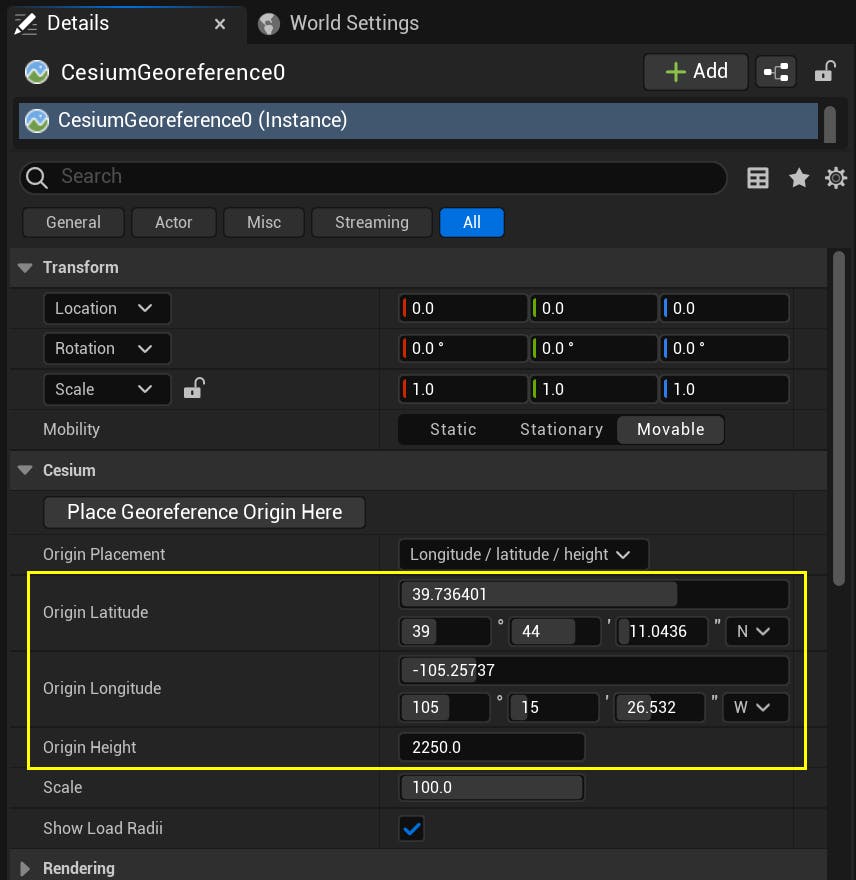
The current values of these variables are set to the hills outside Denver, Colorado, USA.
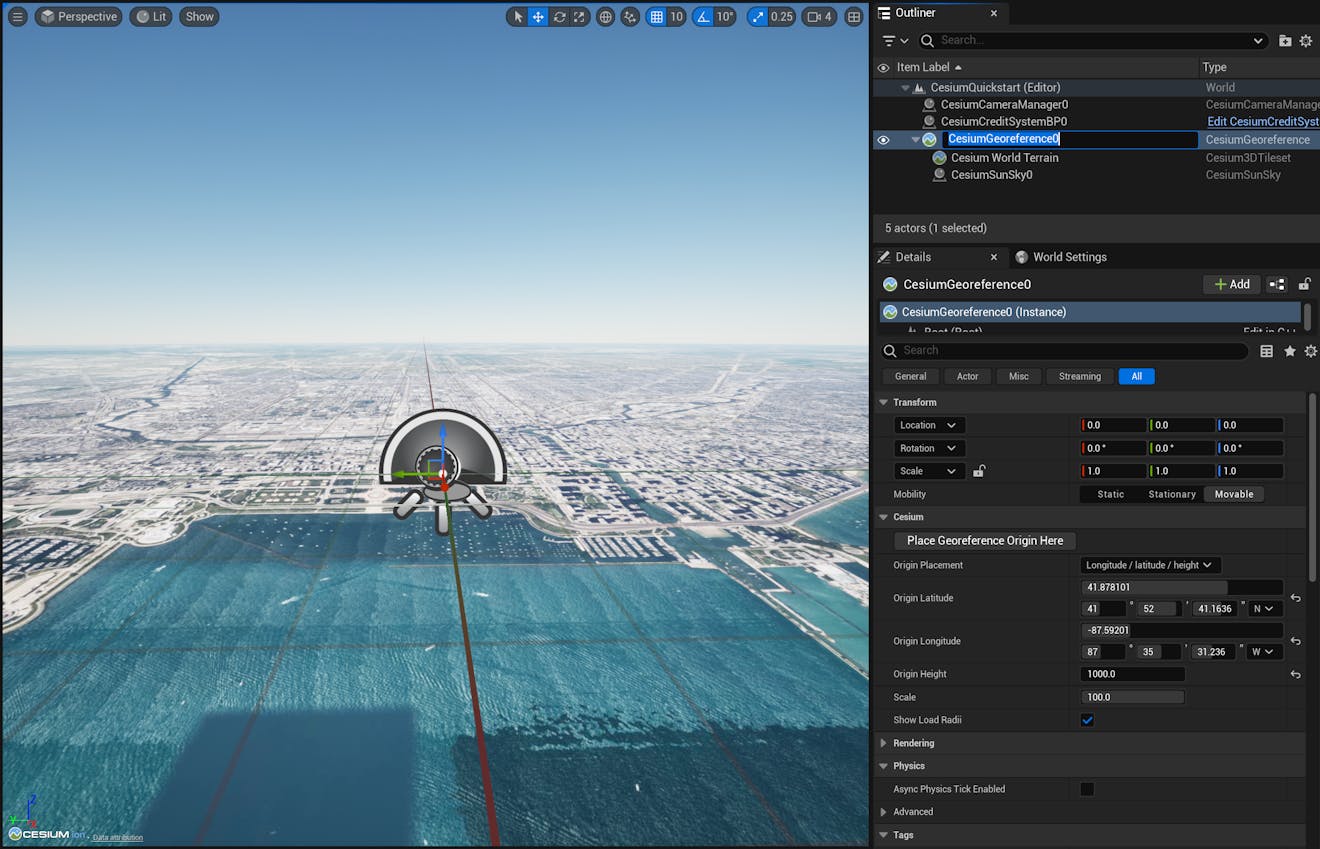
3Change these variables to the coordinates of your favorite city—or use these coordinates to travel to Chicago, Illinois, USA.
Origin Latitude = 41.878101
Origin Longitude = -87.59201
Origin Height = 1000.0
After entering these coordinates, you'll find the level has shifted to this new location.
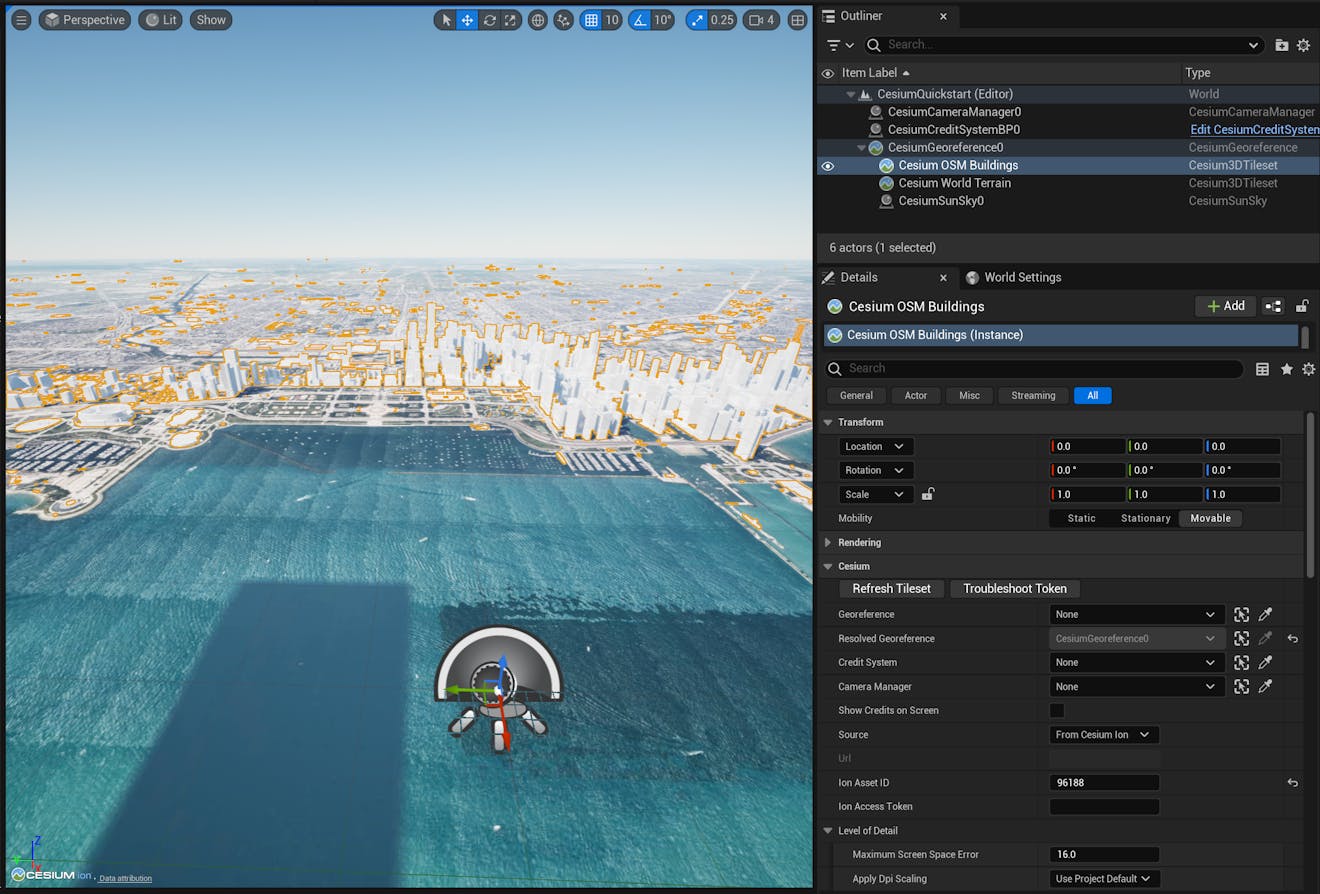
4The city looks very flat. Cesium World Terrain doesn't include building detail. Fortunately, Cesium OSM Buildings can come to the rescue.
From the Cesium Quick Add panel, add Cesium OSM Buildings to the level.
In this section, you'll learn how to navigate your level in the editor and during play. You'll also learn about the Dynamic Pawn, a controller included in the Cesium for Unreal plugin to help you navigate the Earth's immense size.
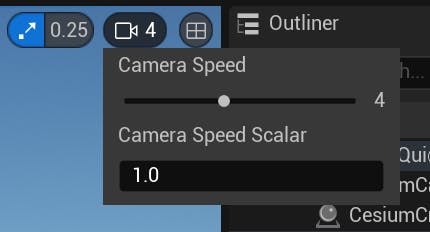
1To move the viewport's camera, click and hold the right mouse button in the viewport window. While holding the right mouse button down, you can look around by moving the mouse and fly around by pressing the W, A, S, and D keys on your keyboard. You can modify the camera speed using the mouse scroll wheel.
You can also modify the camera speed in larger increments using the Camera Speed settings in the top-right corner of the viewport.
If you're having trouble navigating the viewport, check out the Unreal Engine Viewport Controls documentation.
2If you pressed the Play button, you'd notice that the default camera speed is very slow, and not adjustable. Given the scale that real-world data can be, you'll need a different Pawn to efficiently navigate the level during play.
Using the Cesium panel, add a Dynamic Pawn.
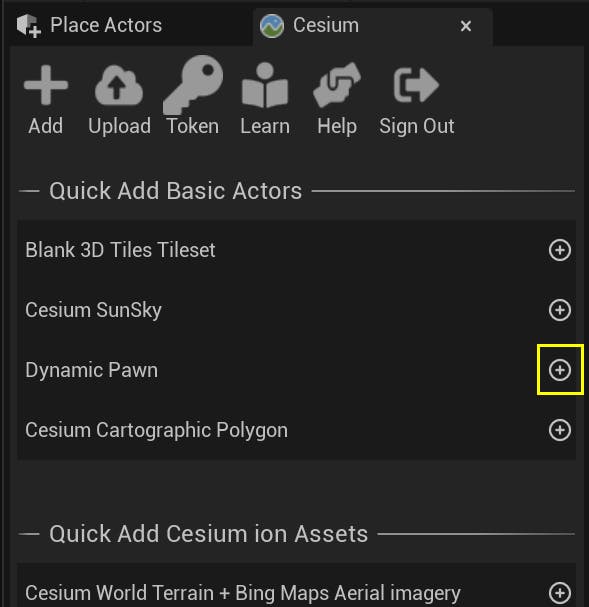
Q: What is the Dynamic Pawn?
Cesium's DynamicPawn actor extends the built-in pawn class by making it globe-aware. The DynamicPawn also adds important movement functionality, such as the ability to adjust movement speed with the mouse wheel and the ability to fly between global locations along a curved path.
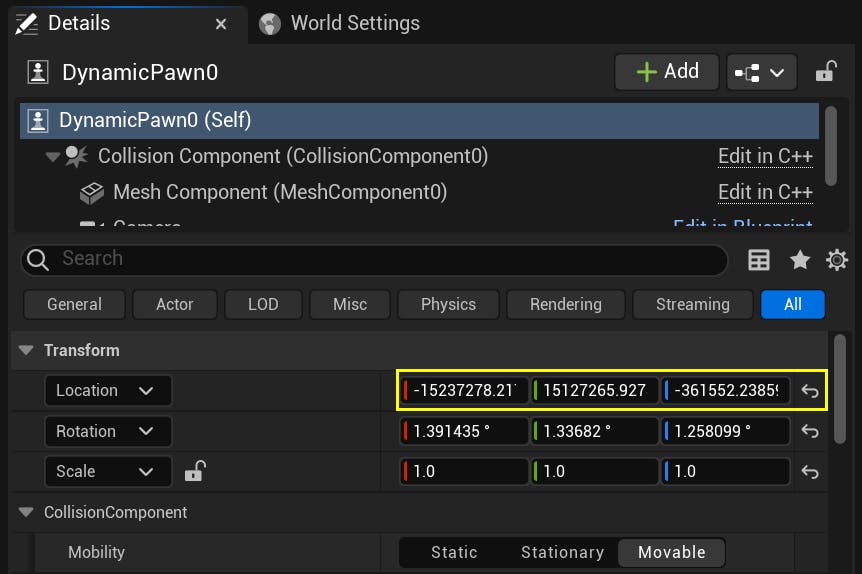
3The DynamicPawn is a georeferenced actor. It maintains its position relative to its coordinates on the globe and not the standard Unreal Engine world coordinates. This means that if you change the Georeference Origin to a different location, the DynamicPawn will stay behind. If you'd like to move it to your new location, select it in the Outliner and set its Location X, Y, and Z coordinates to 0, or use the grey arrow to reset its position to the origin.
4You're ready to test out your level!
Press the Play button at the top toolbar. Similar to the viewport controls, you can use the W, A, S, and D keyboard keys and the mouse to fly around. Use the mouse scroll wheel to change your speed.
You've created your first project with Cesium for Unreal. Feel free to explore and check out the world!
Now you are ready to add more assets and customize the level. Continue on to Adding Datasets.