Adding Datasets
This tutorial shows you how to use Cesium for Unreal to import models. First, you’ll import a photogrammetry model from Cesium ion. You’ll use a model of one of the world’s most livable cities: Melbourne, Australia. Then, you’ll import a local dataset from your computer.
Still using Cesium for Unreal v1? We recommend upgrading as soon as possible, but you can find the tutorial for the old version here.
You’ll learn how to:
- Add a city-scale 3D Tiles photogrammetry model from Cesium ion to your level.
- Use the CesiumGeoreference Actor to geoposition your level on the globe.
- Use a local 3D Tiles dataset from your computer.
- Know how to set up a basic Cesium for Unreal application. Check out our Cesium for Unreal Quickstart guide for instructions on starting with the Cesium for Unreal plugin.
- A Cesium ion account to stream the Melbourne tileset into Unreal Engine.
This tutorial assumes that you have already created a project and installed the Cesium for Unreal plugin. If you have not yet created a project, see the Quickstart for detailed instructions.
1Create a new level by clicking File>New Level. In the window that appears, select Empty Level to start with a blank scene.
2Open the Cesium panel by clicking Window>Cesium.
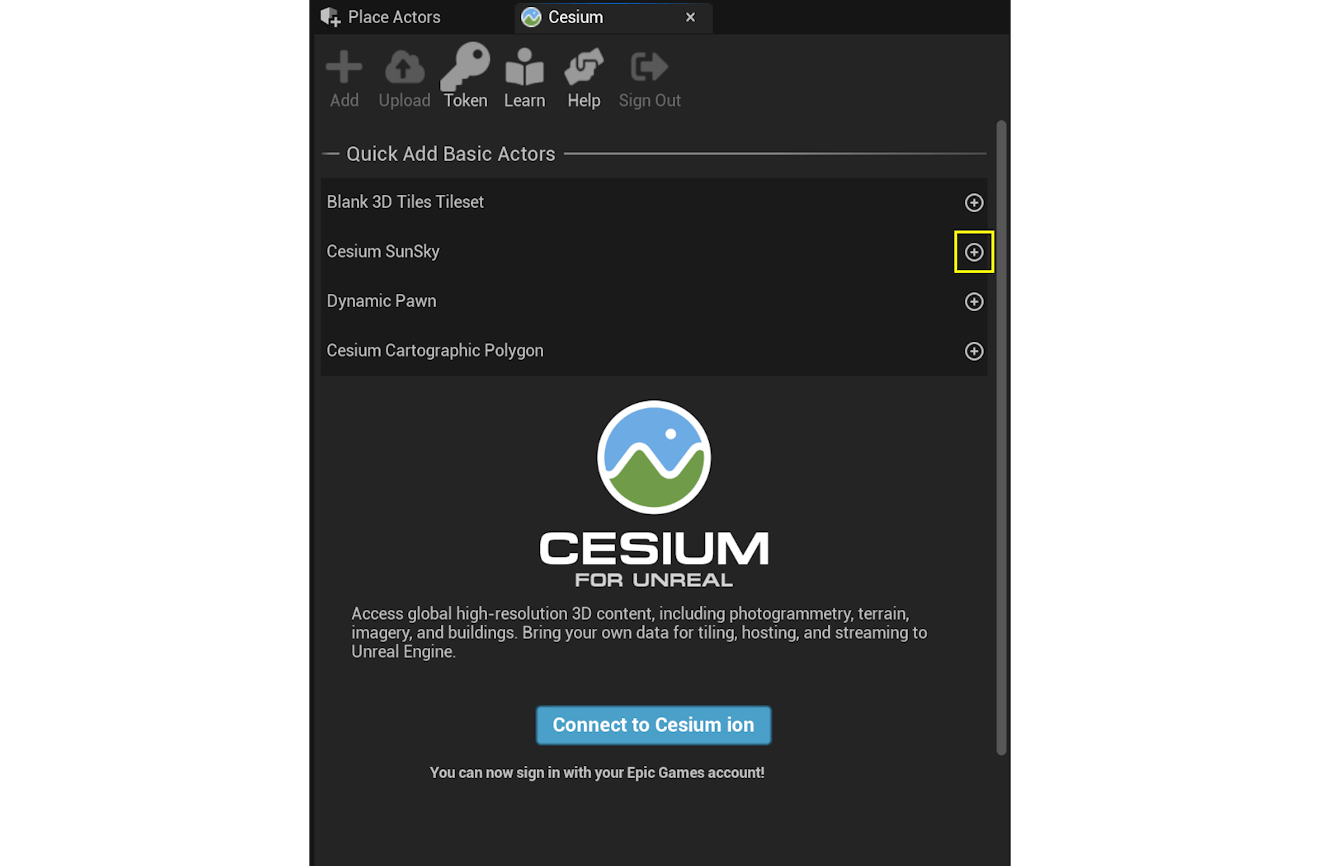
3Add a CesiumSunSky actor to the scene using the "Quick Add Basic Actors" section of the Cesium panel.
This will also add a CesiumGeoreference actor to the scene.
1Connect to Cesium ion if you haven’t already.
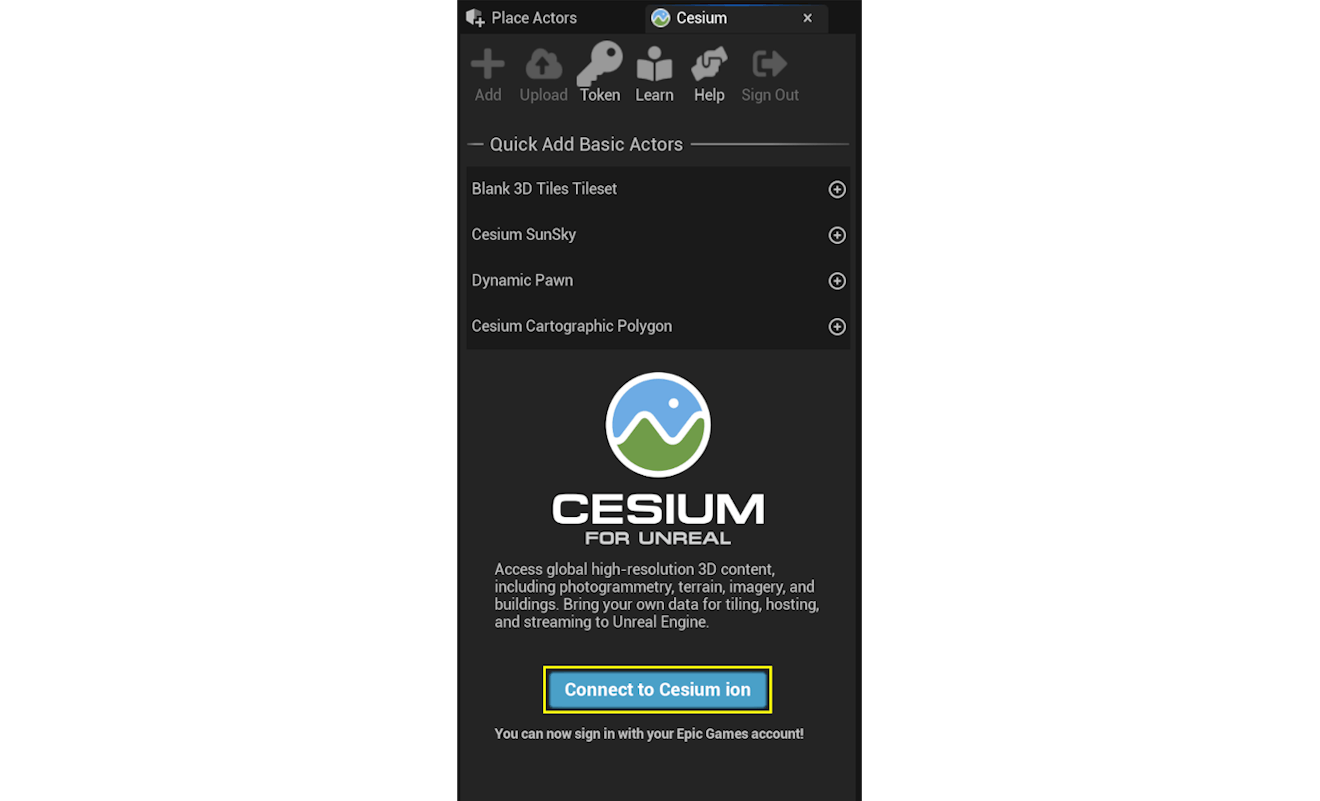
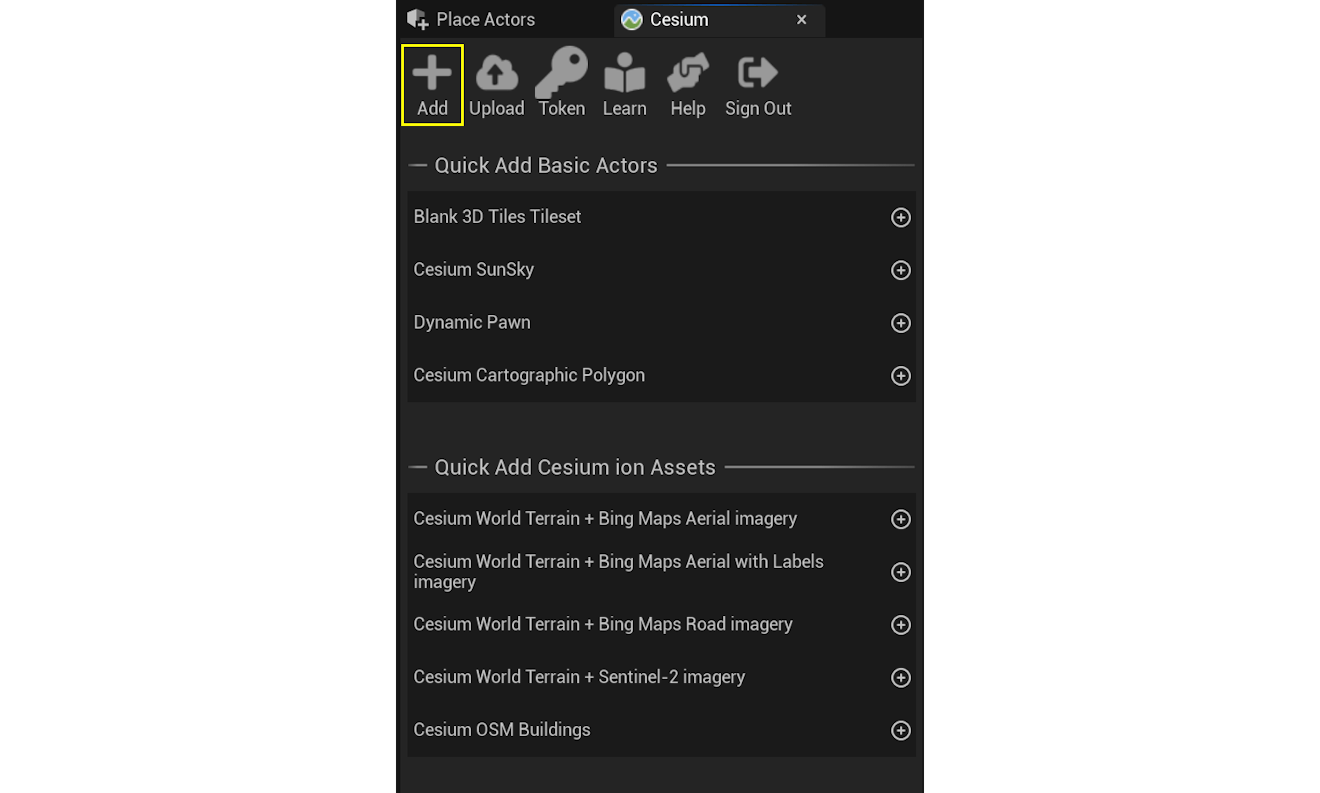
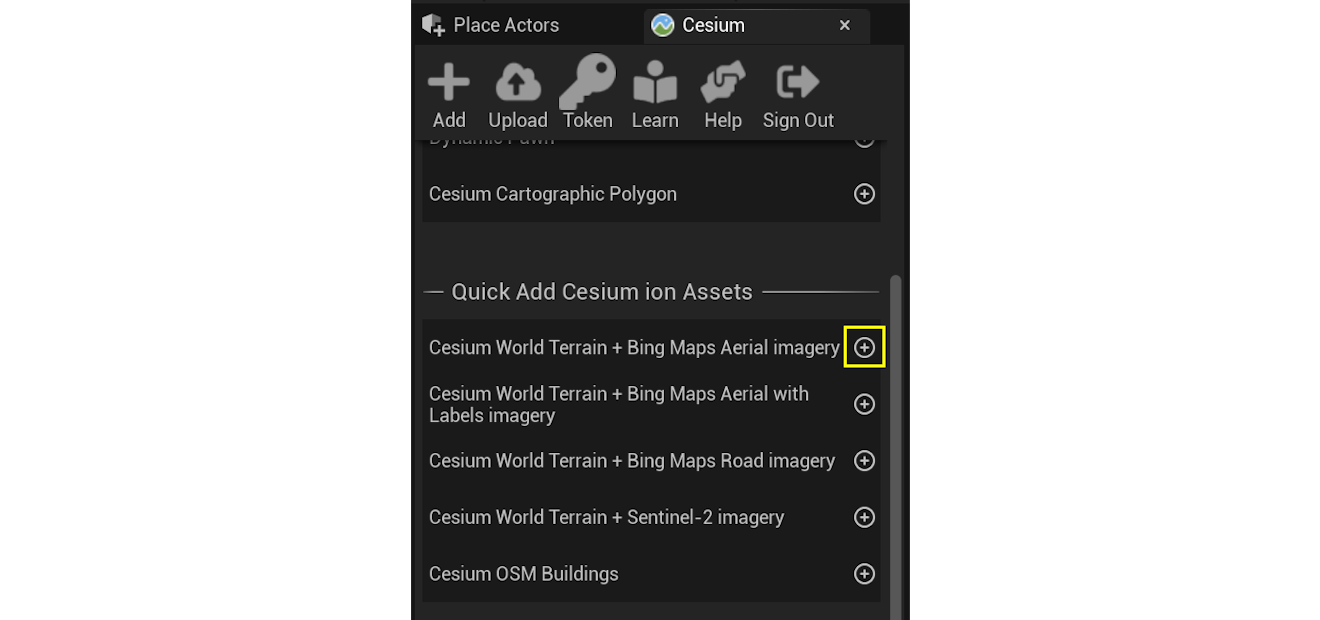
2Click the Add button to open the Cesium ion Assets panel.
3Find Melbourne Photogrammetry in the asset list, click on it, and then click Add to Level.
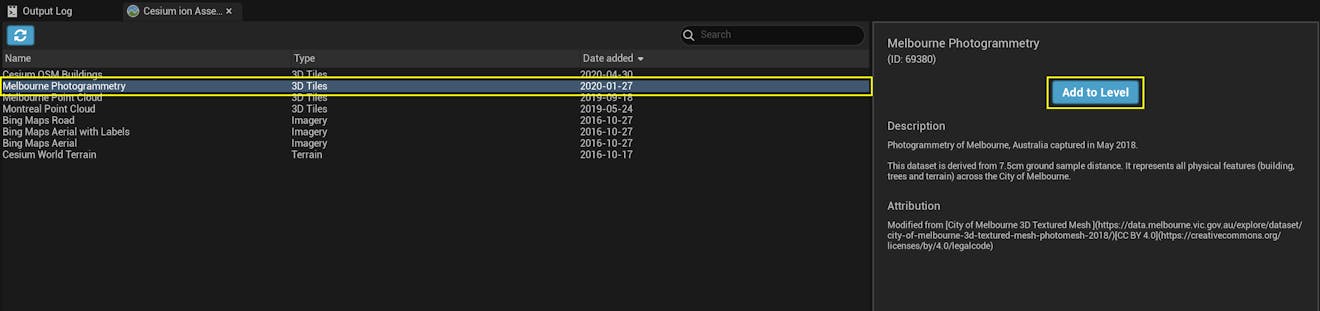
Is Melbourne Photogrammetry missing from the asset list? Visit the Melbourne Photogrammetry Asset Depot page and click Add to my assets. Then return to Unreal Engine and refresh the asset list using the button in the upper left of the Cesium ion Assets panel.
4Click on Melbourne Photogrammetry in the Outliner and take a look at the Details panel.
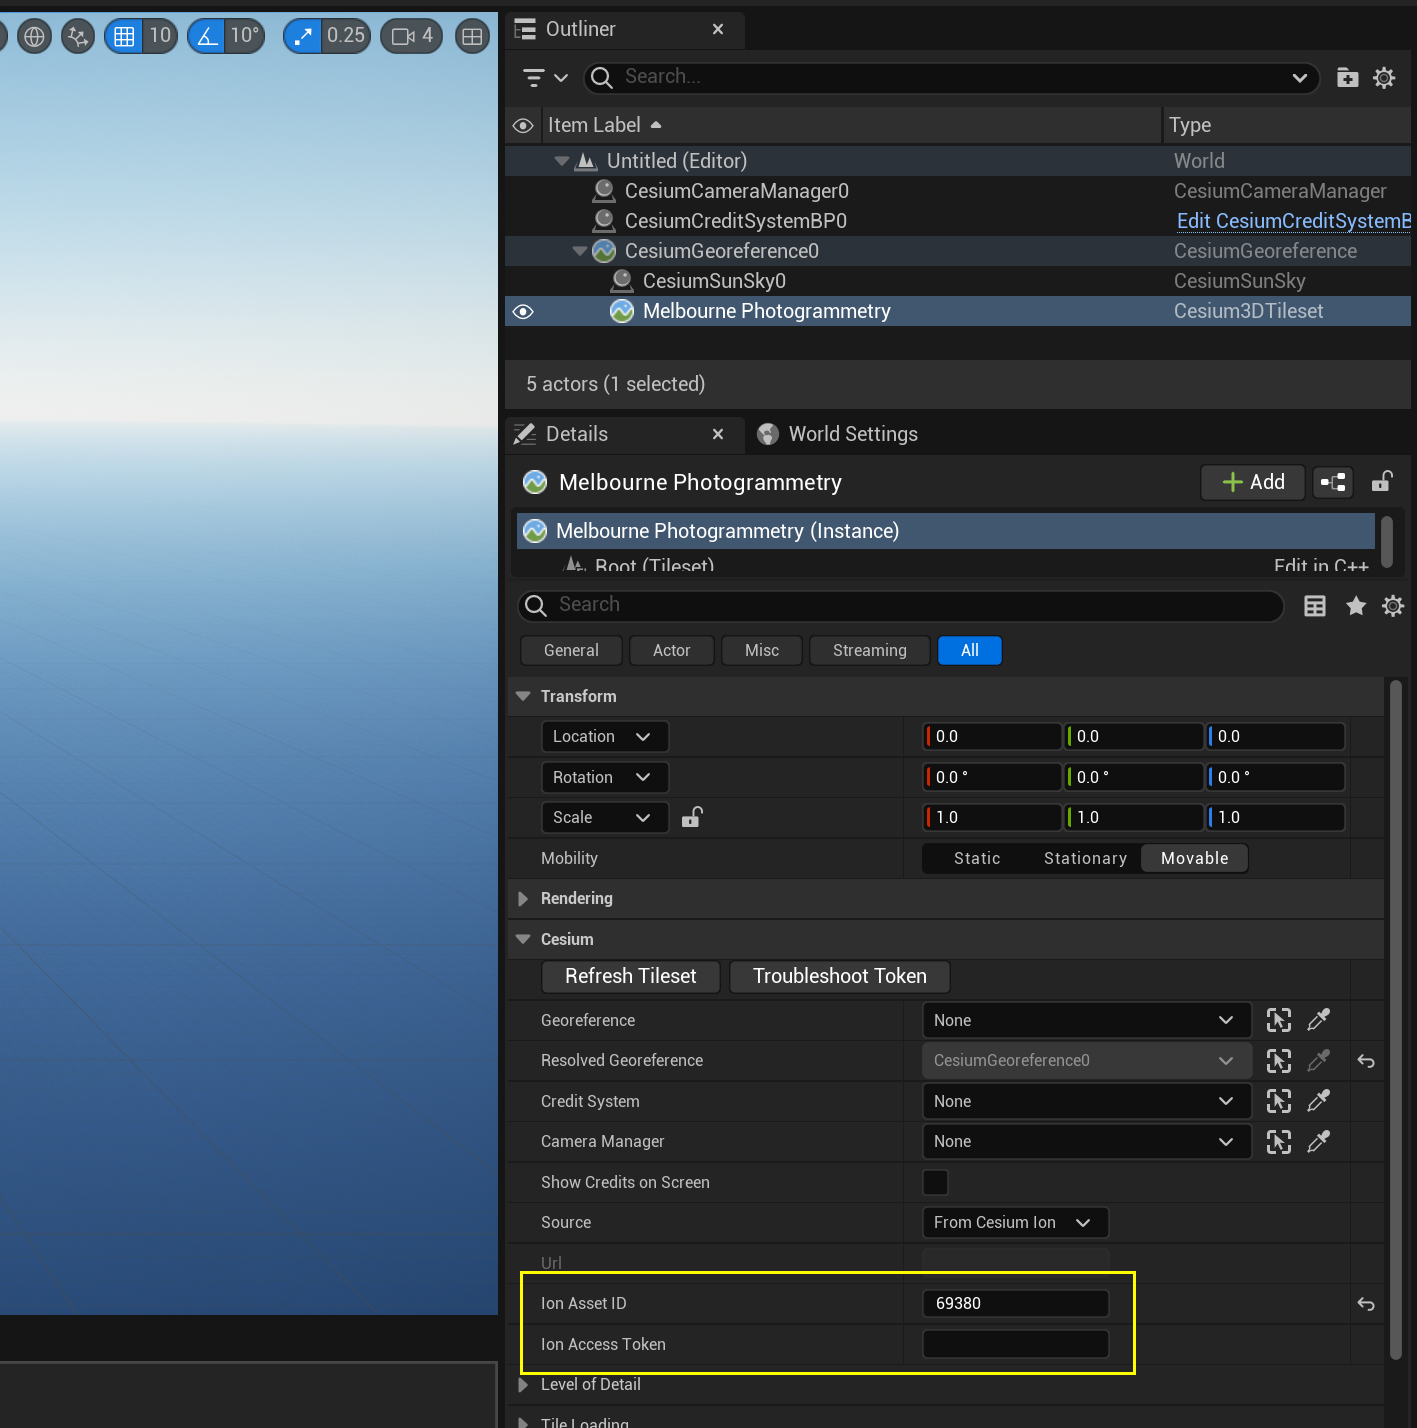
The Ion Asset ID is pre-filled with the Asset ID of the Melbourne Photogrammetry dataset.
The Ion Access Token is blank. This means that the asset is using the project's default token. There's no need to change either of these settings right now.
You can set a tileset's Ion Access Token on a per-tileset basis by copying and pasting an access token from Cesium ion. The tileset will then use that token instead of the project's default token.
Configure your project's tokens using the Token button on the Cesium Panel.
Want to learn more about access tokens? Check out the Cesium ion Access Tokens tutorial.
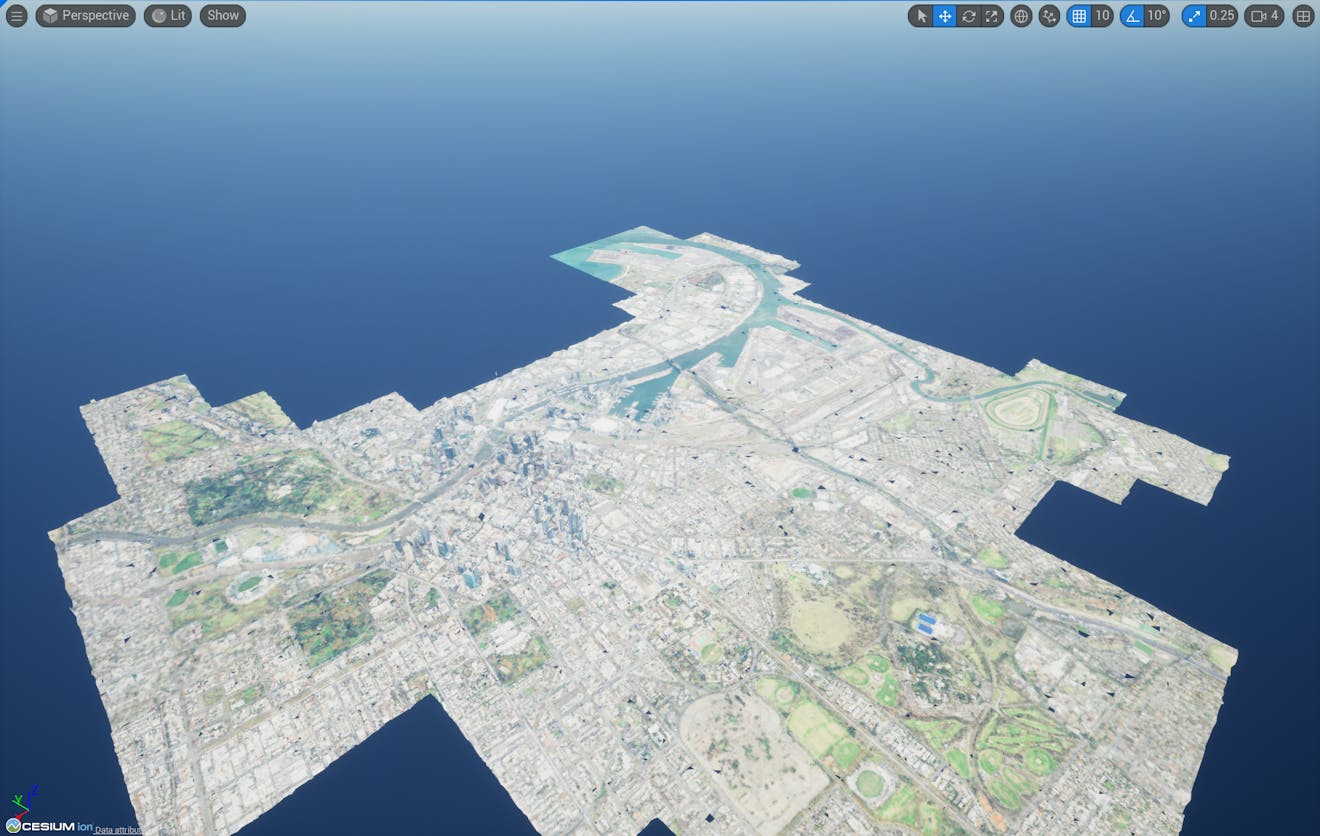
5Double-click Melbourne Photogrammetry in the Outliner to point the viewport at Melbourne.
It will likely be oriented strangely, and you may even be looking at the bottom of it.
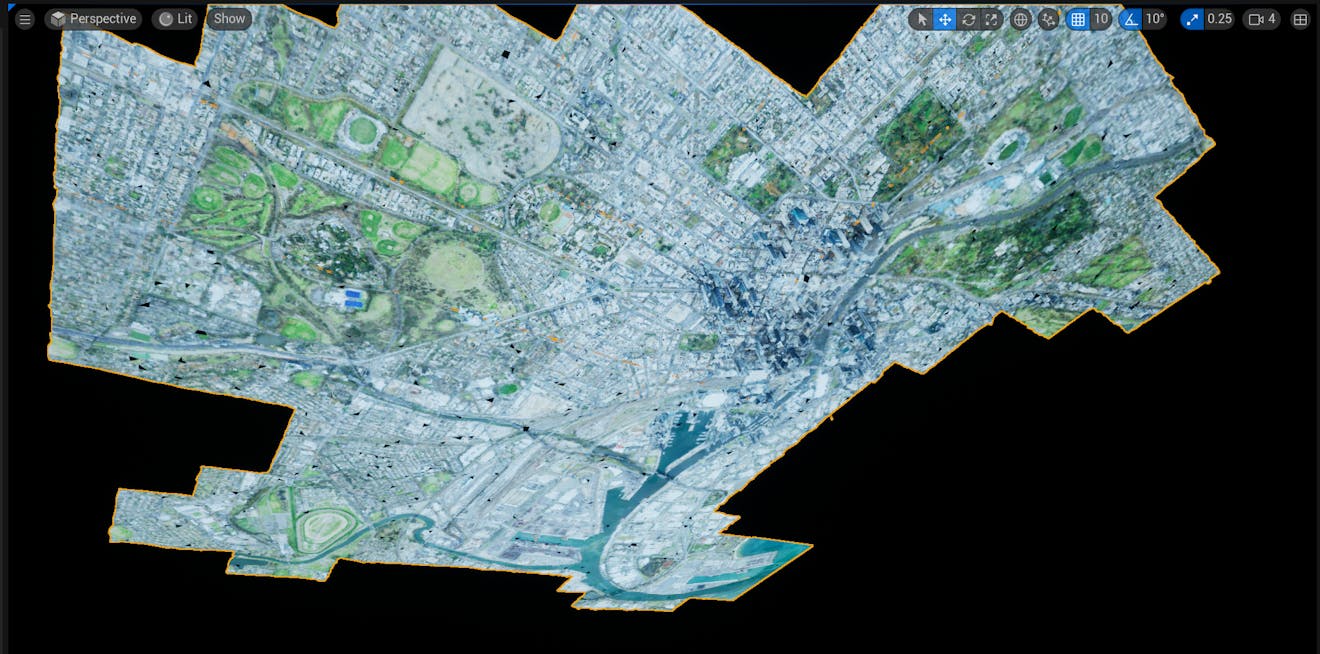
The orientation of Melbourne on the screen is strange because the Unreal Editor camera is maintaining its normal “+Z direction is up” orientation. On planet Earth—unlike in most games—the “up” direction in an Earth-centered coordinate system changes depending on where you are in the world.
Let’s reposition the Unreal Engine world in a more useful way:
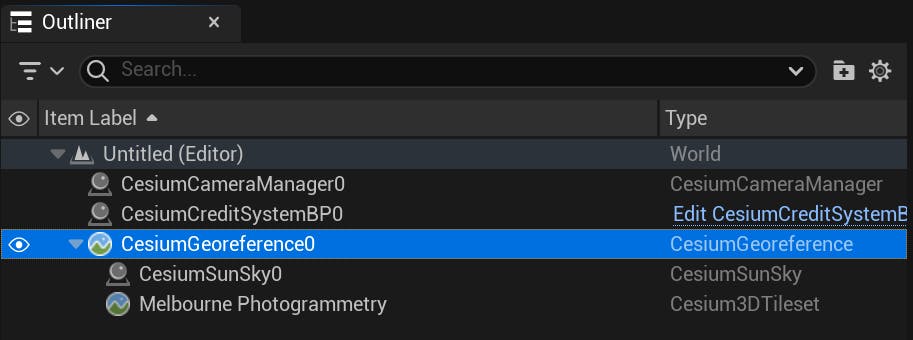
1Click on the CesiumGeoreference0 in the Outliner.
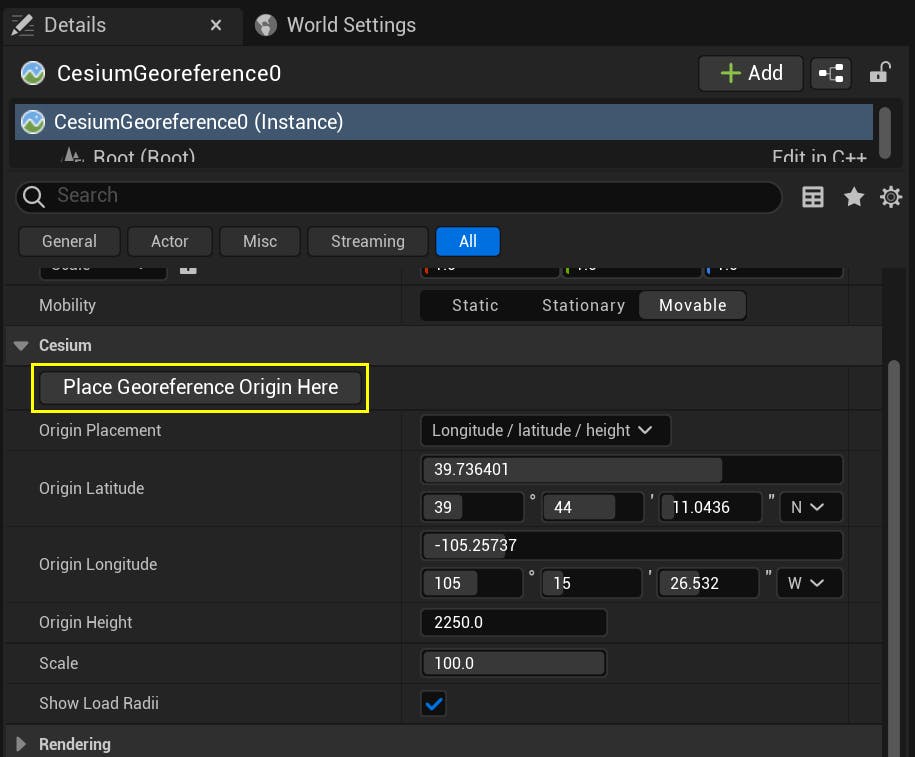
2On the Details tab, click the Place Georeference Origin Here button.
The city will flip upright. If the scene turns black, it’s probably because it’s nighttime in Melbourne. Try setting the Time Zone property on the CesiumSunSky to 10. It's found in the Date and Time section on the Details panel. See Using a Geospatially Accurate Sun for more details.
The Place Georeference Origin Here button didn’t just change the orientation. If you watched closely, you may have noticed that the Origin Latitude, Origin Longitude, and Origin Height fields below the button also changed when you pressed it. In precise terms, the button repositioned the coordinate system of the Unreal Engine level so that its center point, (0, 0, 0), is located exactly where the camera was located previously. And it aligned the Unreal axes so that +X points to the East at that point, +Y points to the South, and +Z points up.
It’s also possible to type in the Latitude, Longitude, and Height values directly to position the world at a precise location.
This ability to position the world origin somewhere on the globe is very helpful because many things in Unreal Engine, from cameras to foliage to physics, prefer a coordinate system with relatively small values and with +Z pointing up. By “georeferencing” the Unreal world in this way, we allow normal Unreal objects to be placed in and around Melbourne and act just as they would in any other game.
At this point, Melbourne is a city floating in a sea of darkness. Let’s add some global context:
1In the Cesium panel, click the + next to Cesium World Terrain + Bing Maps Aerial imagery, or another Cesium World Terrain option of your choosing.
The area around Melbourne will be filled in with the global assets you added:

This looks good from a distance, but when we zoom in close we can see some places where the Cesium World Terrain sticks up through the photogrammetry model:
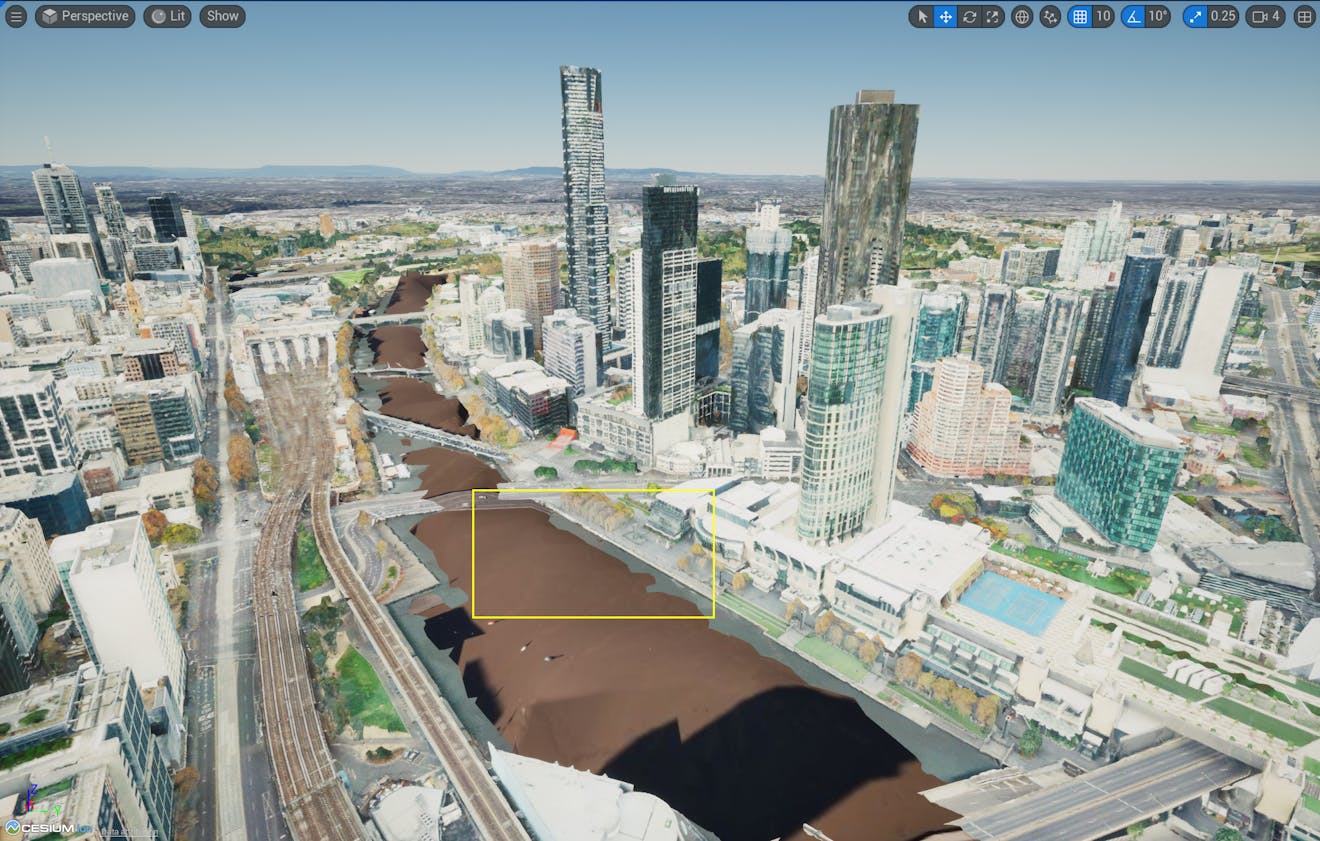
This happens because Cesium World Terrain and Melbourne photogrammetry are both high-resolution datasets, and so their geometry may overlap. For now, let’s move the photogrammetry model upward so that the terrain model no longer pokes through.
If you'd like to learn how to "clip away" Cesium World Terrain to make room for the photogrammetry model, visit the Cartographic Polygons tutorial.
2Select the Melbourne Photogrammetry Actor and adjust the Location Z coordinate by clicking inside the Z coordinate box and dragging toward the right, or by typing a number.
The following section is optional. If you are only using Cesium ion to stream assets, skip this section and jump down to Next Steps to continue in the tutorial series.
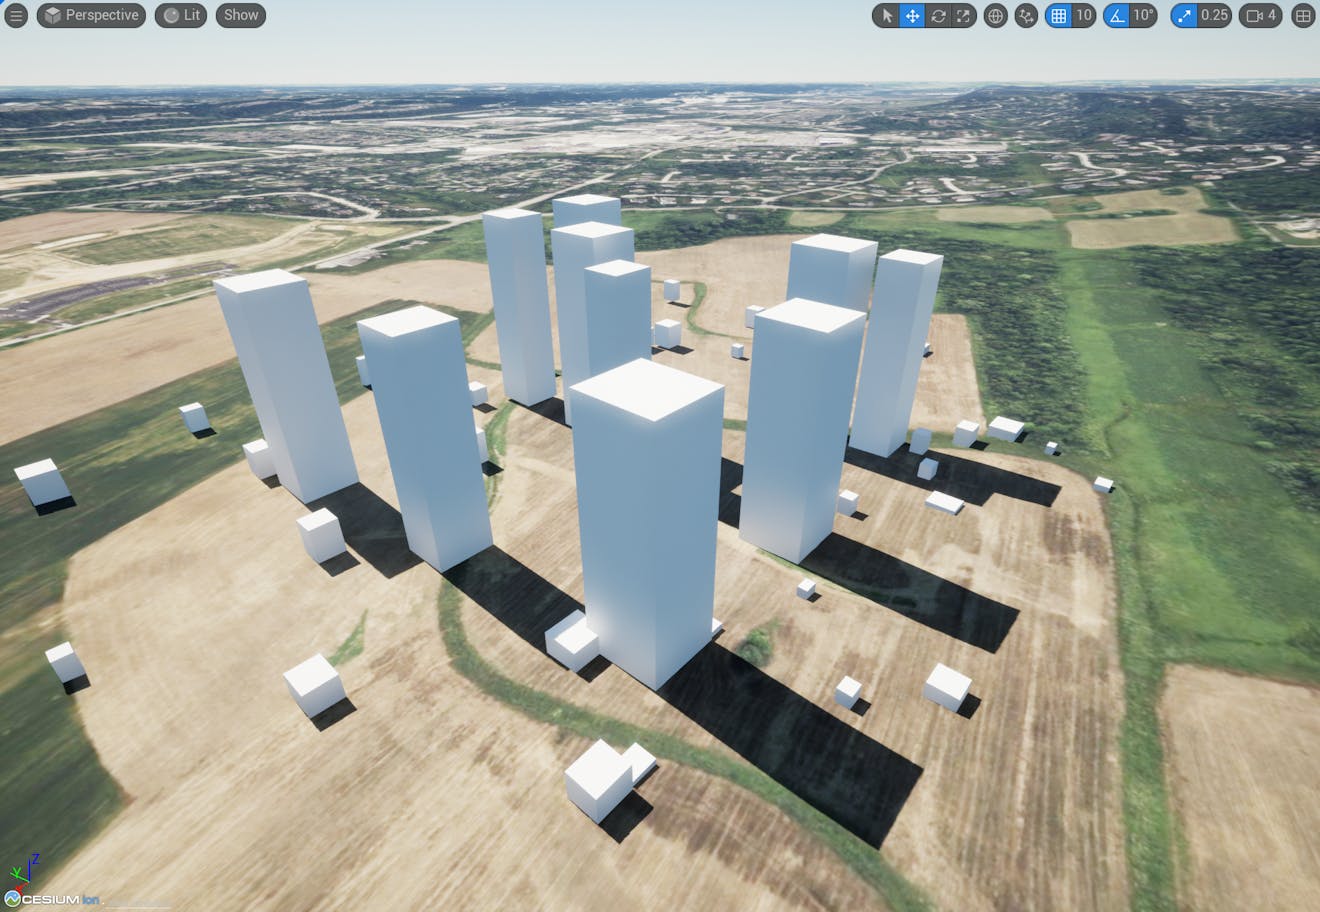
In this section, you will learn how to load a tileset from a location on your computer. The tutorial provides an example 3D Tileset that contains boxes of various heights. Alternatively, you can use any 3D Tileset that is downloaded to your computer.
If you'd like to learn more about the 3D Tiles format, check out the 3D Tiles Specification.
1Download the example 3D Tileset by clicking here. Extract the .zip archive. You can save the files anywhere on your computer, but take note of their location—you'll need it later.
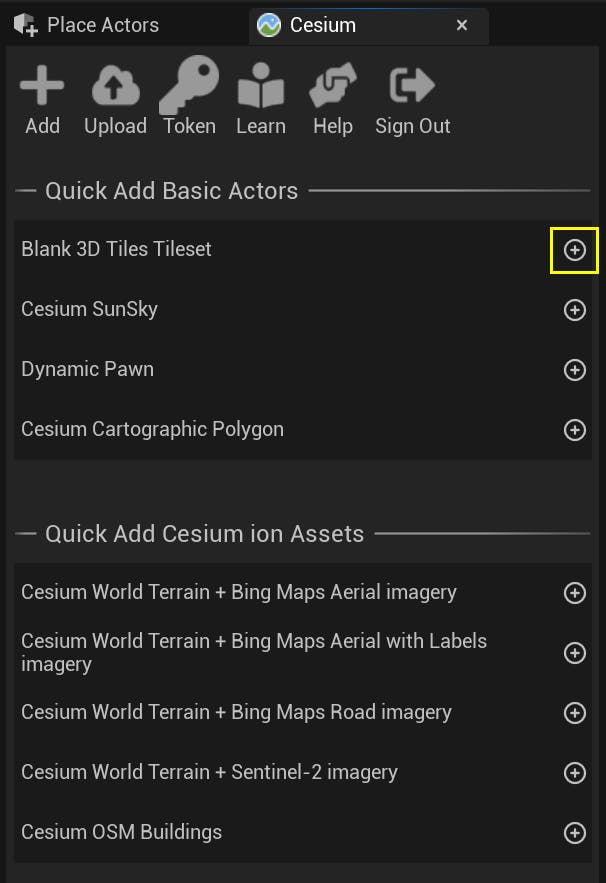
2In the Unreal Editor, add a blank 3D Tileset to your scene using the Quick Add section of the Cesium panel.
3Select the Cesium3DTileset actor in the Outliner. In the Details panel, find the Source parameter. Click on the dropdown and set it to "From URL". Setting this will enable the Url field.
4In your computer's files, locate the tileset.json file of the 3D Tileset that you previously downloaded. Copy the filepath. To use the filepath in the tileset's Url field, you'll need to make some changes.
Replace any backslashes with forward slashes, and any spaces with "%20". Add "file:///" to the start of the path.
For example, the file C:\Users\username\My Project\Data\Tileset\tileset.json would become file:///C:/Users/username/My%20Project/Data/Tileset/tileset.json.
Paste your edited path in the Url field on the tileset.
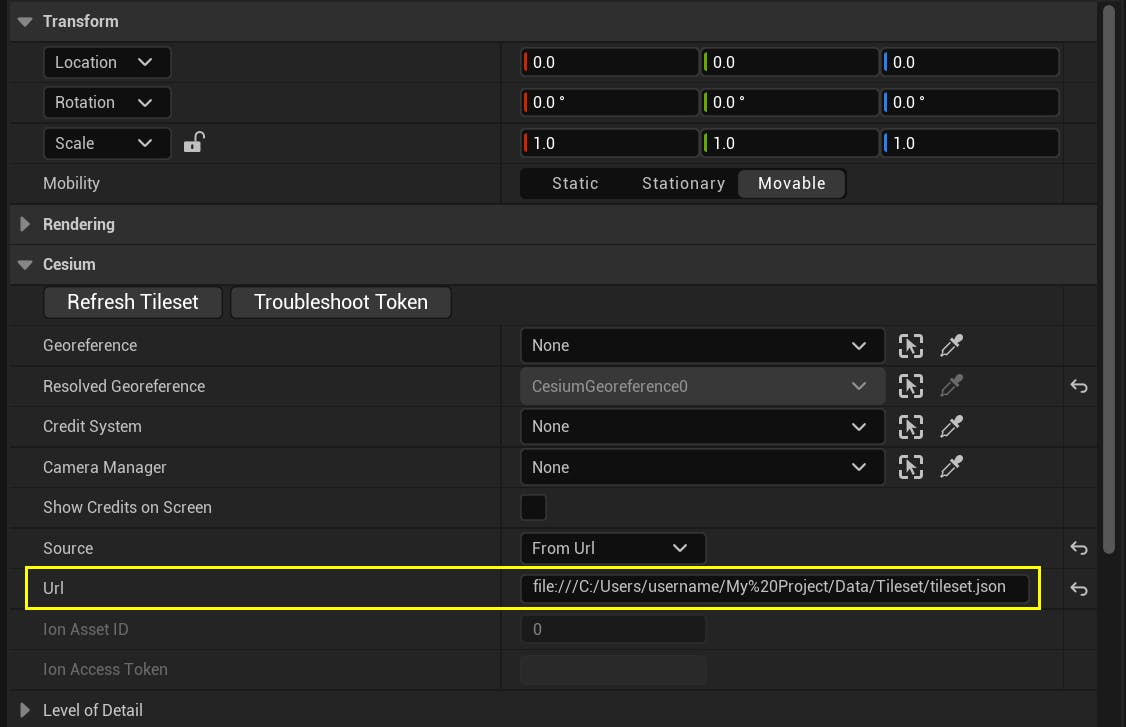
For more information on formatting, see the Local directory filepath formatting section.
5In the Outliner, double click on the Cesium3DTileset actor to focus on it in the viewport.
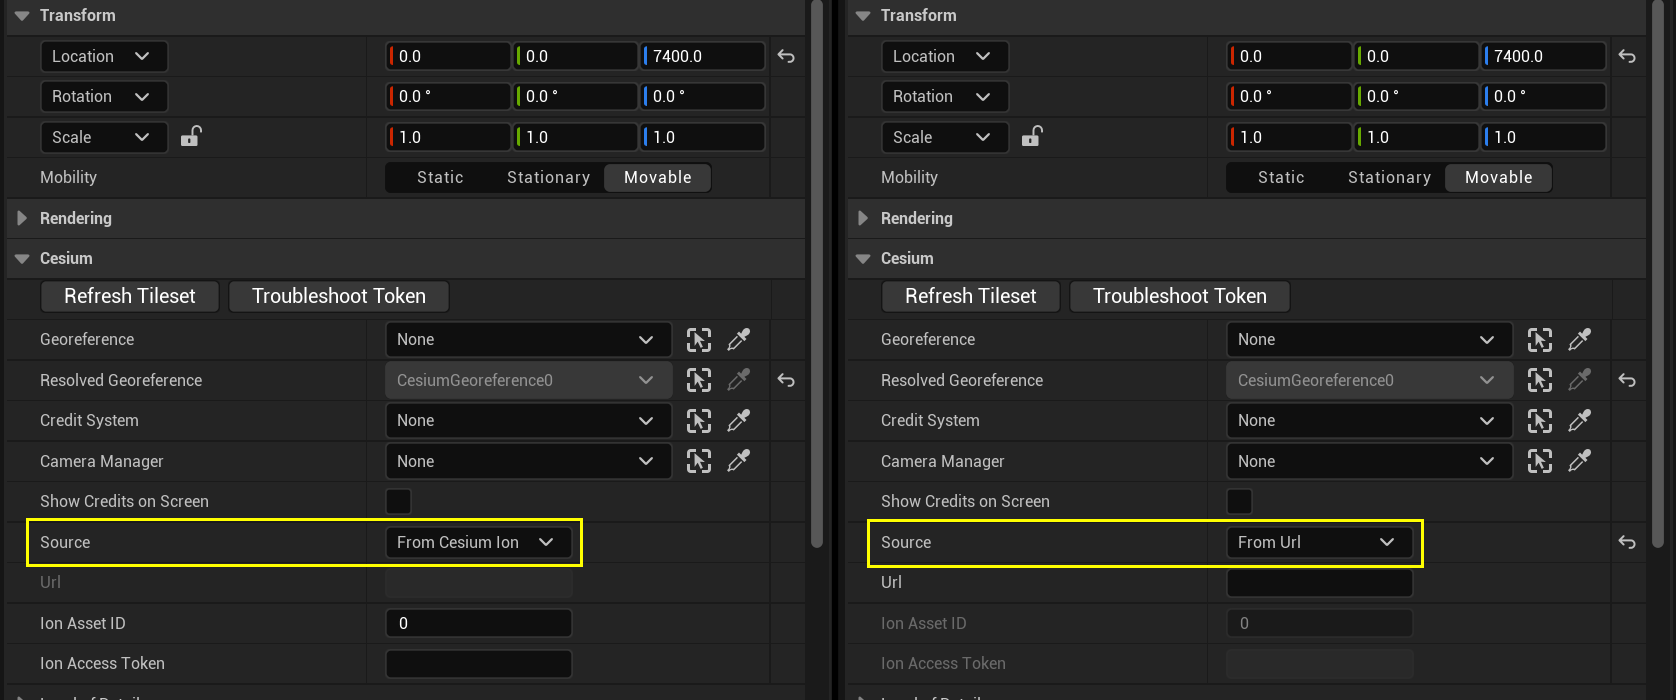
As with Melbourne, the world and 3D tileset may be oriented strangely. To fix it, use the Place Georeference Origin Here button on the CesiumGeoreference actor.

Before setting the georeference origin to be near the tileset (left) and after (right).
6This tileset is clipping through the ground. You can adjust the Location transform of a tileset in the Details panel. To position the base of this 3D Tileset on top of the terrain, change the Z coordinate of its Location transform to 7400.
Tilesets can be loaded from other supported streaming servers, or from local file directories on your computer. A tileset's source can be configured in the Details panel.
To load a tileset from a source other than Cesium ion, you must change the tileset's Source parameter from "From Cesium ion" to "From URL".
Changing this setting will enable the Url field, where you can paste your tileset's address.
If you are loading your tileset from a local directory, you'll use the filepath to your tileset instead.
Local directory filepath formatting
The tileset's Url field can accept a path to a file, but the path must be formatted correctly.
- Add
file:///at the start of the URL. - Change all backslashes(
\) to forward slashes(/). - Replace any spaces in the path with "
%20". - The file path should end at the tileset's main
.jsonfile (usually tileset.json or layer.json).
Using these conventions, the filepath C:\Users\username\My Project\Data\Tileset\tileset.json would become:
file:///C:/Users/username/My%20Project/Data/Tileset/tileset.jsonLoading assets from a local server
3D Tilesets, terrain, and imagery can be loaded from any server, including localhost. To load assets completely offline, consider setting up a localhost to serve the data. The Url field can be filled with http://localhost:portNumber/path/to/asset.
If you are loading TMS imagery, the URL should point to the asset's primary tilemapresource.xml file (e.g. http://localhost:portNumber/imageryAsset/tilemapresource.xml.)
Read on to the next tutorial, Placing Objects on the Globe, to learn more about placing objects in Cesium for Unreal levels.