Getting Started with Cesium and O3DE
This is a quickstart guide to building an O3DE app with the Cesium for O3DE plugin. You’ll create a scene to visualize global terrain and imagery with Cesium World Terrain.
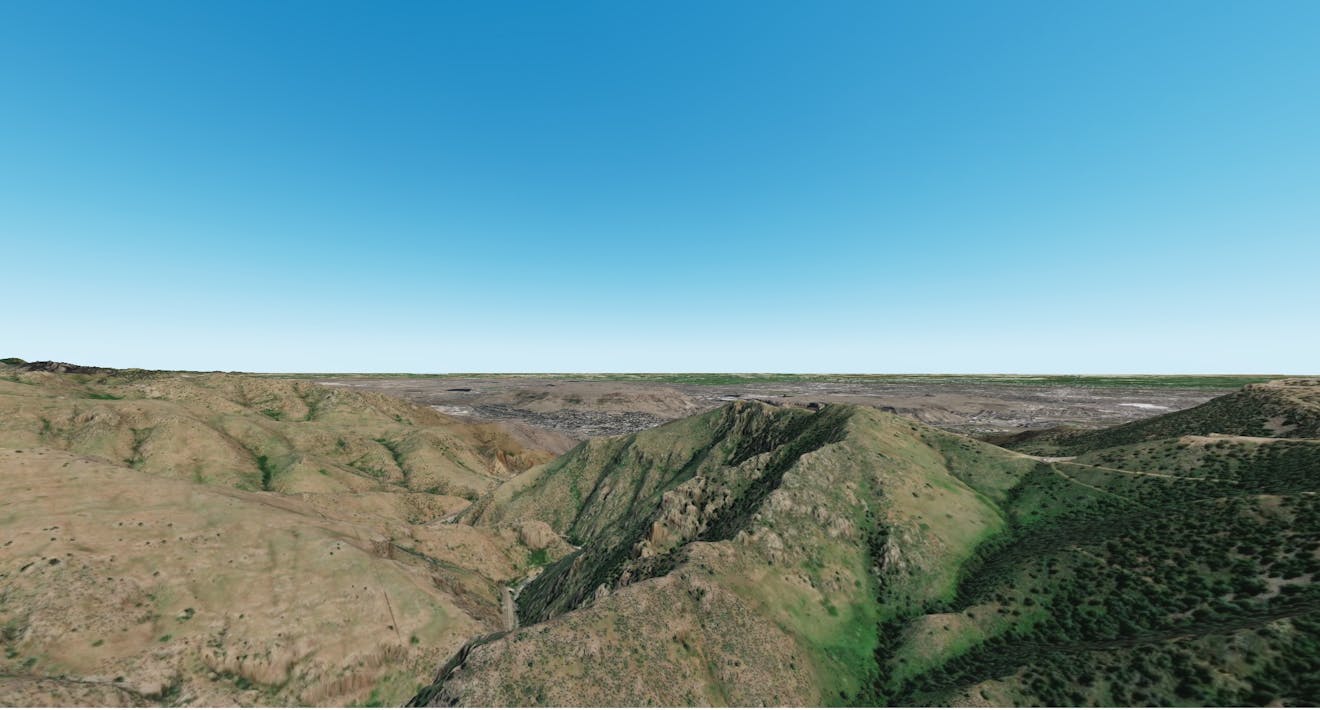
The scene you'll create in this tutorial.
You’ll learn how to:
- Install and enable the Cesium for O3DE gem
- Connect O3DE to Cesium ion
- Move around the globe by changing the origin
Prerequisites
- An installation of Open 3D Engine, Stable 21.11 release or later. For instructions on installing O3DE, visit the O3DE downloads page.
- Ensure that you have also installed all of the O3DE software prerequisites required to use the engine.
- A Cesium ion account for streaming terrain and building assets into O3DE. Sign up for a free Cesium ion account if you don’t already have one.
Cesium ion is an open platform for streaming and hosting 3D content, and includes global, curated data that you can use to create your own real-world applications.
If you'd like an example project to build off of, check out the Cesium for O3DE Samples. This starter project contains levels and prefabs to help you learn the gem. You can use this project in this tutorial by following the instructions on the Github page.
Otherwise, the steps below will walk you through creating a new project from scratch.
1Download the latest version of the gem from the cesium-o3de Github repository. Make sure you are downloading the latest release. You do not need to download the source code.
2Unzip the package to a convenient location on your computer. Remember where the files are - you’ll need to find them again to add the gem to O3DE.
3Open the O3DE Project Manager.
4Next, you’ll need to add and enable the gem to an O3DE project.
If you wish to add Cesium for O3DE to an existing project, click on the project and select the Configure Gems button. Then, skip the next step and go directly to Step 6.
If you’re creating a new project, click the New Project button and select Create New Project from the dropdown.
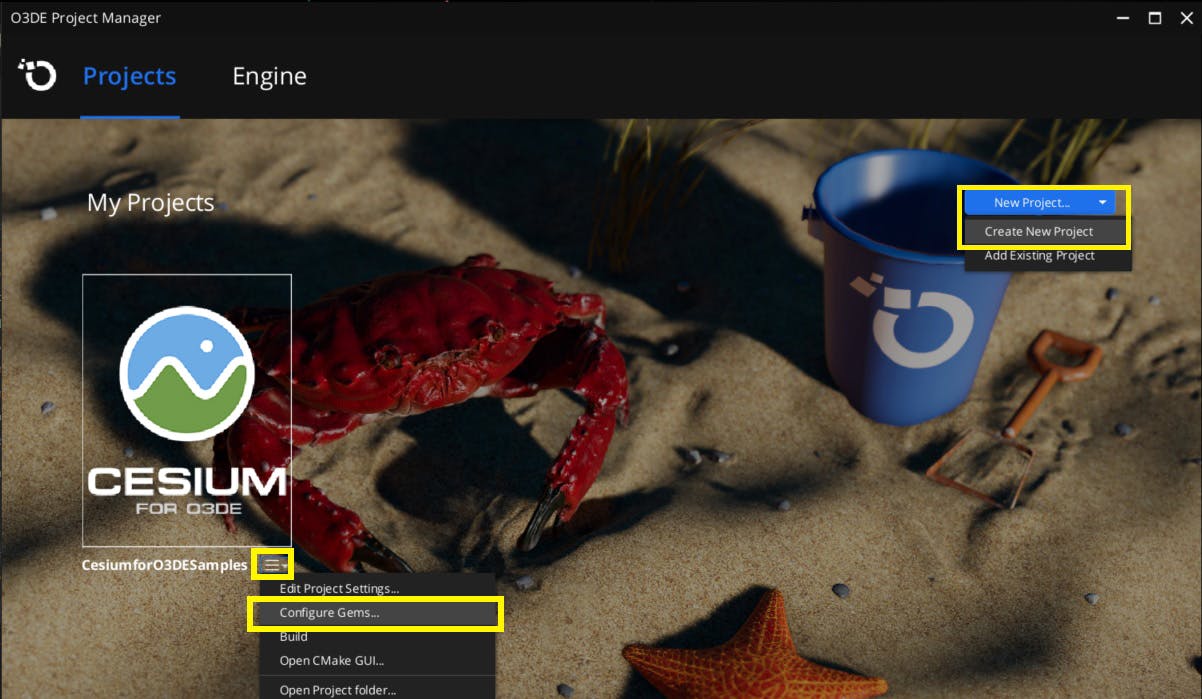
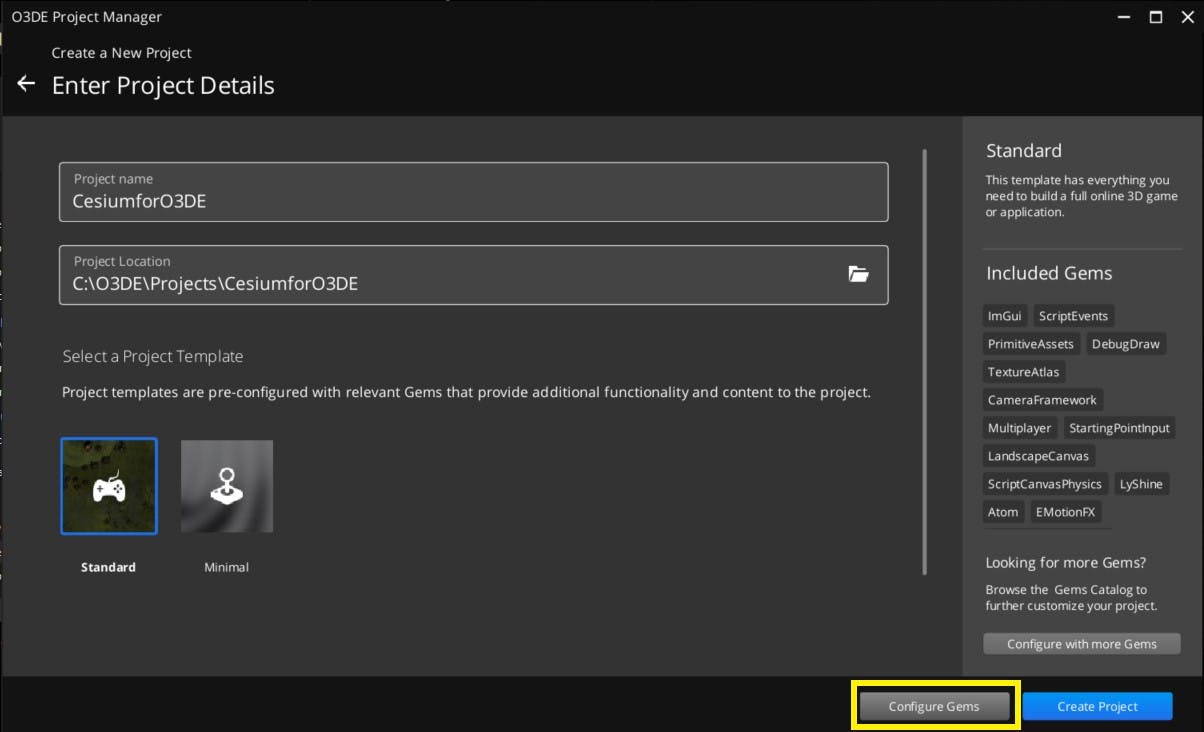
5Name your project, then select the Configure Gems button.
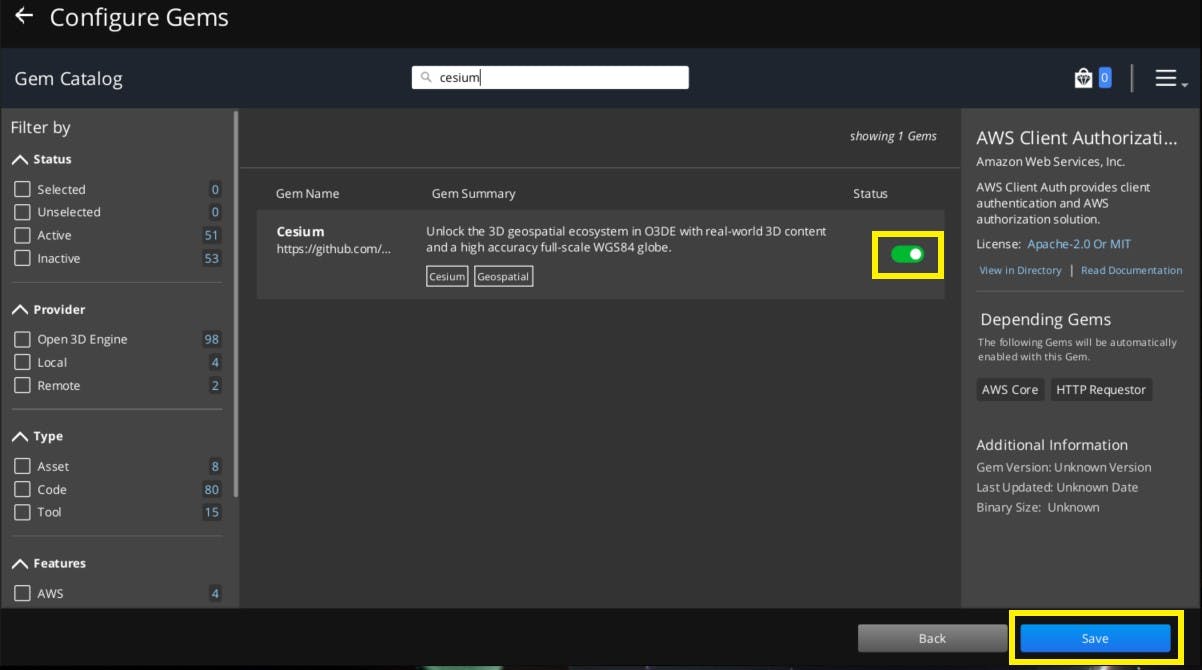
6Click the hamburger menu and select Add Existing Gem. In the file menu, find the cesium-o3de folder.
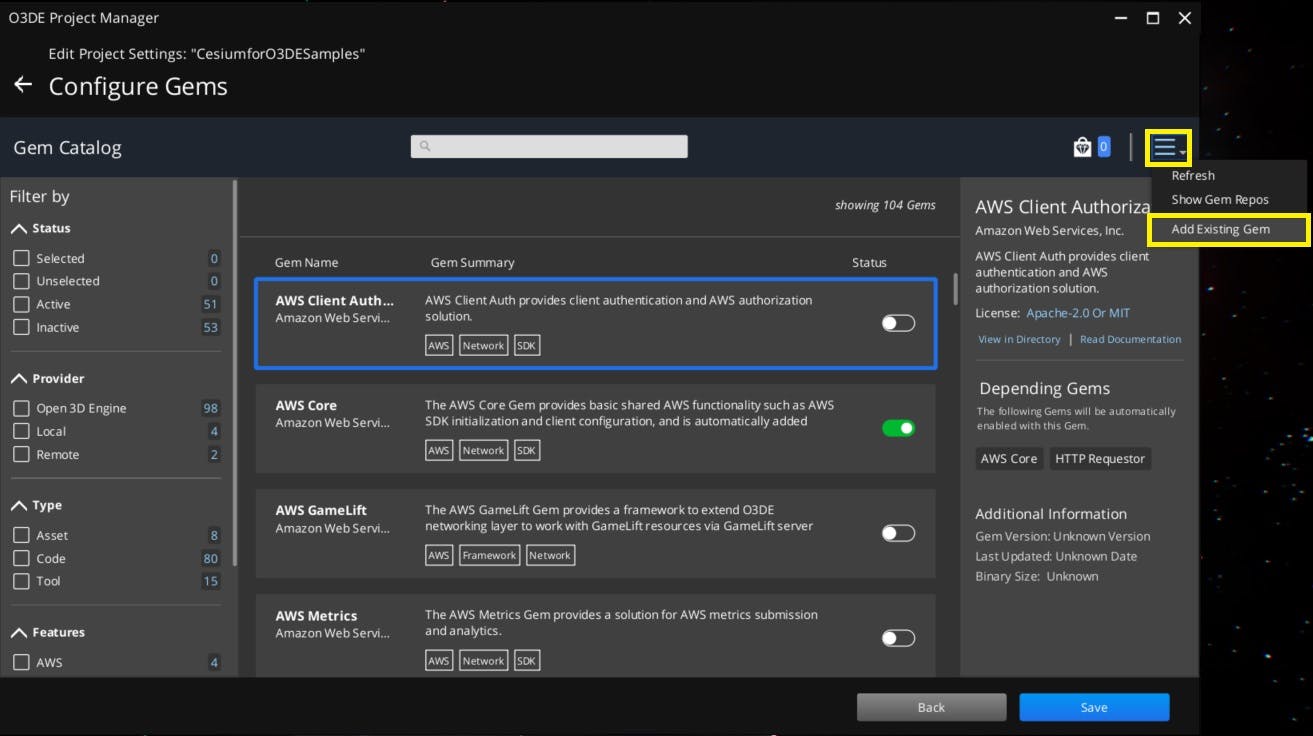
7In the Gem Catalog, search for the Cesium gem. Click the toggle next to the gem to enable it. Then, click the Save or Create Project button.
8Return to the Project Manager screen. Click the hamburger menu next to your project and select Build Project. You’ll need to rebuild your project every time you update the Cesium for O3DE gem.
9Once the project has finished building, select the blue Open Editor button that appears when you mouse over the project.
1Once you’ve opened the editor, you’ll see a window to select or create a new level. Click Create New.
2Click the Cesium button in the upper toolbar. You’ll see a new Cesium ion panel appear.

You can use the Cesium ion panel to quickly add Cesium assets, access documentation, and more. But first, you’ll need to connect to Cesium ion. Click the Connect button.
3A new browser window will appear. If you are not currently logged in, log in now.
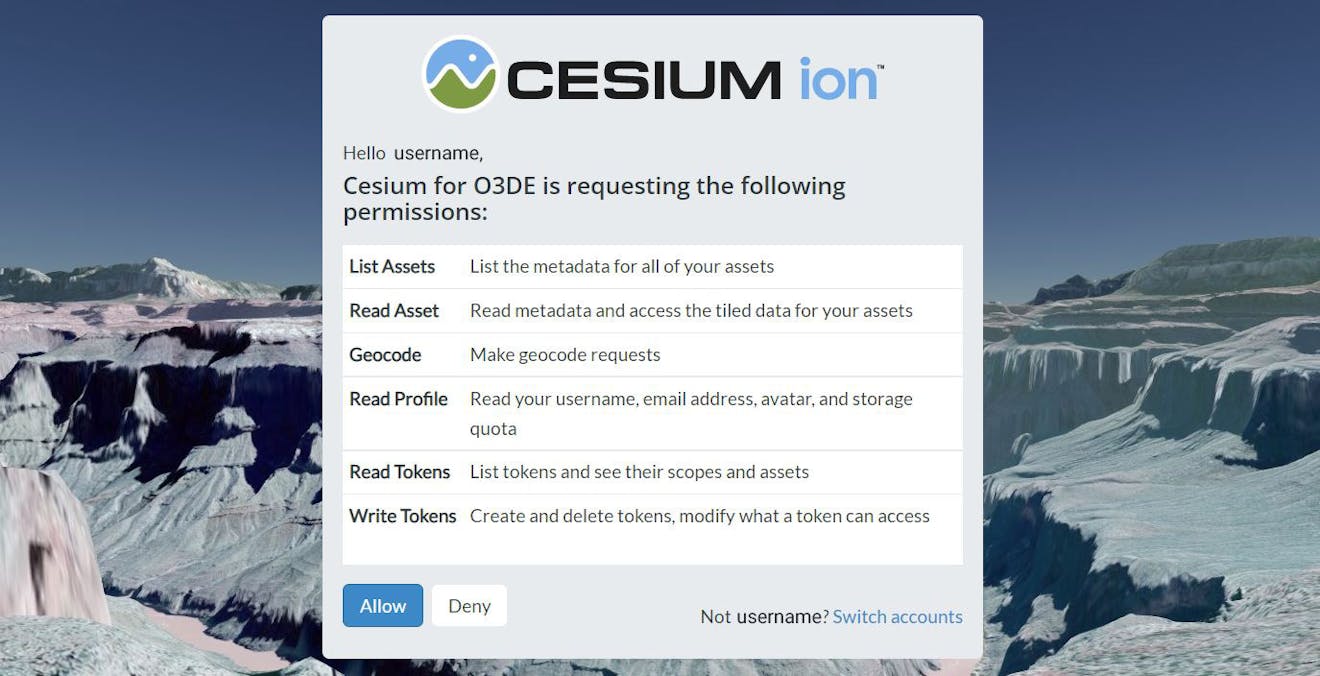
Click the Allow button to access your Cesium ion assets from Cesium for O3DE.
4Close the browser window and return to O3DE.
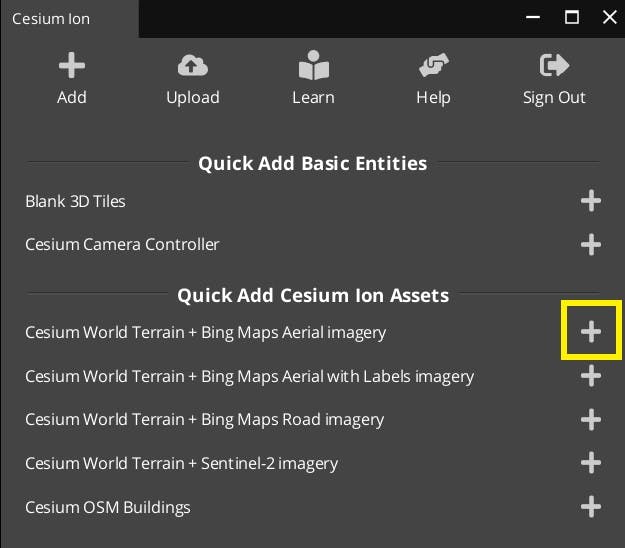
1You’ll see that the Cesium ion panel has changed now that you’ve logged in. Click on the Cesium World Terrain + Bing Maps Aerial Imagery button.
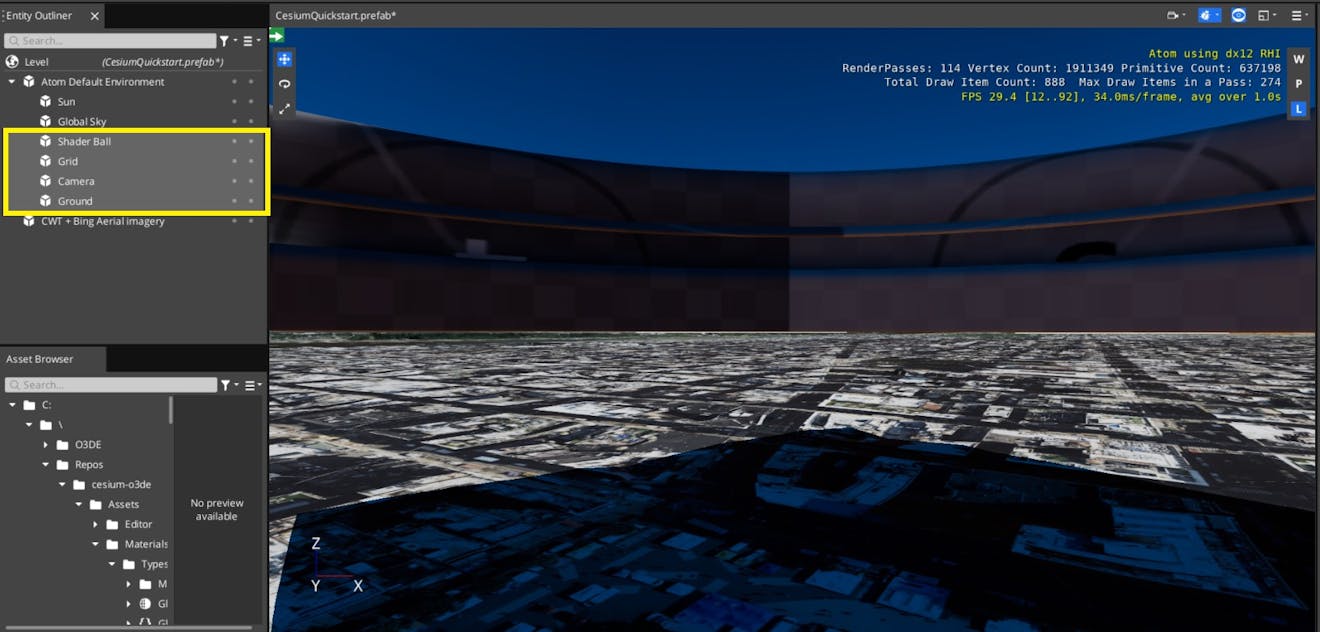
2Terrain will appear in the viewport, and a new entity will appear in the Entity Outliner.
Click the dropdown next to Atom Default Environment and hide or remove the Shader Ball, Grid, Camera, and Ground. They won't be needed for this tutorial, and can obstruct your view while you're working.
1From the Cesium ion panel, add a Cesium Camera Controller. This camera is globe-aware and will allow you to navigate across large distances.
2Select the Cesium Camera Controller entity. In the Entity Inspector, you’ll see a Georeference Camera Controller component, and a Camera Component. These components will determine how the camera will behave during play.
You can change the camera’s speed by adjusting the Panning Speed and Movement Speed on the Georeference camera controller component.
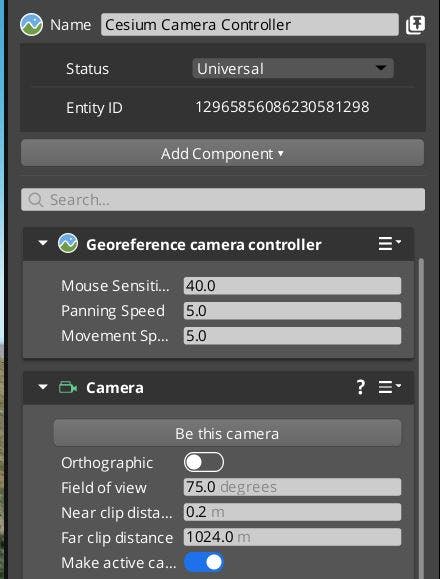
3By default, the Far Clip distance of the camera may be too low to view most tilesets. Change the Far Clip distance on the Camera component to a very high number, like 1000000000.
The default world origin is set to New York City. However, you can change the origin to any location on earth. In the following steps, you’ll learn how to change the origin manually to specific longitude, latitude, and height coordinates. You can also set the origin directly to a tileset’s geolocation - see the Adding Datasets tutorial to learn more.
1Click on the Level entity at the top of the Entity Outliner. In the Entity Inspector, you’ll see a component called Origin Shift.
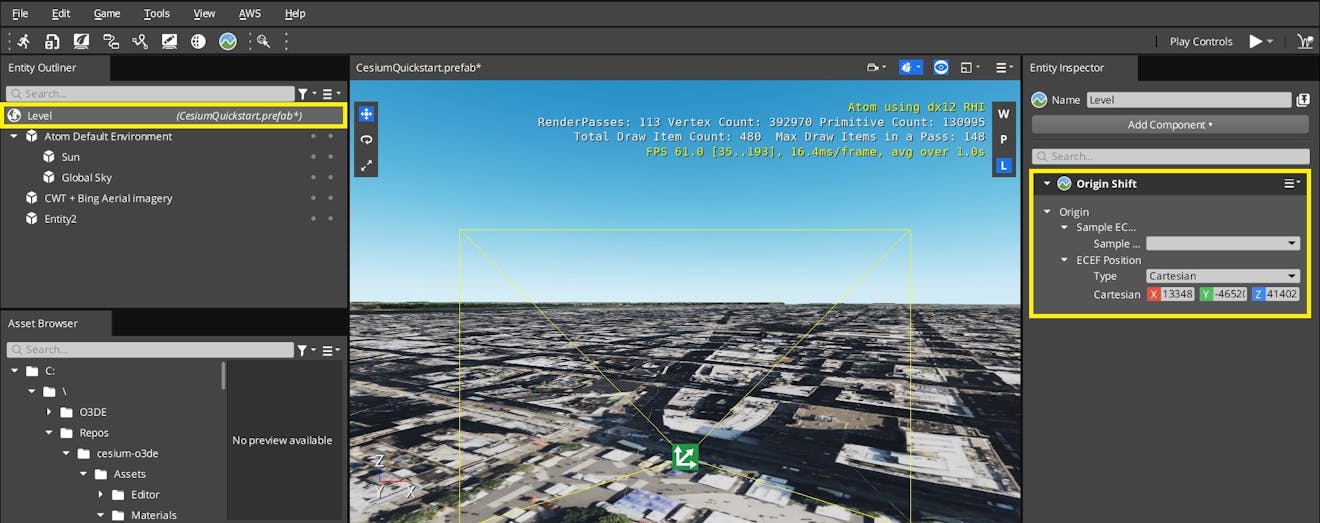
2You can manually set the ECEF (Earth Centered, Earth Fixed) coordinates here from a cartesian world position or cartographic coordinates. Select the Type dropdown and change it from Cartesian to Cartographic.
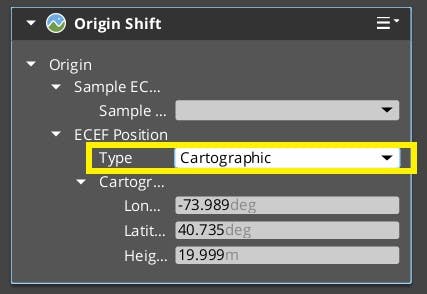
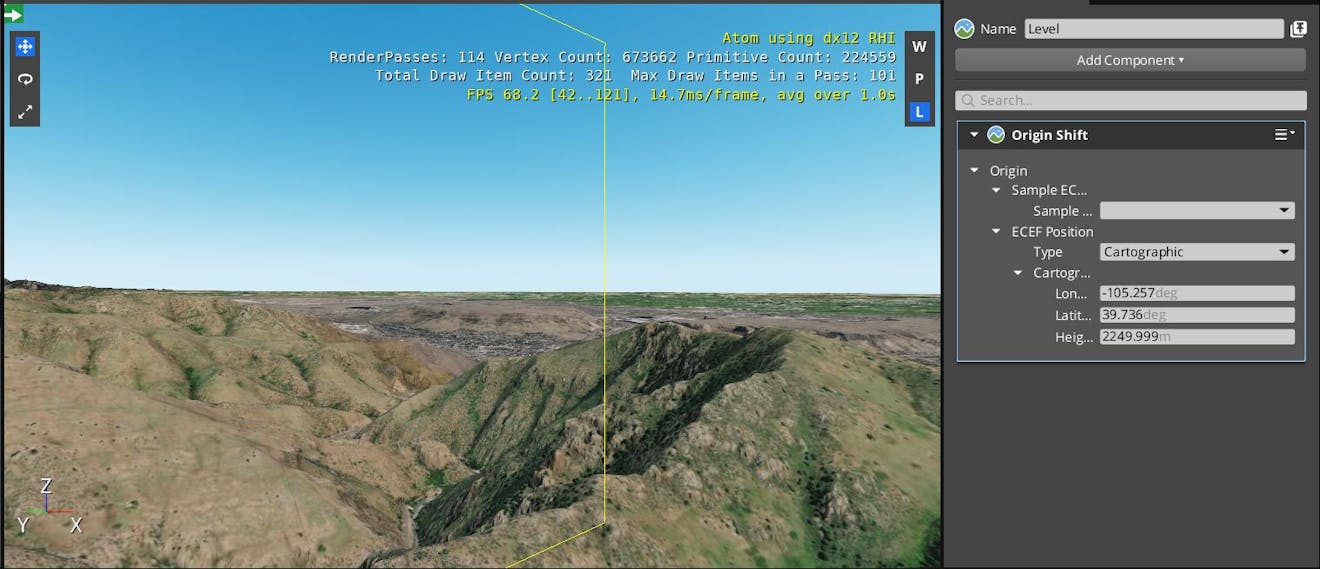
3Set the longitude, latitude, and height to any coordinates you desire. In this example, we’ll use the following:
Longitude: -105.25737
Latitude: 39.736401
Height: 2250.0
After entering these coordinates, you’ll see the terrain change to the foothills near Denver, Colorado.
4Press the Play button in the upper right corner of the editor. You’ll be able to fly around the scene with the W, A, S, and D keys. Look around by right-clicking and dragging the mouse.
You have created a basic scene with terrain, imagery, and a globe-aware camera. Feel free to explore other locations around the globe. Once you’re ready, continue to Adding Datasets to customize your scene further.
Having trouble? Visit the Cesium Community Forums to ask questions and connect with other Cesium for O3DE users.