Adding Datasets
This tutorial shows you how to use Cesium for O3DE to import models. First, you’ll import a photogrammetry model of Melbourne, Australia, from Cesium ion. Then, you’ll import a local dataset from your computer.
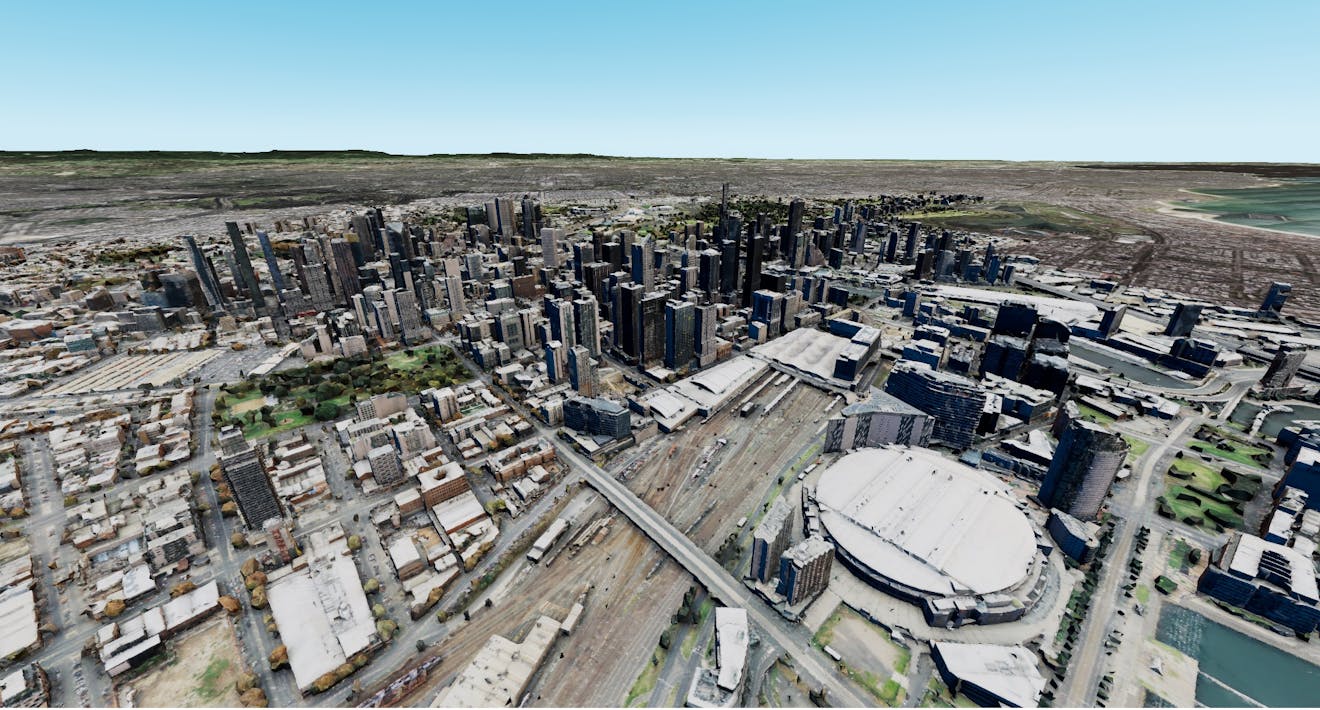
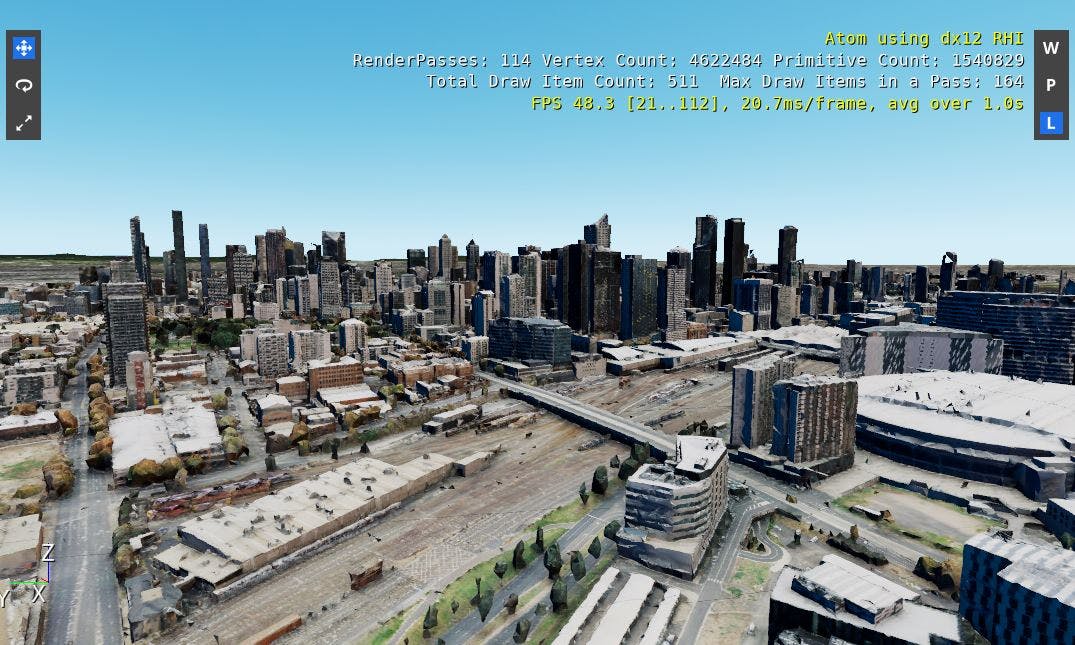
The dataset you'll visualize in this tutorial.
You’ll learn how to:
- Add a city-scale 3D Tiles photogrammetry model from Cesium ion to your level
- Move your level to a tileset’s geographic location
- Use a local 3D Tiles dataset from your computer
- An installation of Open 3D Engine, Stable 21.11 release or later
- A project with the Cesium for O3DE gem installed
- A Cesium ion account
See the Cesium for O3DE Quickstart to learn how to install Cesium for O3DE and connect it with Cesium ion.
This tutorial assumes that you already have a basic level set up with Cesium World Terrain. Visit the Quickstart for step-by-step instructions for creating a level.
1Open the Cesium ion panel by clicking the Cesium button in the toolbar. If you are not already signed in, be sure to connect to Cesium ion.
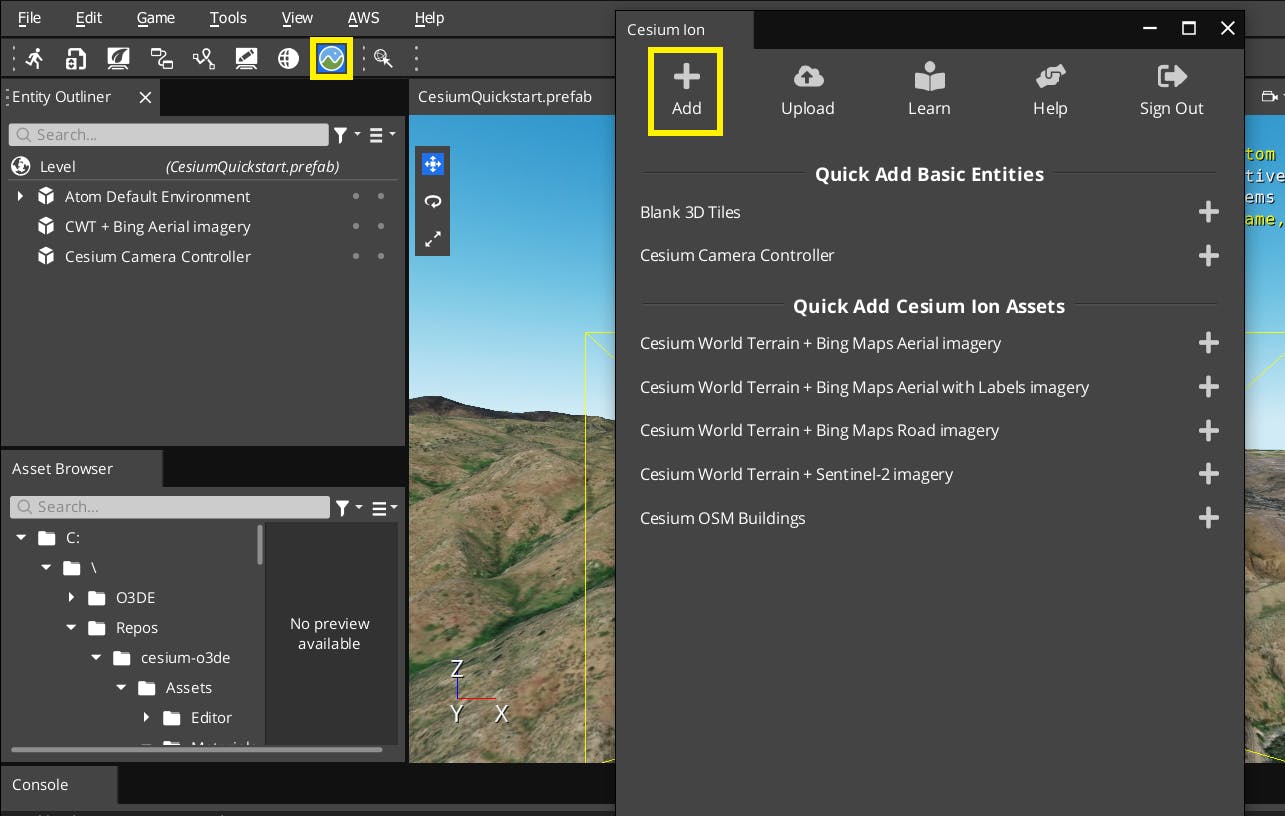
2Click the Add button at the top of the Cesium ion panel. The Cesium Ion Assets window will appear. This window can be used to access the tilesets in your Cesium ion account.
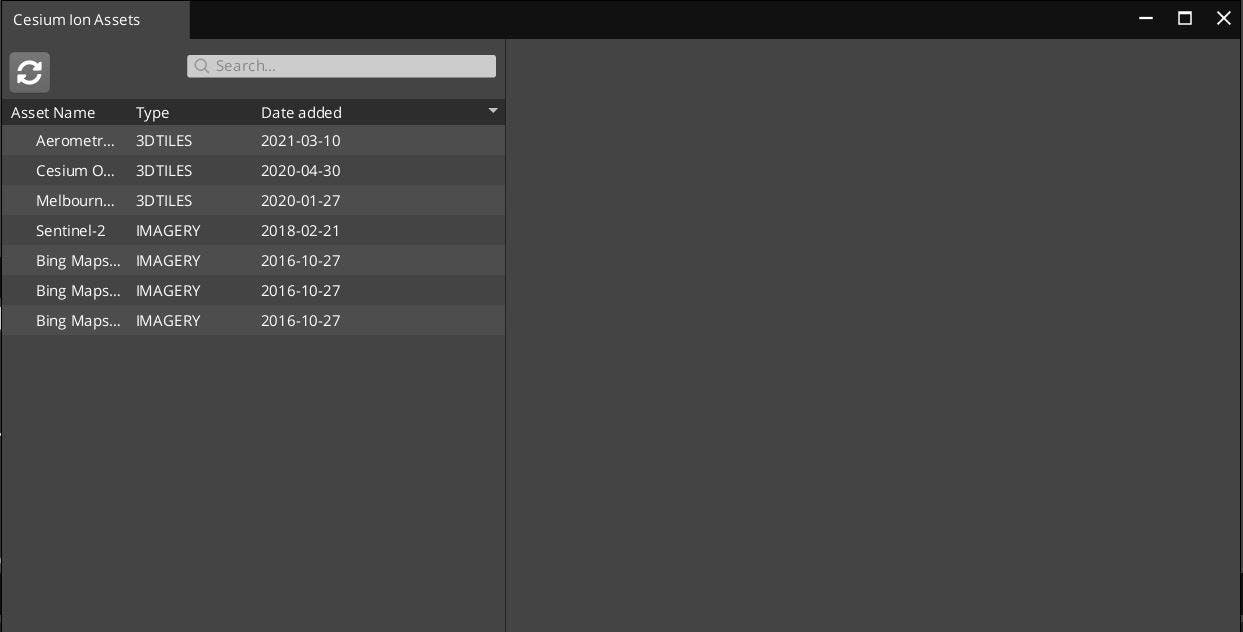
3Select Melbourne Photogrammetry from the list. Then, click Create New Entity.
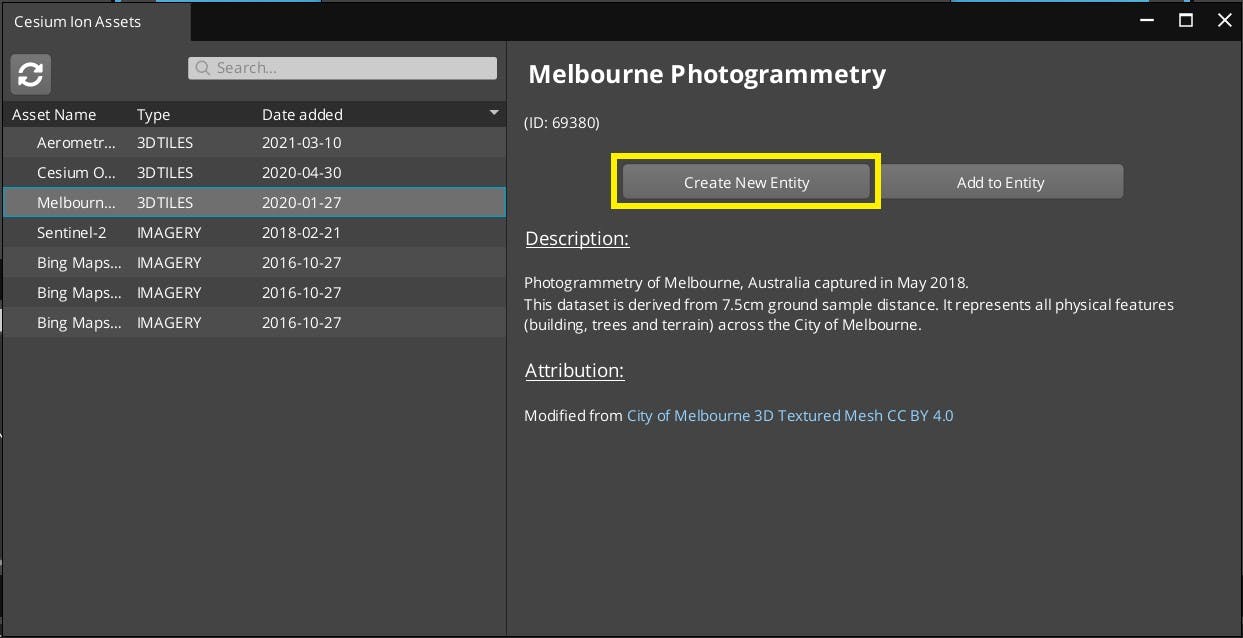
Is Melbourne Photogrammetry missing from the asset list? Visit the Melbourne Photogrammetry Asset Depot page and click Add to my assets. Then return to O3DE, and refresh the asset list using the button in the upper left corner of the Cesium ion Assets panel.
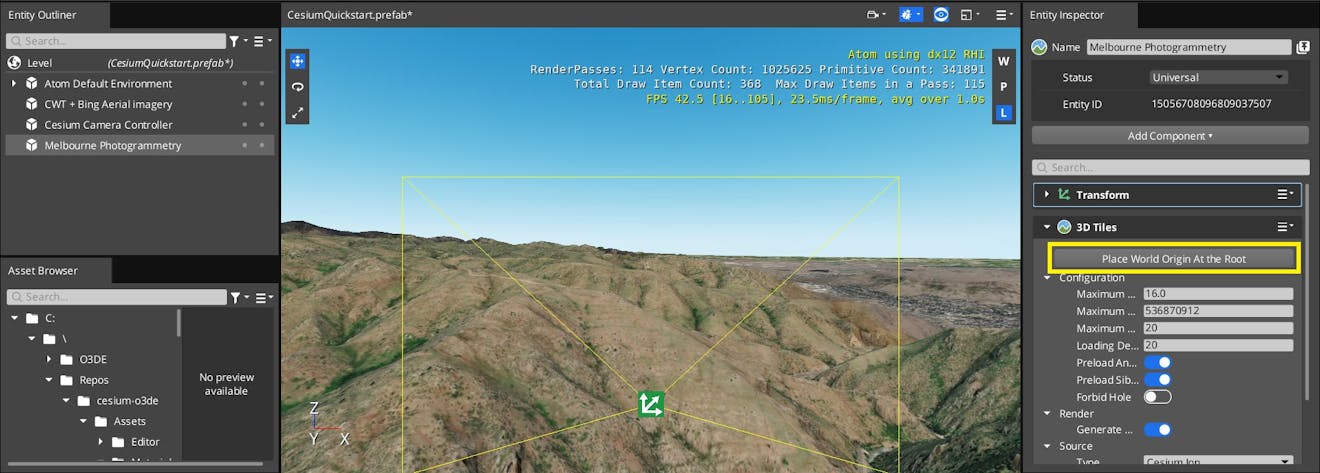
4You’ll see a new entity appear in the Entity Outliner. The tileset is already geolocated to Melbourne, Australia. You’ll need to shift the origin in order to view the tileset.
Click on the tileset in the Entity Outliner. Find the 3D Tiles component in the Entity Inspector, and click Place World Origin At the Root.
The Melbourne photogrammetry will become visible.
5Right click and drag the mouse in the viewport to change the direction you are looking. You can also navigate around the scene in the viewport with the W, A, S, and D keys.
6As you explore the Melbourne dataset, you may notice areas where Cesium World Terrain is sticking up through the photogrammetry model.
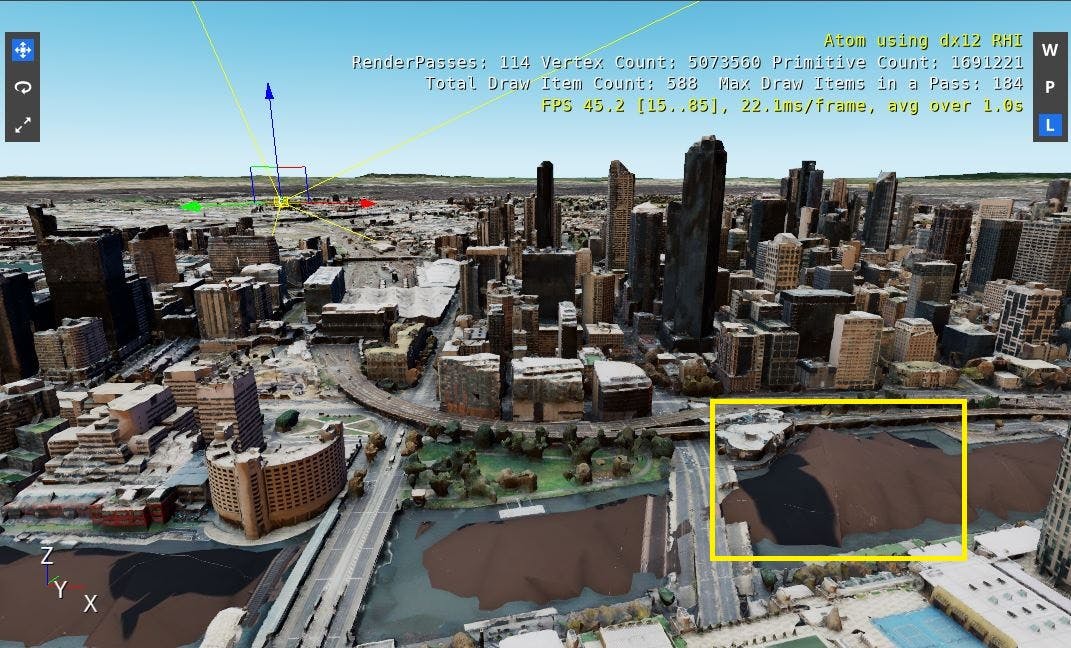
This happens because Cesium World Terrain and Melbourne Photogrammetry are both high-resolution datasets, and may overlap the same geography.
You can avoid this by moving the photogrammetry tileset higher in the level so that it no longer overlaps.
7With the Melbourne Photogrammetry entity selected, change the Translate Z value either by clicking and dragging on the blue transform arrow, or manually changing the value in the Translate Z box in the entity’s Transform component.
For this section, you will use a 3D Tileset that contains boxes of various heights. This 3D Tileset can be downloaded here. Be sure to download the entire Tileset folder, which includes the tileset.json file as well as all of the referenced .b3dm files. You can also use your own 3D Tileset instead.
1From the Cesium ion panel, add a Blank 3D Tiles entity. Select the new Tileset entity in the Entity Outliner.
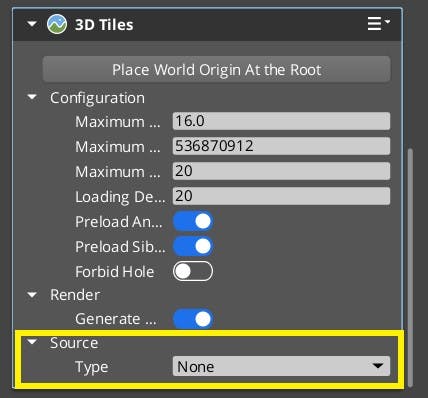
2In the Entity Inspector, take a look at the 3D Tiles component. The Source Type is currently set to None. Select the dropdown and change it to Local File.
3Set the Tileset File Path to the path to the 3D Tileset’s main tileset.json file. Locate the 3D Tileset data in your local directory system.
Be sure to change backslashes to forward slashes before pasting the filepath in there. For example, if the directory is:
C:\Users\username\Data\Tileset\tileset.json
then the Tileset File Path would look be:
C:/Users/username/Data/Tileset/tileset.json
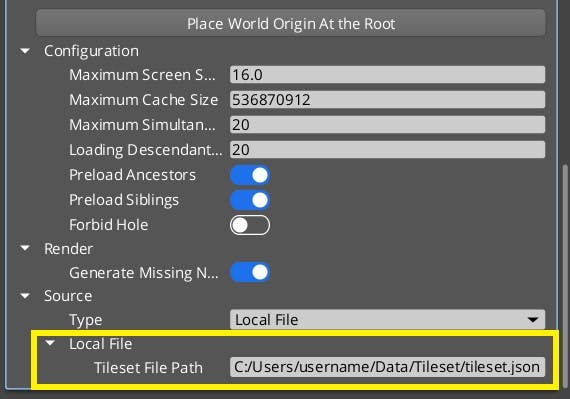
4Click Place World Origin At the Root.
You should now see the tileset in the world.

You may also notice that the tileset is sunken into the ground.
Like the Melbourne tileset, you can use the transform tools to change the tileset’s position.
5Change the Z coordinate of the Location transform to 73.0 so that it is no longer under the terrain.

Currently, loading local quantized-mesh terrain files using Cesium for O3DE is not supported. However, terrain assets can be loaded from any server, including localhost. To load terrain assets completely offline, consider setting up a localhost to serve the terrain.
Now that you’ve learned how to place tilesets on the globe, learn how to move between them during play in the Flying Between Locations tutorial.