FME
This tutorial walks you through seamlessly integrating imagery, point cloud, or 3D building FME workflows with Cesium ion. We’ll look at how to convert source data into ion assets optimized for streaming in a CesiumJS based visualization, which can be extended using the extensive CesiumJS API.
This tutorial assumes a basic understanding of FME Desktop. For tutorials on creating FME data pipelines and workflows for specific data types, see Additional Resources.
- Download and install FME Desktop 2019.0+.
- You need a Cesium ion account to take this tutorial.
We’ll process a folder of CityGML files and send the contents to Cesium ion for tiling. Download and unzip Reichstag.zip, which contains a building model and textures.
Launch FME Workbench and create a new blank workspace. To begin our pipeline we add a reader: click Readers > Add Reader…
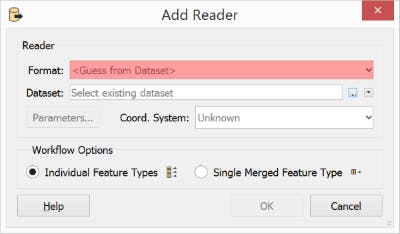
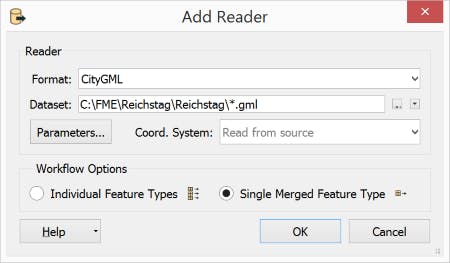
For Format, select CityGML.
To select the input dataset, click the caret (down triangle) next to the Dataset field and choose Select Multiple Folders/Files…
Click Add Folders… and select the folder containing the .gml files. Here it’s Berlin_GML. Since we’re reading only one type of file, select all items where File/Filter is not *.gml and click Remove.

Click OK. Under Workflow Options select Single Merged Feature Type, and click OK to add the reader to the Workspace.
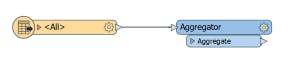
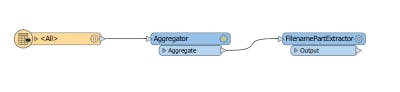
First, we’ll need to combine the features from all the CityGML files into one stream as we want to create one asset. Add a transformer by typing “Aggregator” and selecting Aggregator. Connect the output of the reader to the Aggregator.
We’ll need to grab the directory path of the input files in order to specify the files to upload. Add a FilenamePartExtractor transformer to the workspace. Click the parameters icon (gear), and next to Source Filename, click the caret (down triangle). Choose User Parameter… > SourceDataset_CITYGML.
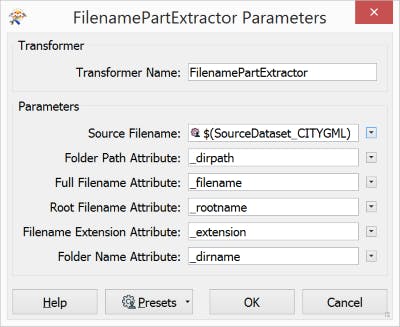
Click OK and connect the output of the Aggregator transformer to the FilenamePartExtractor.
Install the CesiumIonConnector transformer package from the FME Hub by clicking on the canvas and typing “CesiumIonConnector”. Alternatively, in the menu, click Transformers > Add Transformer…
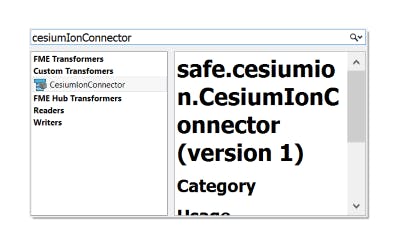
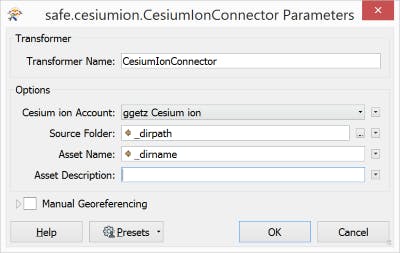
Select the CesiumIonConnector transformer to add it to the canvas. Connect the FilenamePartsExtractor to it.

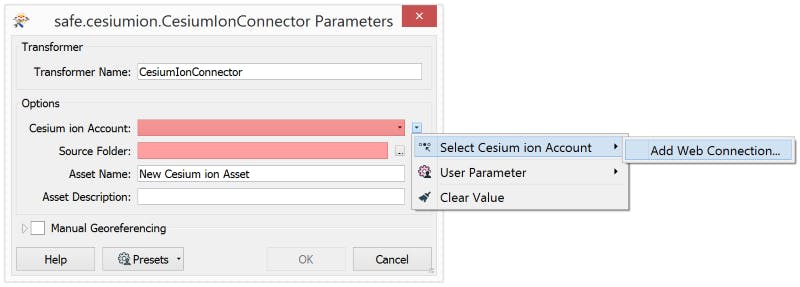
We’ll need to authenticate our Cesium ion account to allow FME to upload assets on our behalf. Click the parameters icon (gear) and click the dropdown arrow next to the Cesium ion Account field. Select Select Cesium ion Account > Add Web Connection…
In the dialogue window, click Authenticate…
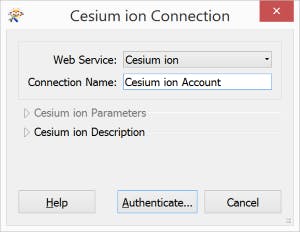
This will open a new window with Cesium ion. Log in with your ion account credentials, then click Sign in.

When prompted for permission on the next screen, click Allow.
CityGML is just one possible source data format. The selected source folder can be any one of the following:
- GeoTIFF files
- One CityGML file and a textures subdirectory
- LAS files
- OBJ files
See Uploading Data to ion for a list of accepted data formats.
After the pipeline creates a new asset in ion, it should display a link to view it. We’ll write the URL in the console window using a Logger transformer.
Click on the canvas, type “logger”, and select the Logger transformer. Connect the output of the CesiumIonConnector.

Click the parameters icon (the gear) and then click Log Message. Print the value of the asset URL by expanding FME Feature Attributes, then dragging _cesiumion_url to the text field.
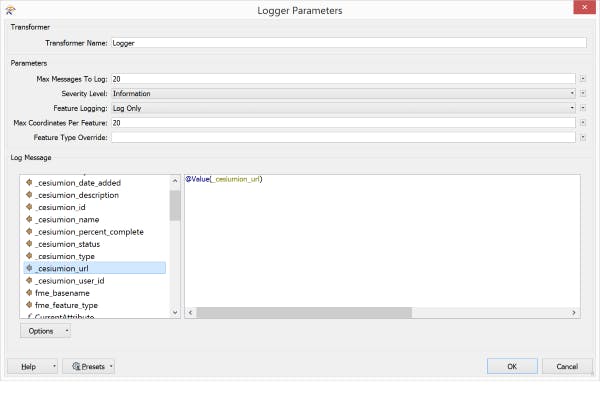
Click OK to confirm.
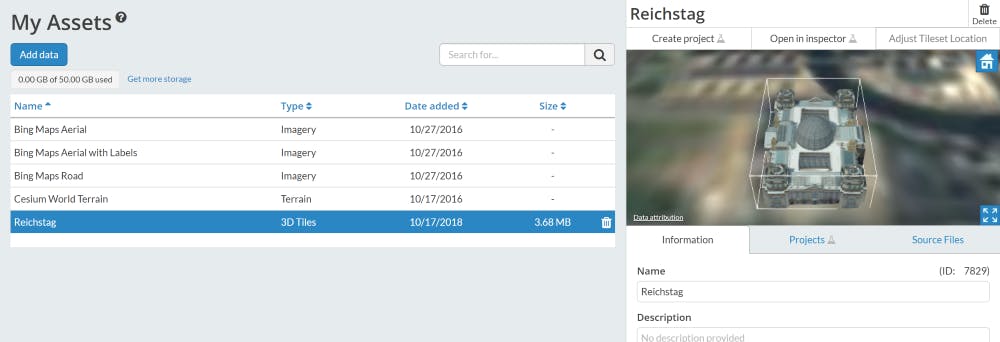
Finally, click the Run Translation button (right triangle) and confirm the input dataset by clicking Run. Congratulations! You have a brand new ion asset. Upon completion, click the link logged to the console window, or navigate to https://ion.cesium.com/, to see the newly created asset visualized.
In the asset information, click Open complete code example in Sandcastle, and a new window will open. There, we have a functioning code example that can be used in any CesiumJS app. See the section on loading your new assets into CesiumJS in the Getting Started tutorial to see how to customize this example.
Logging is the most basic example. There are many more possibilities with the result of this transformation. See the CesiumIonConnector docs for a description of all the output attributes.
The basic CesiumJS snippet provided in ion is a great starting point. Create additional functionality with the CesiumJS API to style an asset, fuse it with other data, and make it interactive. CesiumJS is a powerful library, so browse through the Sandcastle examples to see the many features available and experiment with live coding examples.
This guide covers only the basics of integrating Cesium and FME. Explore more to create robust data workflows and visualize raster data, point clouds, and 3D buildings.
Cesium
FME
- Getting Started with FME Desktop
- FME Core Concepts
- Getting Started with Rasters for more information on pre-processing image data in FME.
- Getting Started with Point Clouds for more on pre-processing point cloud data.