US Government Work-From-Home
Cesium has partnered with our friends at Maxar to make USG-licensed 3D surface models easier for US Government Analysts to access and share. These models cover 30 areas of interest all over the world, including cities like Shanghai, Pyongyang, and Tehran.
MAXAR 3D Surface Models are 3D TIN models of the surface of earth with true photorealistic texture on all sides of buildings and terrain features—providing absolute accuracy of 3m SE90 and 50cm resolution.
Thanks to 3D Tiles, an OGC community standard created by Cesium, you can access these massive, highly detailed 3D surface models from home, directly in your browser and on any device.
The instructions below will walk you through how to visualize this content in Cesium, make measurements, and combine it with your own data.
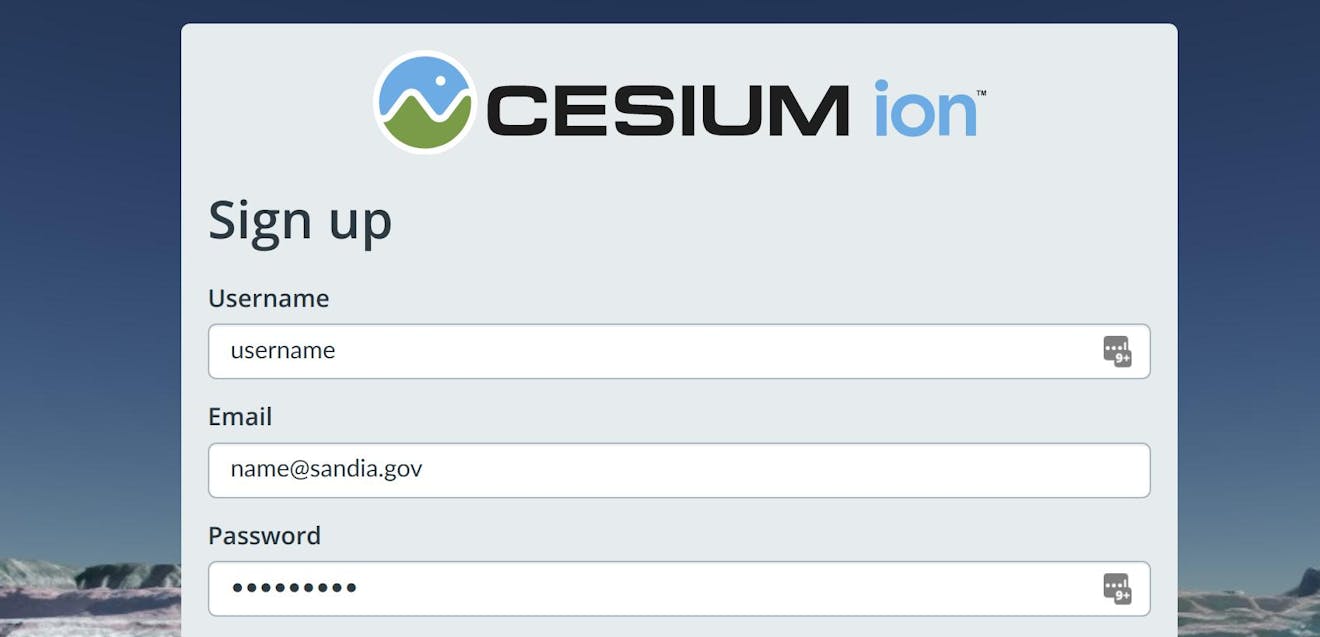
Step 1 - Create an account with your .gov/.mil email
These 3D surface models are only available to members of the US government, so you must use your .gov or .mil email address when signing up as shown.
If you already have a Cesium ion account, email support to request access.
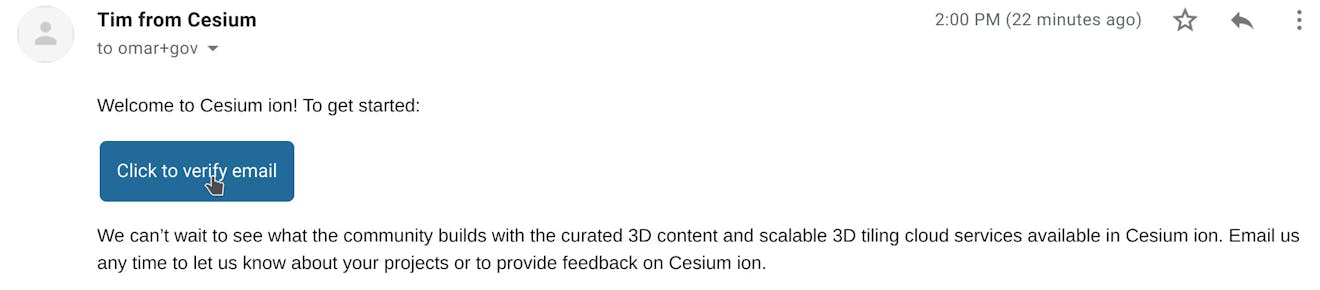
Step 2 - Verify your email
After you sign up, check your inbox for a verification email, and click to verify:
Step 3 - Explore the 3D surface models
Once you verify your email, you'll see a message confirming that you now have access to the Vricon 3D surface models. Click See my assets to preview the models in your account.
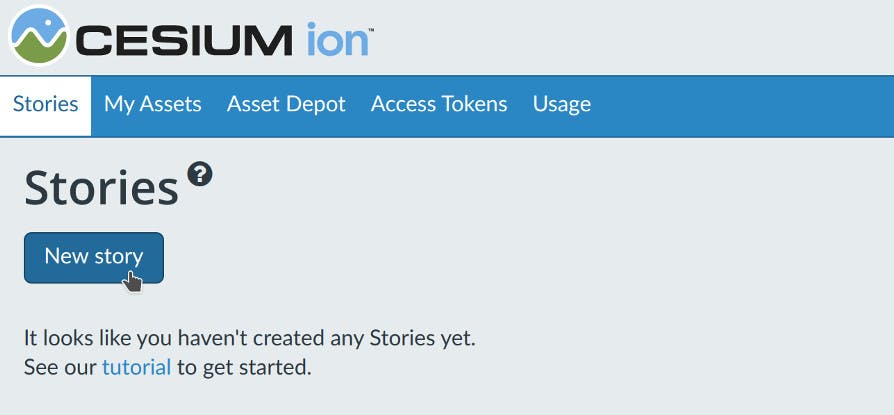
To visualize these models we're going to use Cesium Stories - an easy tool for creating interactive 3D presentations. Think of it as PowerPoint for geospatial.
Click on the Stories tab in the top left. Then click on New story:
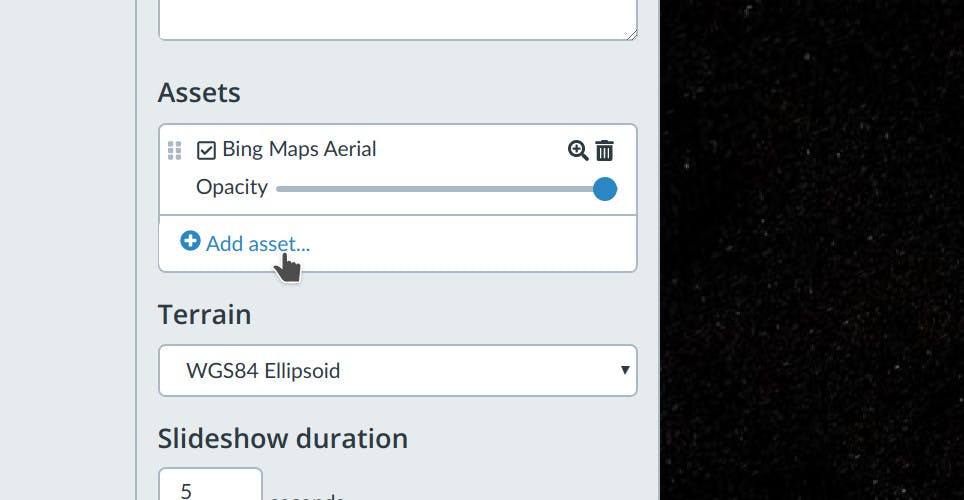
This will open up the Stories editor. We're going to replace the global Cesium World Terrain with the Vricon 3D surface model, so set the terrain option to WGS84 Ellipsoid:
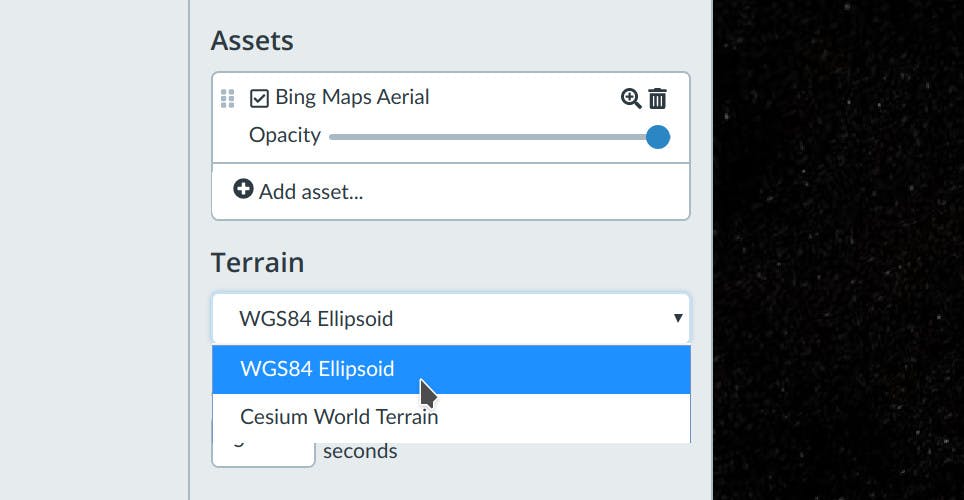
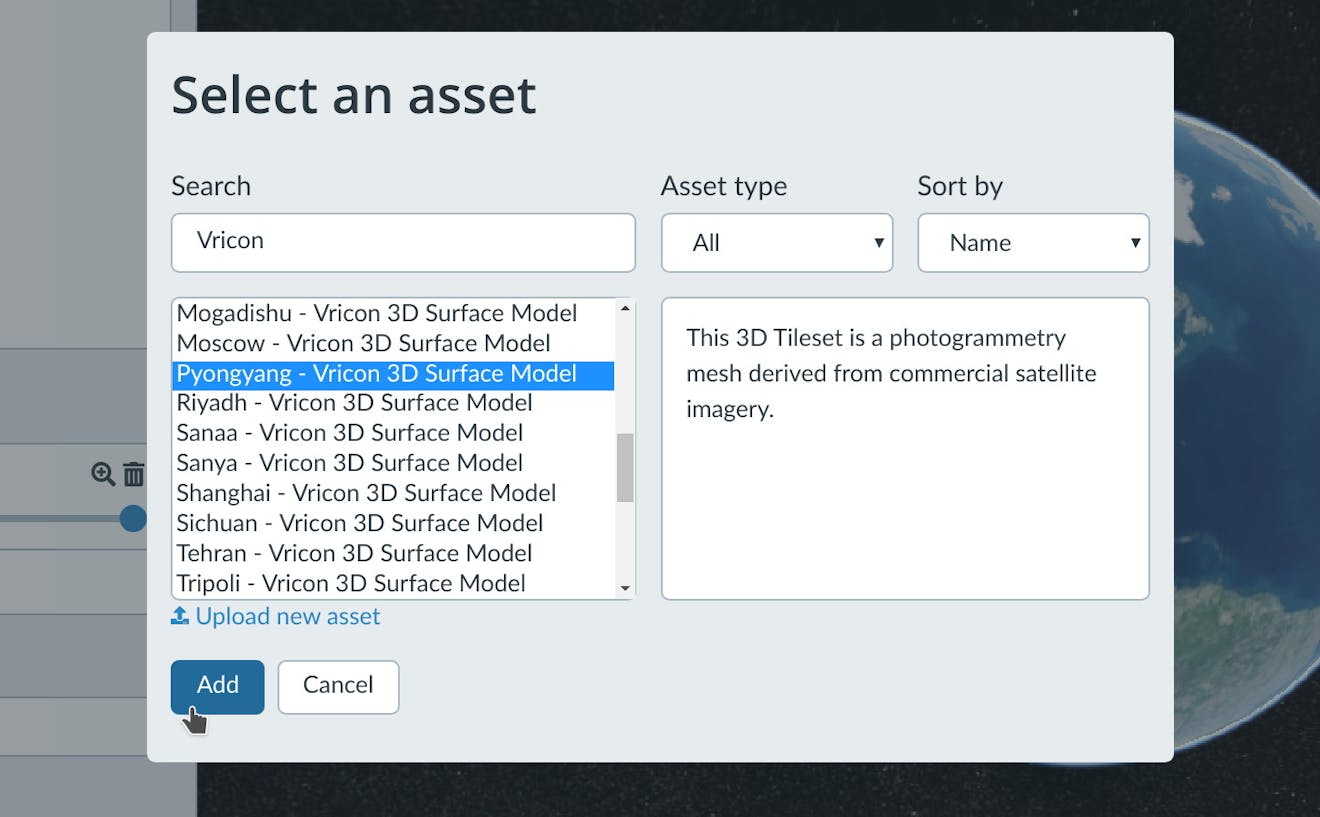
Next, add one of the Vricon 3D surface models to your scene by clicking Add asset:
Select one of the assets, like Pyongyang, and click Add:
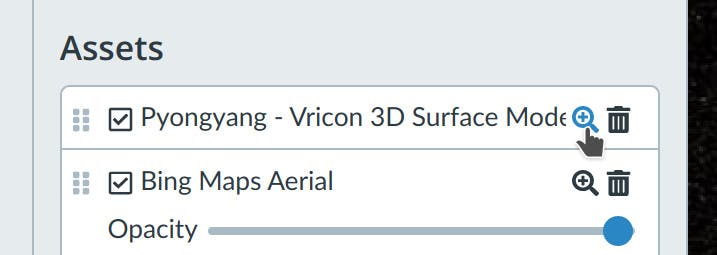
Next, click the magnifying glass icon next to the asset's name to fly the camera to it:
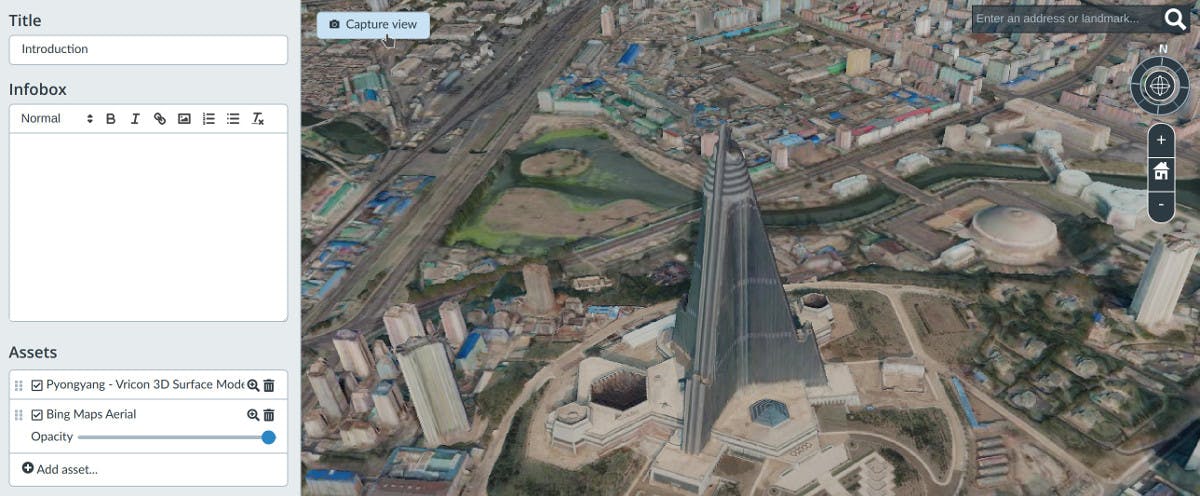
You can now pan and zoom to adjust the camera. When you're done, click Capture View in top left to save this slide.
Step 4 - Make measurements
There are a number of built-in measurement tools in Cesium Stories you can access at anytime by clicking on the measurements button in the bottom left. Click the measurements icon to expand the toolbar and select the "Height from terrain" tool as shown.
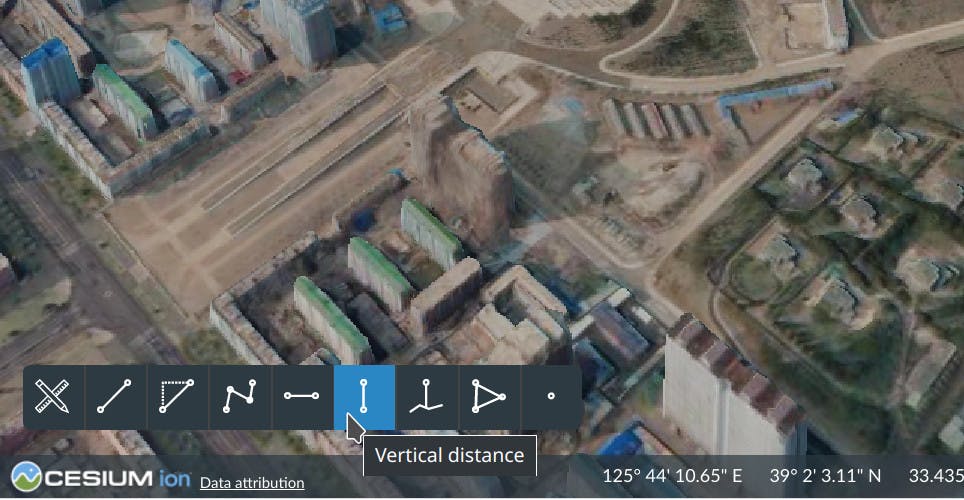
Now click anywhere to measure the height at that point relative to the WGS84 Ellipsoid. You can use the other tools to measure slope, distance and area.
Step 5 - Upload your own data
At any time you can upload your own data to fuse in this scene like photogrammetry models, LiDAR point clouds, terrain and imagery, or vector layers.
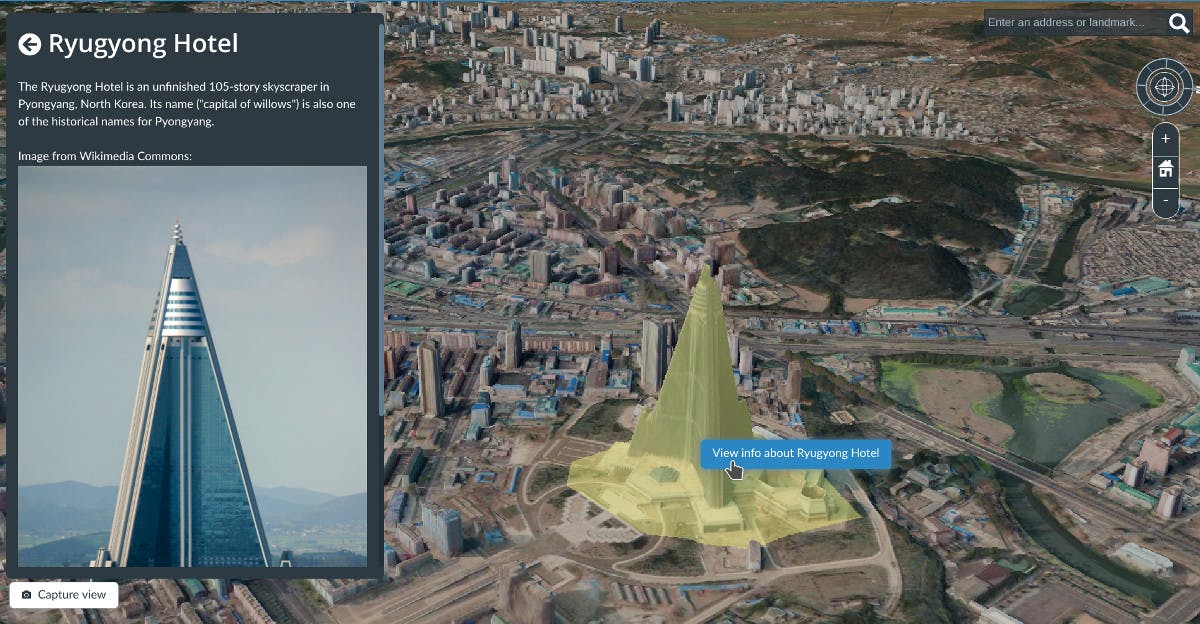
Uploading KML/KMZ can be an easy way to highlight features or add metadata. Click here to download a sample KML that highlights the Ryugyong Hotel.
To add this KML file to your Cesium Story, drag and drop it into the scene. Select "KML, CZML, or GeoJSON (host without tiling)" as the type of data.
Once it's done uploading, the hotel will be highlighted. You can click on it to see any information attached in this KML file as shown:
Next steps
Try sharing the Cesium Stories you create by clicking the "Share" button in the top right. Any member of the US government who has a verified Cesium ion account will be able to explore the 3D scenes you create on their own device.
Need access to an area of interest that's not included here? Maxar has over 20 million km2 of produced content, and they're building more every month. We hope this helps you work more effectively from home!
Learn more about Cesium Stories
Visit our tutorials to learn more about what you can do with Cesium Stories.