Set Location for Data Uploaded to Cesium ion
Some uploaded data is not georeferenced. Use the 3D Tiles Location Editor to set its position, rotation, and scale on the globe.
The steps are:
- On the Cesium ion My Assets page, click on Adjust Tileset Location above the asset preview.
- Pick an initial location and terrain, then click Next.
- Fine tune the position, rotation, and scale of the tileset and push Save.
Details are below.
1On the My Assets page, select the asset you want to position.
2Click the Adjust Tileset Location button above the preview window on the upper right side of the screen.
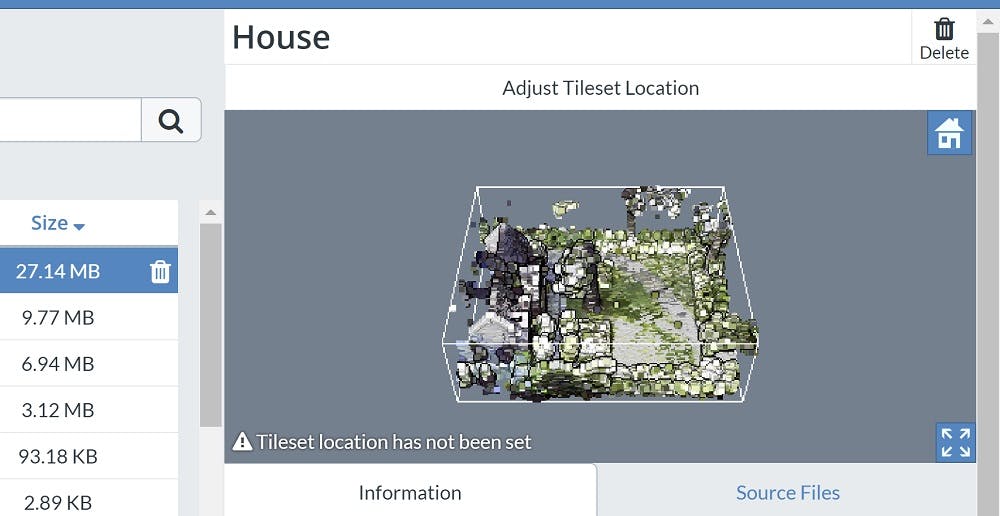
This will open the first page of the 3D Tiles Location Editor.
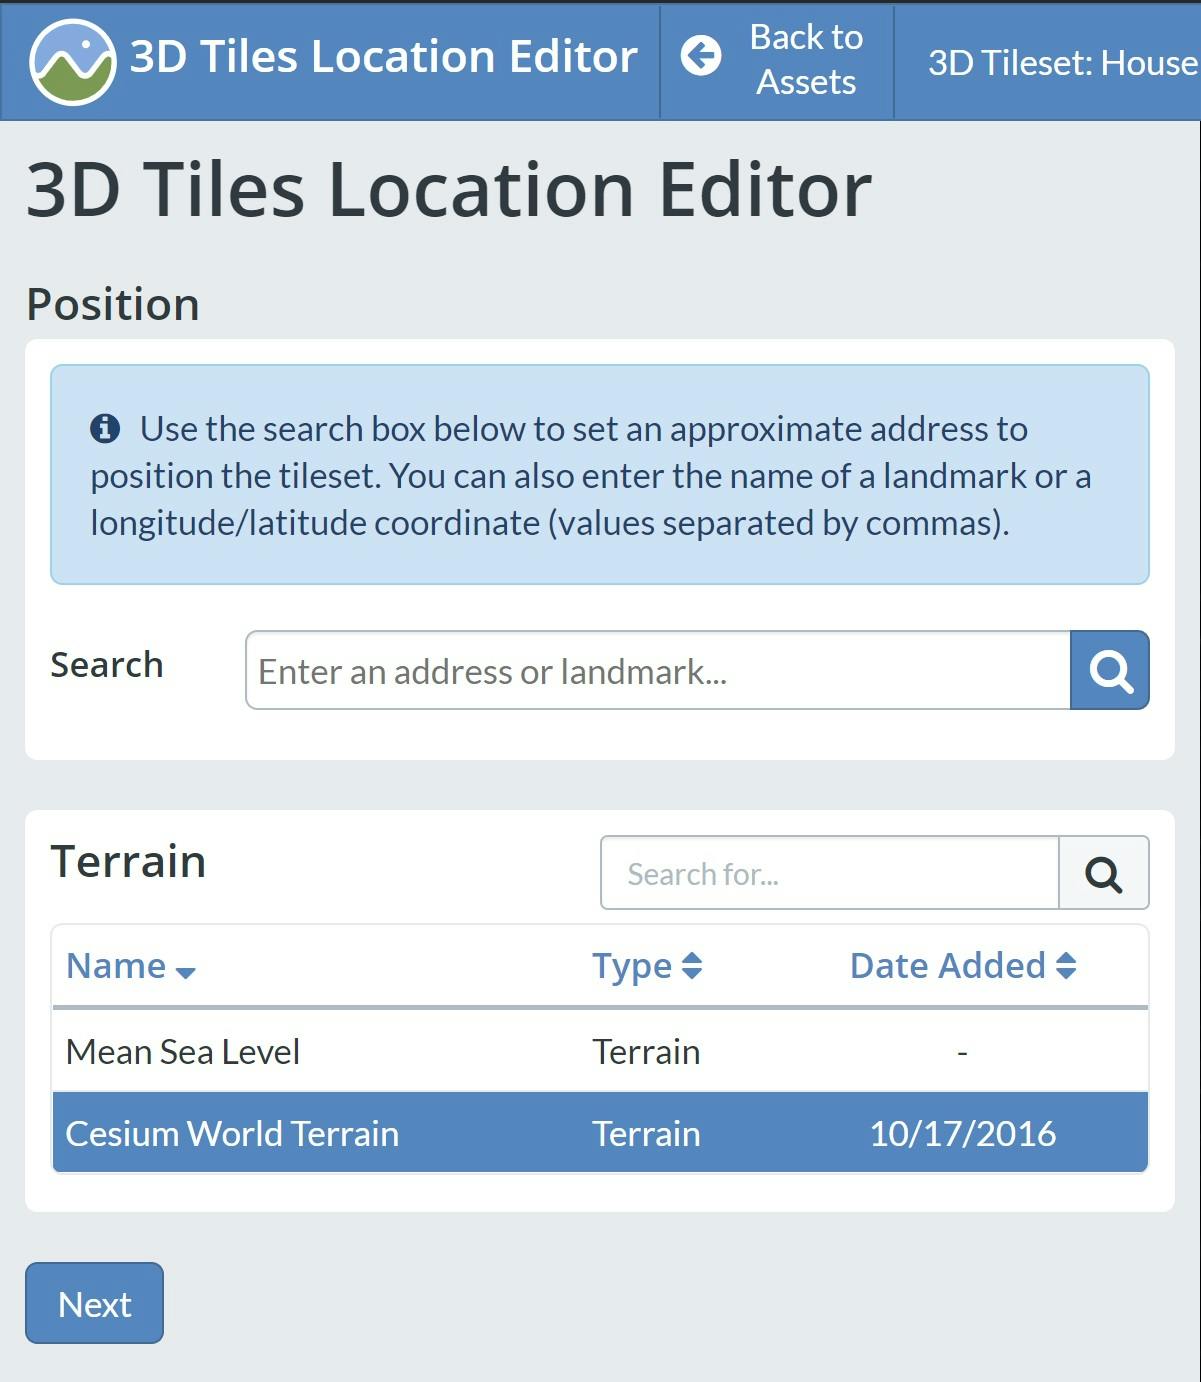
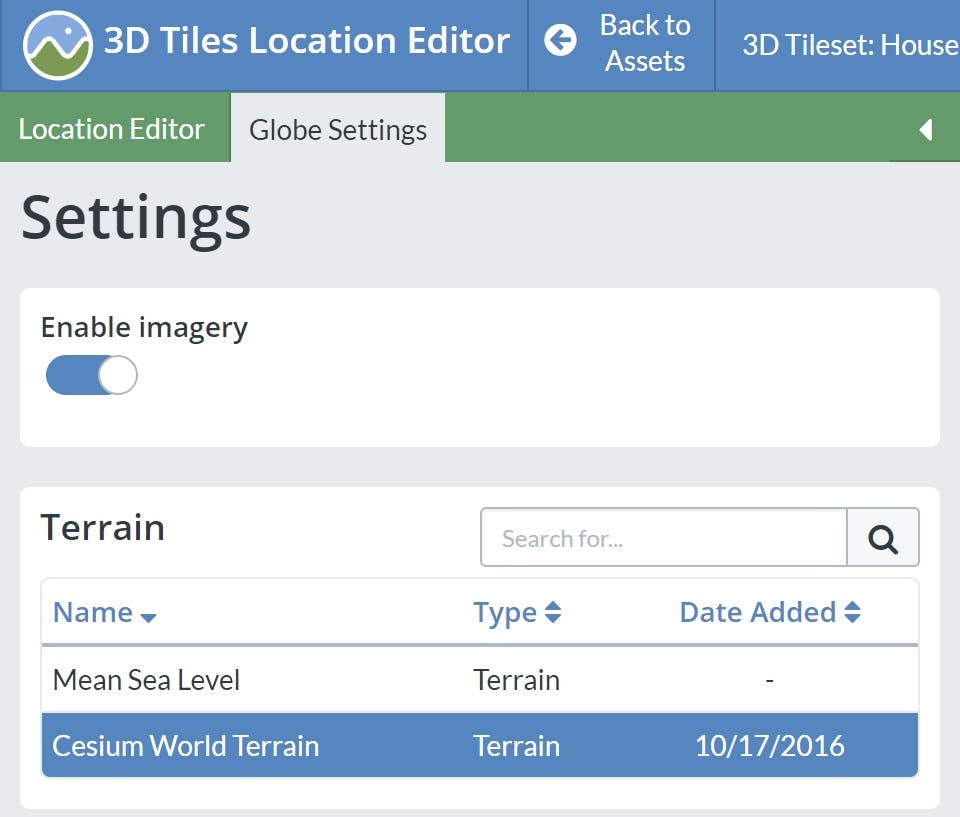
1On the first page of the 3D Tiles Location Editor, set the rough position by entering the initial location address or longitude, latitude coordinates in the Search textbox.
2Select a Terrain asset. Your tileset will be positioned relative to this terrain.
3Click Next.
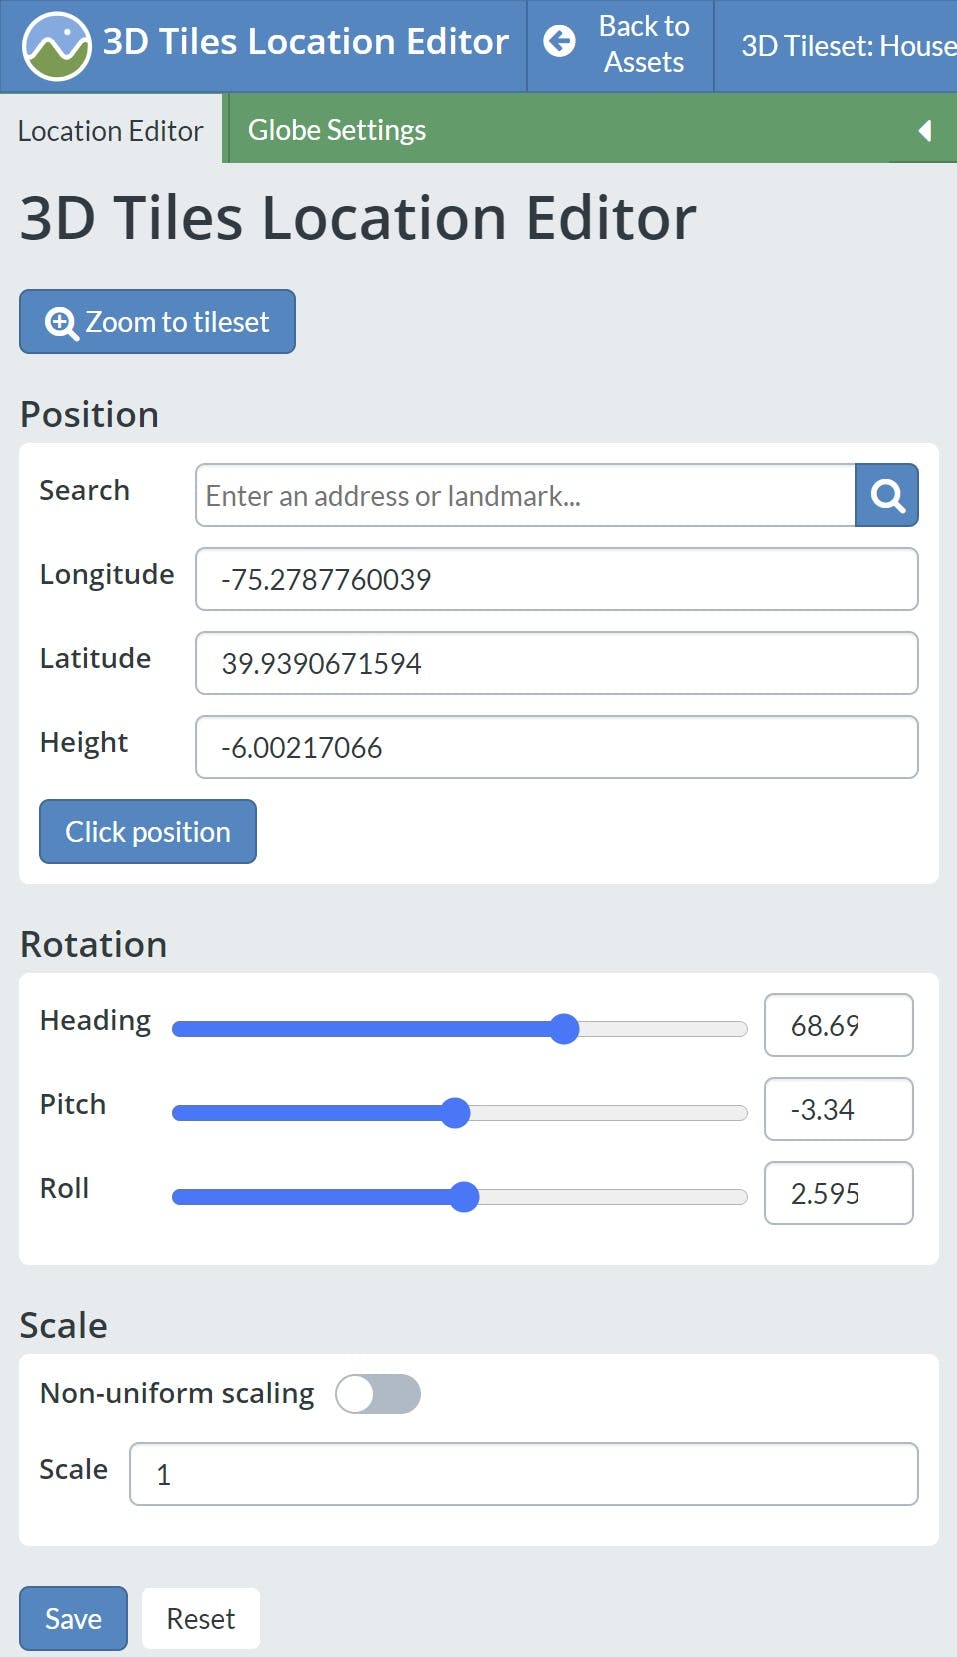
On the second page of the 3D Tiles Location Editor, you can fine-tune positioning, rotation, and scale. Tuning can be done with the interactive tool in the preview or with the form.
- Click position is helpful for large changes: Click the button and click on the location you want to use in the preview.
- Click Zoom to tileset for a better view of the tileset in the set position.
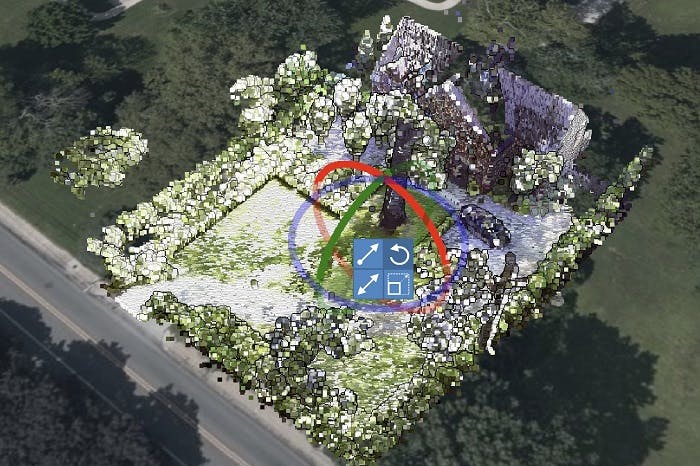
- To use the interactive tool for fine adjustments, click on the menu circle, click on the tool you want to use, then drag on the arrows. You can make the same types of adjustments by entering values in the form.
After locating your data, learn how to visualize it using CesiumJS with Sandcastle examples.
Curious about other ways to bring data into Cesium ion? Check out these plugins for third party tools and services like Blender and Open Drone Map.