Integrating Angular and Cesium with angular-cesium
This is a guest post by Eitan Frailich, co-founder of Articode. Articode is a software company that specializes in GIS solutions and is the creator of angular-cesium, an open-source project for integrating Cesium and Angular. The post assumes some knowledge of Angular.
This post explores angular-cesium, an open source library for working with CesiumJS and Angular. angular-cesium allows you to handle multiple real-time data sources in a very simple and intuitive way.

What is angular-cesium?
angular-cesium combines the awesome power of CesiumJS as a map engine and Angular as a front end framework. angular-cesium’s major benefit is its ability to keep your map (or maps) in perfect sync with all your data sources, whether they are dynamic data sources that push a lot of data over a websocket, or a single HTTP data source that fetches data once, or a user action that changes your inner application state. You can manage all this by using very simple and readable Angular components while focusing on high performance and easy usage.
angular-cesium main features and abilities:
- Declarative template syntax - Build your Cesium application using Angular components and Angular templates syntax.
- Extra features and abilities - angular-cesium comes packed with an awesome set of tools that solve many of the common issues that GIS systems usually face and let you build your system super fast, including map events handling, camera utilities, and graphics drawing tools.
- Plug and Play - angular-cesium allows easy integration between any data source and displaying it on the map, using Angular RxJs data streams (as shown in the diagram below).
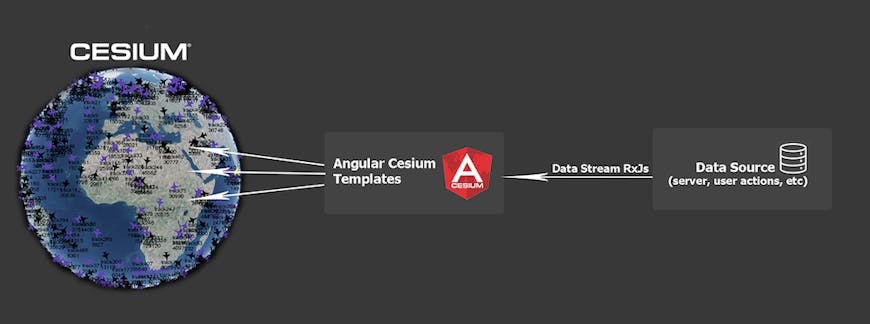
angular-cesium achieves this with RxJS, a core library used by Angular for representing data streams. (In short, you can subscribe to the stream and get notified when new data arrives. If you not familiar with it you can read more here.) Once a data source has been wrapped with an Rx observable, it can be passed to angular-cesium and then the magic happens :) All you need to do is create an Angular component that uses that data stream in its template. There, you’ll describe how you want the entities on the stream to look when drawn on the map. We’ll see a simple example of that later.
It’s important to mention that angular-cesium only extends and decorates the CesiumJS API, but if you want to use the normal Cesium API you always have access to the Cesium Viewer object.
The basics
Let’s go over the basics of how to work with angular-cesium. We will create a small application that shows and updates airplanes on the globe.
Learn here how to install and create a new angular-cesium project.
Create your Cesium globe
<ac-map> component creates your Cesium viewer. Just add it to your app.component.html:
<ac-map></ac-map>
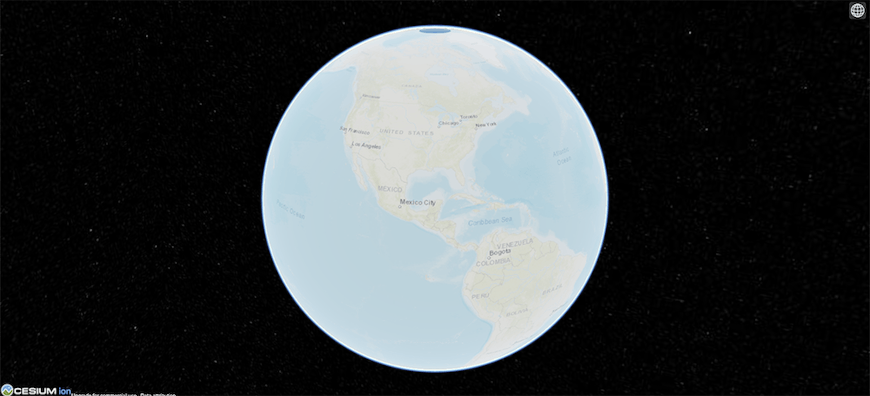
Now try running your app, in the console: npm start or ng serve. Go to localhost:4200 and you should see the Cesium globe.
Add spatial data to your map
After creating the Cesium viewer we will want to add spatial data to our application. angular-cesium supports all Cesium entities as components. See the full list of components.
angular-cesium uses Cesium entities syntax, so it’s good to be familiar with it. So let’s start with adding a layer of planes to our app. Our app will show a list of planes that can update. Let’s say each plane will consist of a label and a billboard (icon).
We’ll create a new component planes-layer.component.html:
<ac-layer acFor="let plane of planes$" [show]="showTracks" [context]="this">
    <ac-billboard-desc props="{
        image: plane.image,
        position: plane.position
    }">
    </ac-billboard-desc>

    <ac-label-desc props="{
        position: plane.position,
        text: plane.name,
        color: getColor(plane)
    }">
    </ac-label-desc>
</ac-layer>
Let’s understand what we did here: we used the Angular template syntax to tell Cesium that each plane will consist of a billboard and a label.
Our plane consists of ac-billboard-desc and ac-label-desc, which are wrapper components for Cesium LabelGraphics and BillboardGraphics, accordingly.
angular-cesium supports all Cesium entities; each component has a -desc suffix, short for description, because the component describes how our plane should look.
Each description component has a props attribute which accepts the same options as the corresponding Cesium class. In our case ac-billboard-desc accepts the same members as Cesium BillboardGraphics. This way you can configure your entities any way you want, like setting position, text, image, or any options you desire.
Layers and ac-layer component
OK, now we have defined what each plane should look like. Next we want to create a list of planes or a layer of planes.
ac-layer represents an array of entities that will be displayed on the map according to the description components. It works with RxJs Observables, meaning it is compatible with the Angular workflow.
Possible attributes:
acForaccepts a data stream (RxJs Observable) in a “let enityName of observer$” syntax (The $ suffix is a common convention for naming observables).
In our example we accept plane$ observable; ac-layer will subscribe to the observable and will handle all updates for us.
showshow or hide the layer.
Connect to data
Let’s see what planes.component.ts (our component logic) looks like:
@Component({
  selector: 'plane-layer',
  templateUrl: 'plane-layer.component.html',
})

export class PlaneLayerComponent implements OnInit {
  planes$: Observable<AcNotification>;

  constructor(private planesService: PlanesService) {
  }

  ngOnInit() {
    this.planes$ = this.planesService.getPlanes().pipe(
      map(plane => ({
        id: plane.id,
        actionType: ActionType.ADD_UPDATE,
        entity: plane,
      }))
    );
  }

  getColor(plane) {
    if (plane.name.startsWith('Boeing')) {
      return Cesium.Color.Green;
    } else {
      return Cesium.Color.White;
    }
  }
}

// Example mock service

@Injectable({
  providedIn: 'root'
})

export class PlanesService {
  private planes = [
    {
      id: '1',
      position: Cesium.Cartesian3.fromDegrees(30, 30),
      name: 'Airbus a320',
      image: 'https://cdn3.iconfinder.com/data/icons/airport-collection/100/23-512.png'
    },
    {
      id: '2',
      position: Cesium.Cartesian3.fromDegrees(31, 31),
      name: 'Boeing 777',
      image: 'https://cdn1.iconfinder.com/data/icons/fly-airbus-and-aeroplane/154/fly-air-plane-airbus-aeroplane-512.png'
    }
  ];

  getPlanes() {
    // Or get it from a real updating data source
    return Observable.from(this.planes);
  }
}
We learned that you must provide a data source to ac-layer for the [acFor] attribute, and the data source must be an RxJs stream.
The next thing we learn is that every notification on the stream should be of type AcNotification:
interface AcNotification {
    id: string;
    actionType: ActionType;
    entity?: any;
}
id - unique entity key,
entity - the data itself for the entity,
actionType - presents what happened to the entity. actionType can be one of these values: ADD_UPDATE, DELETE.
Each AcNotification you pass to plane$ Observable will make angular-cesium render the wanted plane according to the description components defined inside the ac-layer. It possible to add costume logic to define for each property. In our example, each plane color is determined by getColor().
In the case that ADD_UPDATE is passed, the entity will be created or updated depending on whether it exists or not. In the case that DELETE is passed, the entity will be removed from the map.
In our example we have PlanesService, which returns planes data as RxJs stream. Here it’s only hard-coded data, but in the same way, it could be data from a websocket, HTTP response, or whatever you desire.
In planes.component.ts we get the data from planeService.getPlanes() and map them to $plane that is given to ac-layer. Each plane is converted to an AcNotification object. ac-layer will subscribe to $plane and render our planes accordingly.
Don’t forget to add your component to app.component.ts.
<ac-map>
    <plane-layer></plane-layer>
</ac-map>
All the angular-cesium map layers that you create need to sit under the ac-map hierarchy. This is the way that all the components and layers know which globe they should be rendered on. You also get a nice declarative representation of the layers in your viewer.
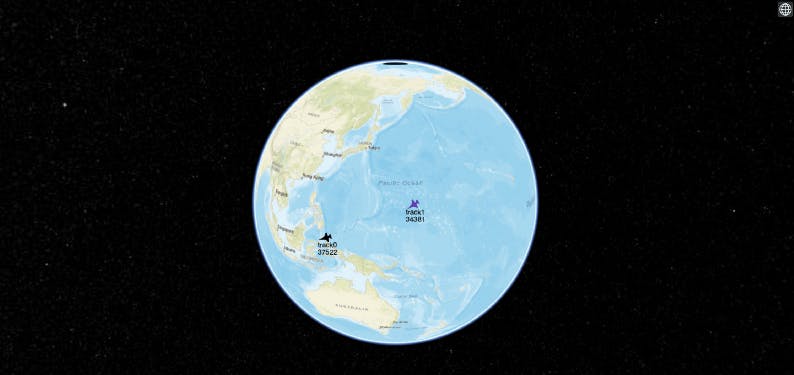
That’s it, now you should see planes on your globe :)
We pass props to ac-billboard-desc as expressions that are based on the plane that we defined earlier. Actually, we say: ‘Dear angular-cesium, please create and manage a billboard using those expressions for each plane. Now, when an entity is passed through the stream—based on its id, actionType, and entity—angular-cesium will know what to do. For example, when passing data with the same id and actionType=ADD_UPDATE, the entity will be updated on the map for every message.
Widgets and utilities
As mentioned above, angular-cesium has many widgets and utilities:
- Graphics Drawing Tools:
undefinedundefinedundefinedundefined - Control of Mouse Events
undefinedundefinedundefinedundefinedundefined - Multiple viewers support
undefined - Bind Angular componets to the map
undefined - And more…
Benefits
After explaining a little bit about ac-layer we hope that you may see the benefits of angular-cesium:
- Easily defining data layers .
- Easily add/update/remove entities - all you have to do is pass a message through the stream, and angular-cesium will keep track of the rest.
- Readable and maintainable code - when reading your HTML, which describes your layer, it is pretty easy to understand how your layer will look.
- Performance - take full advantage of cesium performance with zero overhead from Angular change detection or DOM manipulation.
- Take full control of mouse events with custom events such as drag and drop.
- Bind Angular components to the map and handle them like map entities using ac-html.
- Built in graphics drawing tools.
- Multiple viewers synchronization.
Conclusion
angular-cesium was born out of the need to handle multiple data sources in a consistent and efficient way while keeping an ever growing code base maintainable and readable. In our experience, Cesium is the best solution when it comes to 3D + 2D spatial data visualization. With angular-cesium, we’ve expand Cesium’s awesome capabilities with fast data sources integration and various tools while keeping the Cesium API fully accessible.
More info
This is just the basics of angular-cesium. For more info check out our API doc and angular-cesium Repository. Try cloning the project and play with our demo. angular-cesium is an open source project. Feel free to open issues, ask questions, and open PRs.
Our roadmap includes support for other popular frameworks such as ReactJS, so stay tuned. For additional support options contact us: contact@articode.co.