Integrating Cesium with React
This is a guest post by Hiroki Inoue about the library he developed to integrate Cesium with React, a JavaScript library for building user interfaces. The post assumes a basic familiarity with React. - Sarah
I’ve developed the cesium-react library, which makes it easier to use Cesium with React. The library abstracts Cesium as React components.
The project was inspired by react-leaflet, which enables integrating React and Leaflet.
Normally you can use Cesium as follows:
import Cesium from "cesium";
const viewer = new Cesium.Viewer(document.getElementById("main"));
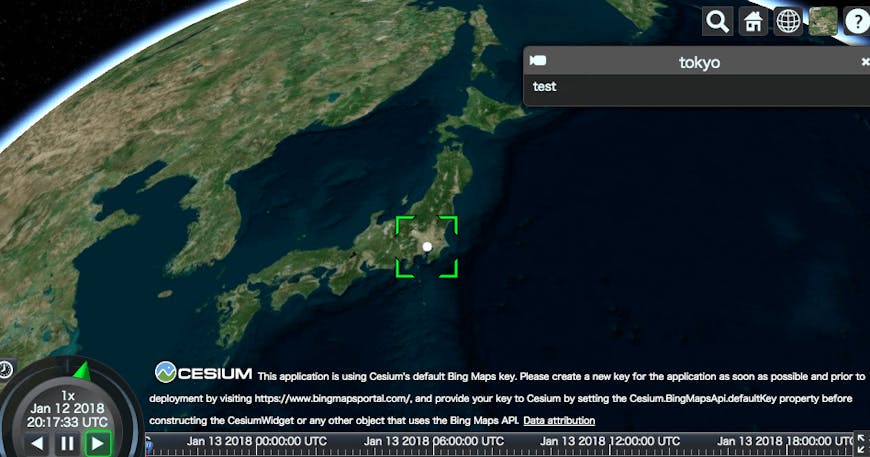
viewer.entities.add({
name: "tokyo",
description: "test",
position: Cartesian3.fromDegrees(139.767052, 35.681167, 100),
point: { pixelSize: 10 }
});
cesium-react provides some React components, so you can use them as follows:
import React from "react";
import { Cartesian3 } from "cesium";
import { Viewer, Entity } from "cesium-react";

export default class Cesium extends React.PureComponent {

  render() {
    return (
      <Viewer full>
        <Entity
          name="tokyo"
          position={Cartesian3.fromDegrees(139.767052, 35.681167, 100)}
          point={{ pixelSize: 10 }}>
          test
        </Entity>
      </Viewer>
    );
  }

}
What is good
cesium-react makes development of React applications with Cesium much more efficient because we can use hot module replacement (HMR) with React and webpack.
cesium-react and HMR enable instant updating of Cesium contents. So we can update contents instantly by just modifying source codes for most properties that are available in Cesium, e.g., entity position, graphics, tiles, camera, etc.
Also, we can write Cesium application declaratively with cesium-react, so it often makes source codes cleaner.
Usage of cesium-react
Before use of cesium-react, it is necessary to change the webpack configuration. Please refer to the documentation.
When we use Cesium we initialize the Viewer object, but in cesium-react we can mount the Viewer component. In cesium.js:
import React from "react";
import { Viewer } from "cesium-react";

export default class Cesium extends React.PureComponent {

  render() {
    return (
      <Viewer full />
    );
  }

}
If full prop is specified, the viewer will fill the whole screen. It equals specifying style prop as { position: "absolute", bottom: "0", left: "0", right: "0", top: "0" }.
Then we can see the Cesium screen as follows:
import ReactDOM from "react-dom";
import Cesium from "./cesium";

ReactDOM.render(<Cesium />);
It’s easy to add entities:
import { Cartesian3 } from "cesium";
import { Viewer, Entity } from "cesium-react";
<Viewer full>
  <Entity
   name="tokyo"
  description="test"
  position={Cartesian3.fromDegrees(139.767052, 35.681167, 100)}
  point={{ pixelSize: 10 }}>
    <h1>Hello, world.</h1>
    <p>This is description rendered as HTML string.</p>
  </Entity>
</Viewer>
import { ArcGisMapServerImageryProvider } from "cesium";
import { Viewer, ImageryLayer } from "cesium-react";<Viewer full>
<ImageryLayer
imageryProvider={new ArcGisMapServerImageryProvider({
url: "//services.arcgisonline.com/ArcGIS/rest/services/World_Street_Map/MapServer"
})} />
</Viewer>
You can load KML, GeoJSON, or CZML as follows:
import { Color } from "cesium";
import { Viewer, KmlDataSource, GeoJsonDataSource, CzmlDataSource } from "cesium-react";
<Viewer full>
  <KmlDataSource url={"/your.kml"} />
  <GeoJsonDataSource url={"/your.geojson"} />
  <CzmlDataSource url={"/your.czml"} />

  {/* you can load data directly with data prop */}
  {/* you can specify entity styles with onLoad prop */}
  <GeoJsonDataSource
    data={{
      type: "Feature",
      geometry: {
        type: "Point",
        coordinates: [-104.99404, 39.75621]
      }
    }}
    onLoad={dataSource => {
      dataSource.entities.values.forEach(e => {
        e.billboard = null;
        e.point = { color: Color.YELLOW, pixelSize: 10 };
      })
    }}
  />
</Viewer>
To move the camera, you can set props of Camera component, or you can animate the camera by using CameraFlyTo, CameraFlyHome, and CameraFlyToBoundingSphere components:
import { Cartesian3, Math as CesiumMath } from "cesium";
import { Viewer, Camera, CameraFlyTo } from "cesium-react";
<Viewer full>
  {/* camera will be moved instantly. */}
  {/* you can use for initializing camera position. */}
  <Camera
    view={{
      destination: Cartesian3.fromDegrees(139.767052, 35.681167, 100),
      orientation: { pitch: CesiumMath.toRadian(-60) }
    }}
  />

  {/* camera animation */}
  <CameraFlyTo
    destination={Cartesian3.fromDegrees(139.767052, 35.681167, 100)}
    orientation={{ pitch: CesiumMath.toRadian(-60) }}
    duration={3}
  />
</Viewer>
If you want to access Cesium’s raw API, you can use a cesiumElement property and onMount, onUpdate, and onUnmount props as follows:
export default Example extends React.PureComponent {

  componentDidMount() {
    const { viewer } = this;

    if (viewer) {
      viewer.entities.add({ /* ... */ });
    }
  }

  entityOnMount(entity) {
    entity.name = "hoge";
  }

  entityOnUpdate(entity, prevProps) {
    entity.description = "foobar";
  }

  entityOnUnmount(entity) {
    // ...
  }

  render() {
    return (
      <Viewer
        ref={e => {
          this.viewer = e ? e.cesiumElement : null;
        }}>
        <Entity
          onMount={e => this.entityOnMount(e)}
          onUpdate={(e, prevProps) => this.entityOnUpdate(e, prevProps)}
          onUnmount={e => this.entityOnUnmount(e)} />
      </Viewer>
    );
  }

}
What is more, entity billboards can be animated with an HTML canvas:
import React from "react";
import { Cartesian3 } from "cesium";
import { Viewer, Entity } from "cesium-react";

export default class CanvasEntity extends React.PureComponent {

  state = {
    progress: 0,
    image: null
  };

  componentDidMount() {
    // initialize two canvases
    const { progress } = this.state;
    this.c1 = this.initCanvas();
    this.c2 = this.initCanvas();
    if (progress < 1) {
      this.i = setInterval(() => {
        this.updateProgress();
      }, 10);
    }
  }

  componentWillUnmount() {
    clearInterval(this.i);
  }

  updateProgress() {
    // render canvas on component rendering like double buffering
    this.setState(({ progress, image }) => {
      const canvas = image === this.c1 ? this.c2 : this.c1;
      const newPrgoress = Math.min(progress + 0.01, 1);
      this.renderCanvas(canvas, newPrgoress);
      if (newPrgoress >= 1) {
        clearInterval(this.i);
      }
      return {
        progress: newPrgoress,
        image: canvas
      };
    });
  }

  i = null;
  c1 = null;
  c2 = null;

  initCanvas() {
    const can = document.createElement("canvas");
    can.width = 100;
    can.height = 100;
    return can;
  }

  renderCanvas(can, p) {
    const c = can.getContext("2d");
    c.clearRect(0, 0, can.width, can.height);
    c.fillStyle = "rgba(100,0,0,0.8)";
    c.beginPath();
    c.arc(can.width / 2, can.height / 2, p * can.width / 2, 0, Math.PI * 2, false);
    c.fill();
  }

  render() {
    const { image } = this.state;
    return (
      <Viewer full>
        <Entity
          name="test"
          description="test"
          position={Cartesian3.fromDegrees(-74.0707383, 40.7117244, 100)}
          billboard={{ image }} />
      </Viewer>
    );
  }

}
Conclusion
cesium-react makes it possible to easily develop Cesium applications with React.
cesium-react is a very new library, so documentation is still in process. At present it also does not support Model, ParticleSystem, and so on. I am currently developing them and will continue to update the project. Pull requests and issues in Github are welcome!