Baking Ambient Occlusion in the glTF Pipeline
Ambient occlusion, or AO, describes how cracks, crevices, corners, and other small, semi-enclosed spaces tend to be darker than surrounding surfaces under real-world lighting conditions. Their insides are occluded, so ambient light can't get in. AO adds realism to views rendered in Cesium and other real-time 3D engines and can also be helpful for bringing out details when a scene isn't supposed to have a direct light source—for example, Sponza at night.
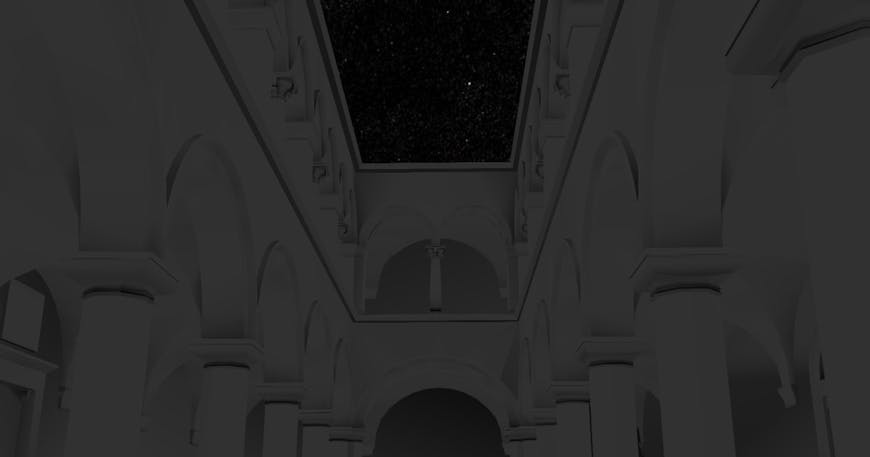
Sponza with ambient occlusion.
Similarly, here are two identical clusters of buildings from Seattle lit over 24 hours. The model on the left has AO, while the model on the right does not. Observe that the model on the left still shows some details that distinguish buildings after the sun has passed overhead and gone down. This makes ambient occlusion potentially useful for 3D building scenes, such as cities rendered using 3D Tiles.
Here is a bird's eye view of the same buildings with lighting approximating noon. Use the carousel to switch between the model with AO and without on the right.
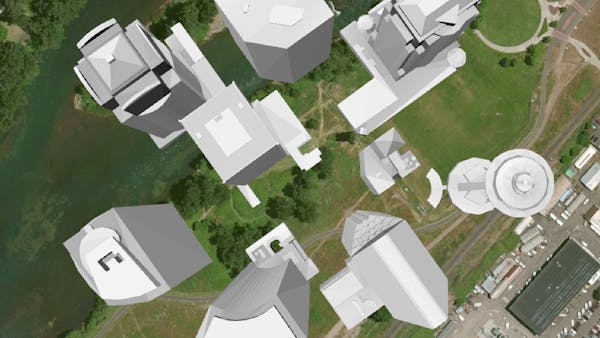
With lighting approximating noon

Without lighting
And here is a 2 cylinder engine model. Model with AO is first, model with some added ambient light for comparison is second. Observe how AO darkens the spaces between cooling fins and gear teeth.
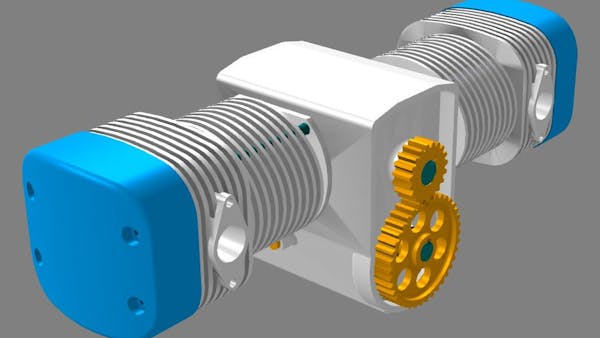
Model with AO
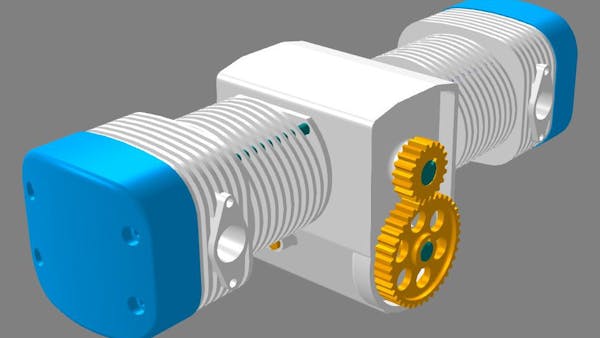
Model with some added ambient light
Although shader techniques exist for approximating AO as a post-processing effect, AO can also be precomputed and stored ("baked") for static objects since it is independent of the scene's actual lights. This is useful for situations where getting consistent results with post-processed AO is difficult. For example, Cesium does not currently support post processing well in shaders and is used to render such a wide variety of scenes that any single algorithm may not be robust enough.
We have been working on an ambient occlusion baking stage for the new, open source gltf pipeline to help easily add realism to glTF models. This ambient occlusion baking stage is now available as an option in the Cesium model converter, with more advanced options when used directly through the gltf pipeline.
How does it work?
"Ambient light" is light that illuminates a point from all directions. In real life, light scatters in the atmosphere, bounces off walls, and gets reflected and refracted in all sorts of complicated ways, illuminating everything it hits along the way. This phenomenon is called global illumination and explains why true darkness is hard to find in the real world—in a typical scene, some amount of indirect light hits every object from every direction. We can think of ambient light as a simplification of indirect light and ambient occlusion as an approximation of one global illumination effect: when real light bounces around, it has a harder time reaching occluded, enclosed spaces.
"Baking" ambient occlusion into a scene is like painting each model so that occluded areas are darker. This means looking at points all over the surfaces of the scene and trying to compute how much ambient light can reach each point.
We do this by shooting a bunch of rays out in different directions from each point, distributed over a hemisphere around the point based on the surface normal there. If a ray hits geometry (say, the side walls of a crevice or the insides of this duck's beak) before reaching some drop off distance, then we know that no ambient light illuminates this part of the model from the ray's direction: the light is blocked by the crevice walls.
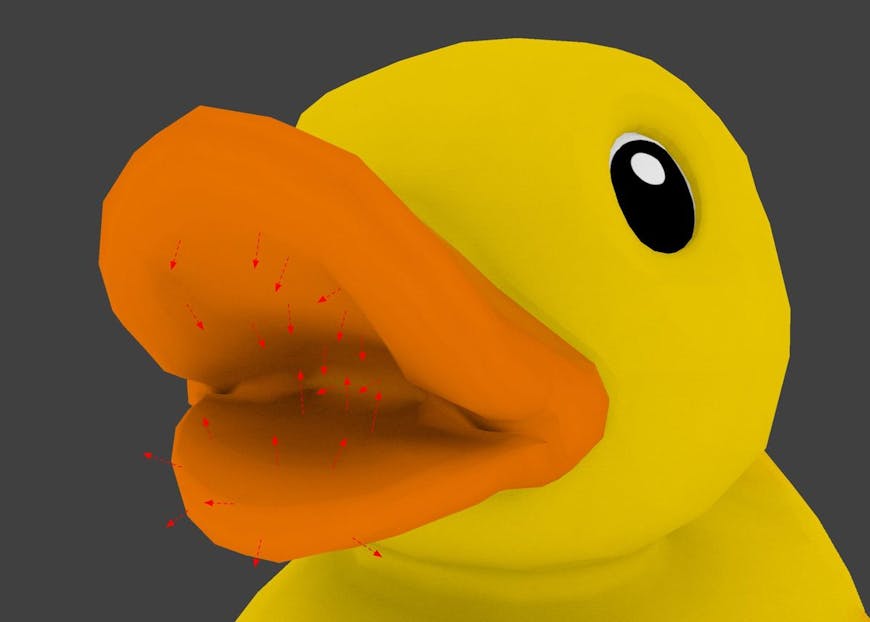
Ambient occlusion in Blender
By shooting a lot of rays in a lot of directions, we can get a pretty good approximation of how much total ambient light should illuminate this point. This technique is similar to ray tracing, which forms the backbone of most offline global illumination renderers.
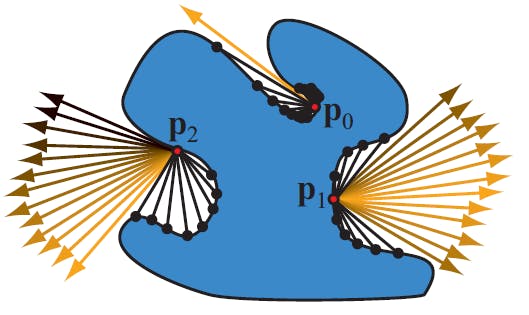
Figure from Real-Time Rendering
After we have computed AO data over a large number of points on the model, we store this information either on the model's vertices, using an averaging scheme, or directly in the model's diffuse texture. For vertex-baked AO, a small shader modification then blends this AO data with the shader's original computed lighting. Everything that an engine like Cesium needs to display the model with AO is bundled together in the glTF itself—no modifications are needed in the engine.
You mentioned ray tracing. This sounds very slow.
Rendering by ray tracing involves repeatedly asking the question, "What triangle in the scene does this ray hit first, and where does it hit it?" The simplest way to answer this question is to check every triangle in the scene against the ray. When we need to cast multiple rays from multiple points on every triangle in the scene, this gets very time consuming very quickly for complex models, particularly in JavaScript where this process is not so easy to parallelize.
However, for ambient occlusion we only really have to answer, "Does the ray hit any triangle within some given distance?" This is a yes-or-no question, so we can exploit a simple trick called early return: we don't actually have to check the ray against every single triangle since we can stop checking triangles once we find a first intersection within the given distance.
This "given distance" qualifier can also help rule out even more triangles with another trick called uniform grid neighbor search. Since we don't care if the ray hits objects beyond a given distance, we only have to check those triangles that are within the given distance from the ray's origin. We eliminate triangles that are definitely too far away by loading all the triangles into a grid with cells that are as wide as the ray's falloff distance. When we want to find a triangle that intersects a ray, we only have to put the ray's origin in a grid cell and check the triangles in that cell and its neighbors.

A Uniform Grid
Given a ray's position and direction, the grid also allows us to determine triangles that the ray is definitely pointing away from, further reducing the number of triangles we have to check. Consider the 2D case: since we know the ray is pointing to the northeast we can safely ignore any triangles in cells to the south and the west of this ray's origin.

A Uniform Grid
That all sounds nice, but how is the actual performance?
Here are some rough performance figures:
- Node 4.4.5 on Windows 10 64 bit
- i7-4890HQ with 16.0 GB RAM
- COLLADA duck, 4212 triangles
- All figures in seconds, logged using node's script timer and averaged over 5 runs with default AO settings
| technique | time |
|---|---|
| naive | 17.5044 |
| early return | 16.8362 |
| uniform grid | 4.8826 |
| grid + cell culling | 2.7528 |
| grid + cell culling + early return | 2.627 |
The uniform grid trick has a flaw, however: what if we set the ray dropoff distance so that triangles can still occlude points all the way on the other side of the model? Then the grid cells are basically as big as the model, and we still have to check every triangle in the scene for every ray. This is an issue we intend to fix in the future, using some of the many other tricks from the world of offline rendering and fast physical approximation that may be applicable here. These include
- Hierarchical spatial data structures: what if we recursively subdivide each cell into smaller, nested cells?
- Voxels and voxel cone tracing: it's easy to tell if a cell in a grid has stuff in it, while it's relatively expensive to check if a ray hits a triangle in continuous space. What if we rebuild the entire scene and all the rays out of tiny cells?
Since the gltf-pipeline is open source, anyone is also welcome to experiment with optimizations we haven't thought of as well as with features on our AO Roadmap. Feel free to open a pull request if you build something wonderful: we would love to hear about it!
Using the ambient occlusion baking stage
The AO baking stage has preselected settings for three quality levels: low, medium, and high. Using just the --ao flag will default to low. However, when tweaking any AO settings, do not include the --ao flag alone or any modified settings will be discarded. With the COLLADA duck:
gltf-pipeline ./Duck.gltf --ao.quality=high -o DuckAO.gltf
COLLADA duck with --ao.quality=high.
We can also specify the ray's dropoff distance in world space. Keep in mind that measurements in glTF's world space are treated as meters. Having rays go further is usually more appropriate for models that are supposed to look small. As of this writing, the default ray distance is 20% of the model's smallest XYZ dimension. Be warned that increasing this value may dramatically increase render time, but setting it too small can also cause Node to run up against its default memory allowance for some models.
gltf-pipeline ./Duck.gltf --ao.rayDistance=10.0 -o DuckAO.gltf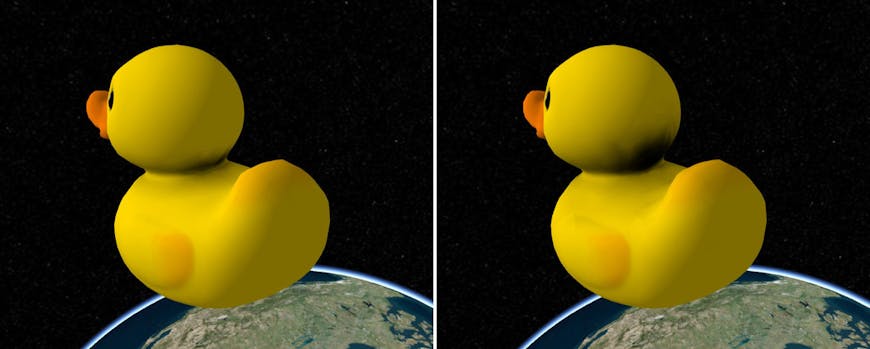
The duck on the right has more occlusion on its head from its back and tail.
We can also specify whether we want to include a ground plane in our AO computation.
gltf-pipeline ./Duck.gltf --ao.groundPlane -o DuckAO.gltf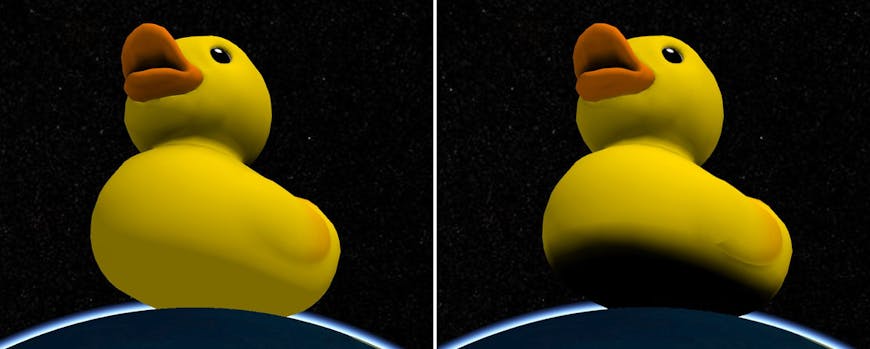
COLLADA duck without and with ground plane.
Generally, when baking to vertices the results look best on models that have high tessellation and evenly sized triangles. Baking to texture has some problems but is also available along with other fine-tuning when running the pipeline locally. Check out the additional ambient occlusion parameters in bakeAmbientOcclusion.js.
Feedback on parameter tuning, code contributions, and visuals of cool results are all highly appreciated!
Additional reading
- Understanding Ambient Occlusion - Mark Masters - February 4, 2014
- GPU Gems Chapter 17: Ambient Occlusion - Matt Pharr and Simon Green - September 2007
- Fun: Inigo Quilez's real-time analytical ambient occlusion for spheres - November 9, 2014